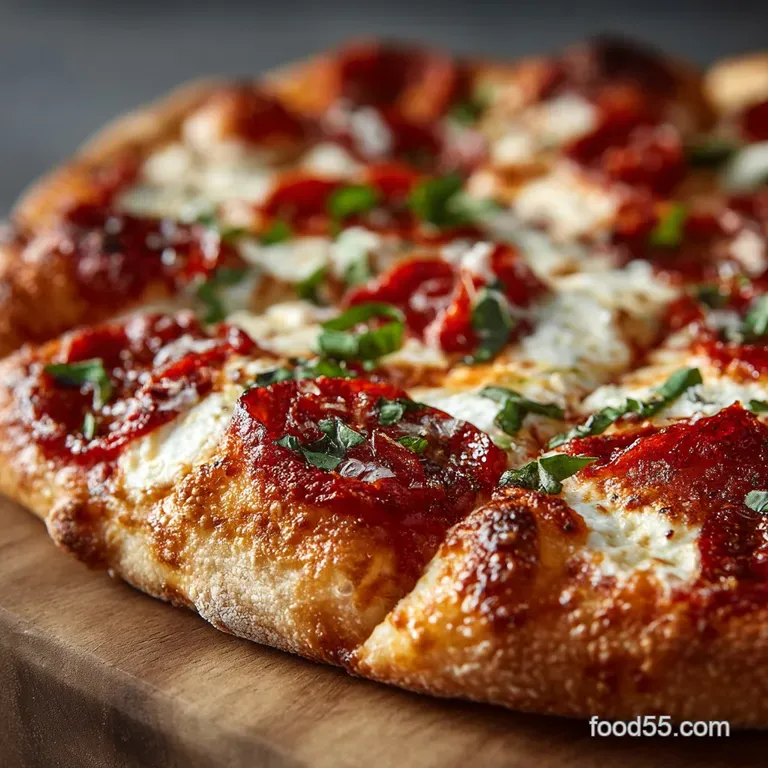
The Weekend Warriors Classic Pizza Dough Chewy Crust Flawless Results
Elevating Homemade Pizza: Why This Dough Matters
The foundation of any great pie isn't the sauce or the cheese it's the Pizza Dough . For too long, home cooks have settled for tough, bland bases, but mastering this specific pizza dough recipe is your entry point into restaurant quality results.
This particular recipe, designed to yield four medium sized bases perfect for making Individual Pizzas , focuses on developing both structure and deep flavor, resulting in a beautifully airy, robust Homemade Pizza Crust .
The True Secret to an Airy, Blistered Crust
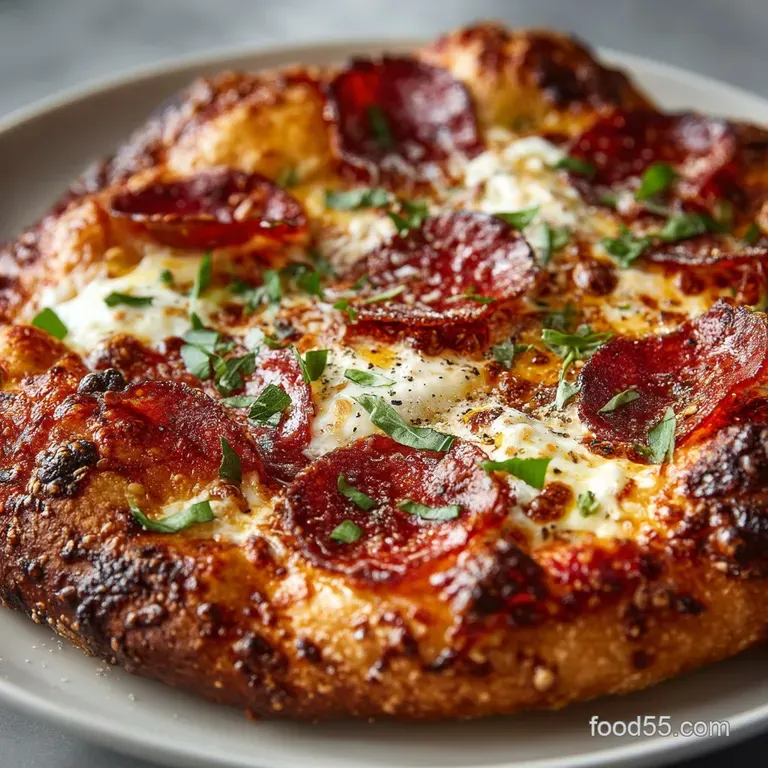
Achieving the coveted "cornicione" that puffy, blistered edge characteristic of artisan pizza hinges on high hydration and gentle handling. This dough is designed with a high water ratio (approximately 68-70% hydration, using 350ml of water for 500g of flour), which encourages air pockets to form within the structure.
Crucially, once the dough is proofed, you must stretch it out carefully using your fingertips, rather than resorting to a rolling pin. The rolling pin forces the trapped carbon dioxide out, resulting in a dense, flat base.
By stretching, we preserve those crucial air bubbles, ensuring a wonderfully chewy crust and a light, airy internal crumb during the rapid, high heat bake.
Developing Complex Flavor Profiles Through Slow Fermentation
While you can make a basic Quick Easy Pizza Dough in under three hours, the depth of flavor is sacrificed. The true magic in a classic pizza dough recipe with yeast lies in allowing the Instant Dry Yeast time to work its magic.
We use just one teaspoon (3.5g) of yeast, relying on time, not quantity, to develop complexity. By allowing the dough sufficient rest, the gluten softens and the natural sugars in the flour break down, creating nutty, savory notes often missing in rushed recipes.
This slow process transforms simple ingredients into a rich, sophisticated base, elevating your Pizza Dough from scratch beyond expectation.
Essential Components for Perfect Pizza Dough
Moving from theory to practice, achieving the ideal Homemade Pizza Crust requires careful attention to the specific components, emphasizing quality and accuracy, especially when mixing your initial Pizza Dough .
Decoding Flour: High Protein Options for Optimal Chew
The most critical ingredient is the flour. For the best elasticity and chew, you must select high protein bread flour (3 ½ cups or 500 grams). Standard all-purpose flour simply does not contain enough gluten forming protein to handle the high hydration and aggressive kneading required to build a strong structure.
The protein chains developed during kneading are what prevent the crust from tearing and what deliver that satisfying, resilient texture once baked.
The Role of Water Temperature in Activating Yeast
Proper yeast activation is vital for successful rising. We use lukewarm filtered water, aiming for approximately 105° F ( 40° C). This temperature is warm enough to instantly wake up the instant dry yeast without being so hot that it kills the culture.
Along with the water, we incorporate 2 tablespoons of extra virgin olive oil, which contributes to the elasticity of the dough and provides a subtle layer of flavor, especially important in a lean recipe like this Easy Pizza Dough .
Plus,, 2 teaspoons (10g) of fine sea salt are essential not only for taste but also for controlling the rate of yeast activity.
Recommended Tools: Mixer, Proofing Containers, and Scales
Accuracy is key in baking. To consistently execute this pizza dough recipe , a Digital Kitchen Scale is highly recommended; using metric measurements (grams) ensures the precise ratio of flour to water is achieved every time.
While you can certainly knead by hand for 12 to 15 vigorous minutes, a Stand Mixer equipped with a dough hook drastically cuts the active prep time down to 8– 10 minutes.
For proofing, you will need a large bowl, along with four smaller, lightly oiled containers (for the second rise of your Individual Pizzas ), and a bench scraper for clean dividing.
Related Recipes Worth Trying
- LowCarb Zucchini Pizza Boats Recipe The Ultimate Healthy Pizza Swap — These Pizza Stuffed Zucchini Boats are a brilliant healthy pizza hack Our foolproof method ensures tender courgette shells and a gooey bubbly filling A...
- Best Potato and Cheese Pierogi Recipe Tender Dough — Master the art of making homemade pierogi This foolproof recipe delivers tender dough and creamy potato filling panfried for crisp perfection Start making...
- The Freshest Summer Star Watermelon Pizza with Feta Balsamic — This Watermelon Pizza with Feta and Balsamic is the ultimate refreshing Summer Appetizer Creamy whipped feta meets sweet fruita real showstopper Get the...
Mastering the Weekend Warrior Pizza Dough Workflow
This workflow focuses on maximizing flavor development while keeping the hands-on time low, ensuring you can make Pizza Dough from scratch without stress.
Hydration and Initial Mixing: The Shaggy Mass Stage
Begin by combining all the dry ingredients the bread flour, salt, instant dry yeast, and an optional teaspoon of sugar (which gives the yeast a quick food source) in your mixing bowl. Next, pour in the lukewarm water and olive oil.
Mix this combination on low speed (or with a wooden spoon) only until a rough, shaggy mass forms and no dry streaks of flour remain. This initial mixing stage, which takes about two minutes, ensures full hydration before the intense gluten development starts.
Proper Kneading Technique for Elasticity
Once the shaggy mass is achieved, the kneading begins. This phase is crucial for transforming the sticky mixture into smooth, elastic dough. If using a stand mixer, knead for 8 to 10 minutes on medium low.
If kneading by hand, be prepared for a 12 to 15-minute workout, using the heel of your hand to push and stretch the dough outward. The final indicator of readiness is the windowpane test : you should be able to gently stretch a small piece of dough until it is translucent enough to see light through it without tearing.
If it tears, continue kneading for another two minutes.
The First Rise: Achieving Maximum Volume (Bulk Fermentation)
After kneading, form the smooth dough into a tight ball, coat it lightly in olive oil, and place it in a clean bowl. Cover the bowl tightly with plastic wrap to prevent a skin from forming. This stage, known as bulk fermentation, requires patience.
At room temperature, the dough should roughly double in size, typically taking between 1.5 and 2. 5 hours, depending on the warmth of your kitchen. Do not rely solely on the clock; rely on the visual cue of doubled volume and a light, airy feel.
This makes for a wonderfully Easy Pizza Crust .
Dividing and Shaping Your Pizza Dough Balls
Once the bulk fermentation is complete, gently turn the dough out onto a lightly floured surface handling it gently to preserve the air. Using a bench scraper, divide the mass into four equal pieces, each weighing approximately 200g.
To prepare them for the final proof, gently shape each piece into a taut ball by tucking the edges underneath. Place these smooth balls into separate, lightly oiled containers. They will need at least 30 minutes of final rest at room temperature to relax the gluten, ensuring they are supple and easy to stretch into Individual Pizzas .
Troubleshooting and Optimizing Your Pizza Dough Results
With this foundational pizza dough recipe established, we can now discuss advanced techniques and ways to perfect your ultimate Easy Pizza Dough .
Can I Use a Cold Fermentation Process? (The Overnight Option)
For truly superior flavor the kind that makes people ask where you bought the crust the cold fermentation process is essential. After dividing and shaping the four dough balls (Step 11), instead of letting them rest on the counter, seal them and place them in the refrigerator for 24 to 72 hours.
The cold temperature drastically slows the yeast activity, encouraging the beneficial bacteria to produce richer, nutty, and slightly acidic flavor compounds. When ready to bake, remove the dough from the fridge one hour ahead of time, allowing it to return to room temperature before stretching.
Storage Solutions: Freezing and Refrigerating Prepared Dough
This recipe makes four bases, which is perfect for future use. If you want to prepare the Pizza Dough from scratch ahead of time, refrigeration (cold fermentation) is ideal for up to three days. For long term storage, freezing is an excellent option.
Once the dough balls have been shaped, lightly oil them, wrap each tightly in two layers of plastic wrap, and place them in a freezer safe bag. Frozen dough keeps well for up to three months.
To use, thaw the wrapped dough overnight in the refrigerator, then unwrap and allow it to come to room temperature on the counter for at least 60 minutes before attempting to stretch it into your Easy Pizza Crust .
Troubleshooting Common Pizza Dough Issues (Too Sticky? Not Rising?)
If your dough is excessively sticky during kneading, resist the urge to dump in cupfuls of extra flour, which will ruin the hydration ratio. Instead, lightly flour your hands and work surface and use your bench scraper to manage it.
If the dough fails to rise during bulk fermentation (after 90 minutes), your yeast may be expired, or your kitchen may be too cold. To encourage rising, place the covered bowl in a slightly warmer spot, perhaps on top of a turned off oven that was recently used, or near a sunny window.
Nutritional Breakdown per Serving of Base Dough
Based on the full recipe yielding four servings, each base of this classic Pizza Dough provides a balanced foundation for your meal. Before adding any toppings, each quarter serving is estimated to contain approximately 330 calories, 12 grams of protein, 5 grams of total fat, and 60 grams of carbohydrates.
This provides a substantial and high fibre base upon which to build your ultimate meal.
Recipe FAQs
My finished Pizza Dough is far too sticky to handle! What did I muck up?
Sticky dough usually means the hydration is a tad high, or, more commonly, you haven't kneaded it enough to properly develop the gluten structure. Resist the urge to immediately dump a massive amount of flour on top; instead, use a light dusting on your surface and keep kneading until it feels smooth and passes the "windowpane test." If the dough is tacky but smooth, lightly oil your hands rather than flouring them further.
Is the 24-hour cold proofing really worth the faff, or can I just use it today?
It's definitely not essential if you’re pressed for time and need a fast weeknight dinner, but the cold ferment is the key to truly great flavour. The slow, cool process allows the yeast to develop complex, slightly nutty flavours, mimicking a professional artisan crust.
If you can manage the extra time, the difference in the final taste is worth the patience, making the crust taste rich and sourdough like.
How do I get that big, bubbly, 'Stone Cold Classic' crust like they do in the fancy places?
The secret is two things: high heat and gentle handling. Ensure your oven is cranked up to its absolute maximum temperature and preheat your pizza stone or steel for at least 45 minutes to guarantee a searing surface.
Crucially, when stretching the dough, avoid using a rolling pin, which deflates the precious air bubbles you’ve worked hard to create during proofing.
I've made way too much! Can I freeze this lovely dough for a rainy day?
Absolutely! This dough is brilliant for batch cooking and freezing. After dividing the dough into balls (Step 9), lightly oil each one, wrap them tightly in cling film, and pop them into a heavy duty freezer bag.
They'll keep happily in the deep freeze for up to three months; just remember to defrost them in the fridge overnight and bring them fully to room temperature for an hour before stretching.
Do I really need high protein bread flour, or can I just use plain old standard flour?
While standard plain flour will work in a pinch if you're stuck, using high protein bread flour is strongly recommended for this recipe. The higher gluten content creates a much stronger, elastic network that can trap more gas, giving you that wonderful chewiness and preventing the crust from becoming disappointingly dense.
Think of bread flour as the foundation for a truly excellent pizza base no skimping allowed!
Classic Chewy Pizza Dough Recipe

