Cookies and Cream Cookies: Bakery Style
- Time: Active 15 minutes, Passive 10 minutes, Total 25 minutes
- Flavor/Texture Hook: Velvety white chocolate paired with a dual textured cookie shatter
- Perfect for: Shared meals, neighborhood bake sales, or beginner friendly gifting
- Structural Magic Behind Cookies and Cream Cookies
- Structural Science for Better Bites
- Vital Statistics for Baking Success
- Selecting the Best Pantry Staples
- Tools for Even Baking
- Step by Step Dough Construction
- Fixing Common Cookie Texture Issues
- Delicious Twists on the Classic
- Proper Storage and Keeping Fresh
- Ideal Pairings for Dessert Time
- Recipe FAQs
- 📝 Recipe Card
Structural Magic Behind Cookies and Cream Cookies
The air in my kitchen usually smells like toasted sugar, but when these go in, it’s different. It is that specific, nostalgic scent of dark cocoa wafers hitting hot butter that brings everyone running to the counter before the timer even dings.
I remember the first time I shared these at a backyard gathering; they didn't even make it onto the serving platter.
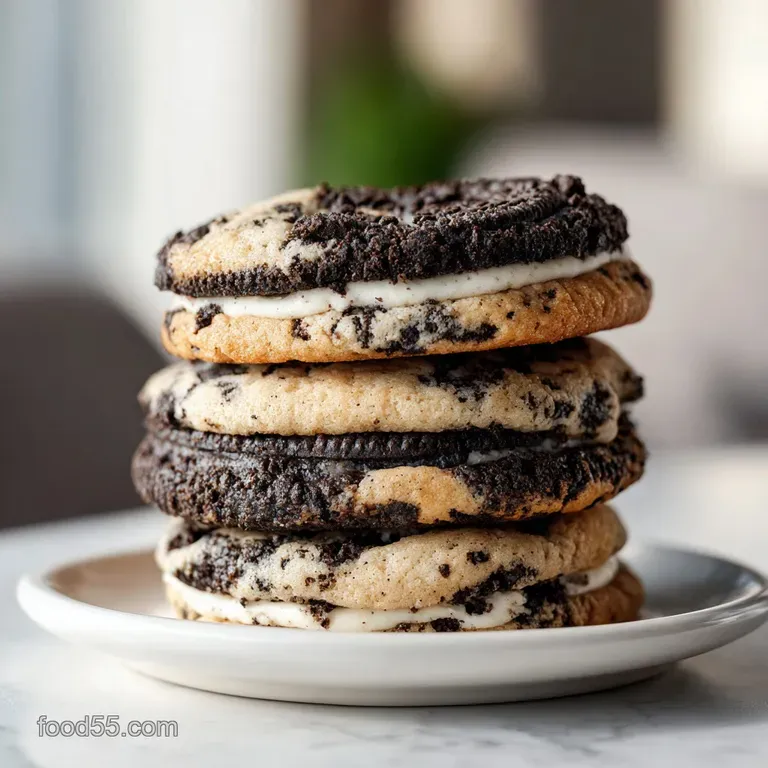
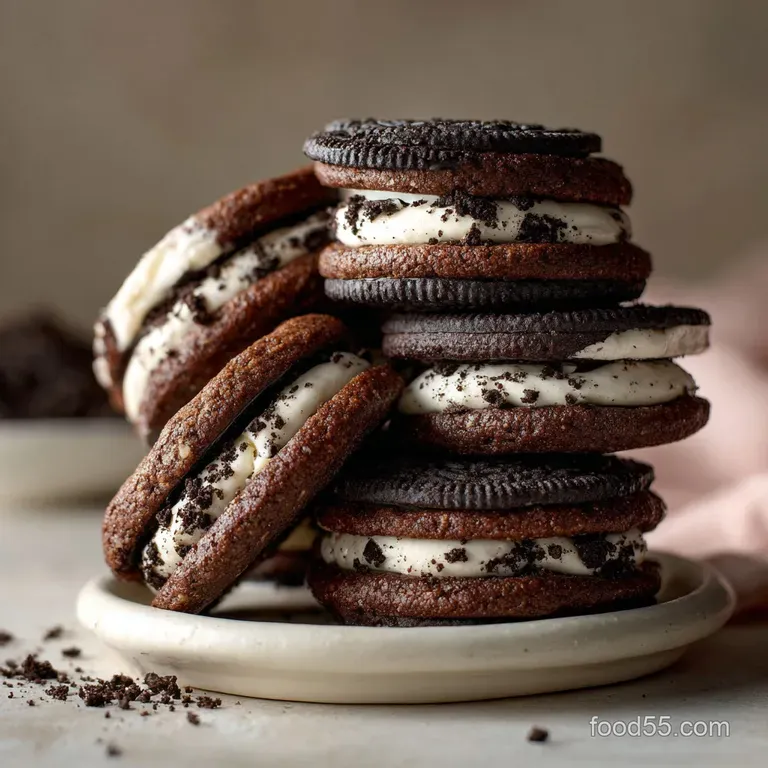
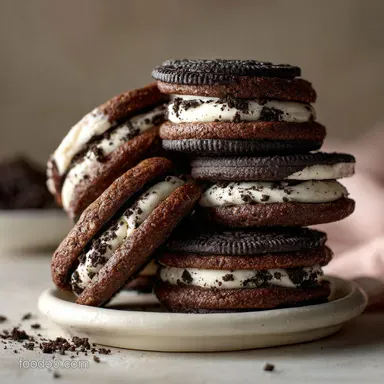
We've all had those cookies that are either too soft or way too hard, but this version hits that sweet spot of a chewy center with a distinct outer snap. It is a convivial treat that genuinely brings people together because it combines two of the best things on earth: a classic buttery dough and the unmistakable crunch of Oreos.
You’ll find that the white chocolate chips don't just add sweetness, they provide a creamy contrast to the dark cookie chunks. It’s all about those layers of texture that make every bite feel like a small celebration.
Trust me on this, once you nail the balance of the mix ins, you’ll never go back to plain chocolate chip again.
Structural Science for Better Bites
To get that specific bakery style lift without the dough turning into a flat puddle, we have to look at how ingredients interact under heat. It is a bit of kitchen physics that ensures the center stays plush while the edges get that golden sizzle.
- Starch Reinforcement: Adding 10g of cornstarch interrupts gluten formation, creating a tender, melt in-your mouth crumb that stays soft for days.
- Thermal Stability: Using slightly cool butter at 15°C (60°F) prevents the fat from melting too quickly in the oven, which is the main reason cookies spread too thin.
- Leavening Balance: The 5g of baking soda reacts with the acidic components in the brown sugar to create immediate carbon dioxide bubbles for a better rise.
| Method | Time | Texture | Best For |
|---|---|---|---|
| Standard Baking Sheet | 10 minutes | Crispy edges, chewy center | Classic bakery style |
| Cast Iron Skillet | 18 minutes | Deeply caramelized, fudgy | Family style sharing |
| Air Fryer (Batch) | 8 minutes | Extra crunchy exterior | Quick single servings |
Choosing your baking method changes the final bite significantly. While the baking sheet is my go to for those beautiful individual circles, a skillet version creates a dense, decadent experience that is fantastic for a warm dessert at the table.
Vital Statistics for Baking Success
The chemistry of a good cookie depends on more than just mixing things in a bowl. Each component has a specific job to do, from providing structure to ensuring the sugars caramelize at just the right temperature.
Component Analysis
| Ingredient | Science Role | Pro Secret |
|---|---|---|
| 350g All Purpose Flour | Provides the structural framework | Weigh it to avoid a dry, tough cookie |
| 100g Light Brown Sugar | Adds moisture and molasses notes | Pack it tightly for consistent sweetness |
| 10ml Pure Vanilla Extract | Enhances the cocoa and dairy notes | Add after the egg for better aroma |
Cornstarch for Tender Texture
By including a small amount of cornstarch, we are effectively lowering the protein content of the all purpose flour. This results in a "softer" bite that mimics cake flour while maintaining enough strength to hold all those heavy Oreo chunks.
Cold Butter Logic
Unlike many recipes that call for room temperature butter, keeping your 225g of unsalted butter slightly cool (around 15°C) is vital. This temperature ensures the fat stays emulsified during the creaming process, leading to a much thicker, loftier cookie.
Selecting the Best Pantry Staples
When you're shopping, look for high-quality fats and fresh leavening agents to ensure your Cookies and Cream Cookies recipe turns out exactly like the photos. The quality of your white chocolate chips actually matters here because cheap ones often contain too much oil and won't hold their shape.
- 350g All purpose flour: The backbone of the dough.
- Substitute: 350g Spelt flour (adds a nutty flavor and slightly denser crumb).
- 225g Unsalted butter: Controls the spread and flavor. Why this? Allows you to control the salt levels perfectly.
- Substitute: 225g Salted butter (omit the extra sea salt if using this).
- 150g Granulated sugar: Provides the crisp edges.
- Substitute: 150g Caster sugar (dissolves faster for a smoother finish).
- 150g Oreo cookies: Coarsely chopped for that signature look.
- Substitute: 150g Hydrox or generic chocolate sandwich cookies.
- 170g White chocolate chips: Adds a velvety sweetness.
- Substitute: 170g Chopped white chocolate bar (melts into beautiful pools).
If you’re looking for a different project later, you might enjoy learning how to bake recipe techniques that focus on sweet treats and heavenly textures.
Tools for Even Baking
You don't need a professional kitchen, but a few specific items make the process much smoother. A heavy duty stand mixer (like a KitchenAid) is great, but a simple hand mixer works perfectly fine too.
- Digital Scale: Essential for measuring the 350g of flour accurately.
- Large Baking Sheets: Use light colored pans to prevent the bottoms from burning.
- Silicone Mats or Parchment: Prevents sticking and helps the cookies spread evenly.
- Cookie Scoop: I use a 50g scoop to ensure all 20 servings are the same size.
- Wire Cooling Rack: Crucial for letting air circulate so the bottoms don't get soggy.
step-by-step Dough Construction
The secret to this dough is the order of operations. We want to build a stable emulsion of fat and sugar before we ever introduce the dry ingredients.
1. The Aeration Phase
Cream the 225g cool butter with both sugars. Mix for 3 minutes until the color lightens. Note: This creates tiny air pockets for the baking soda to expand.
2. Emulsifying the Liquids
Add the cold egg and 10ml vanilla extract. Beat until the mixture looks like smooth buttercream.Note: A cold egg helps keep the butter from warming up too much.
3. The Dry Integration
Sift together the 350g flour, 10g cornstarch, 5g baking soda, and 3g sea salt. Fold gently into the wet ingredients.Note: Stop as soon as you see no more white streaks to avoid tough cookies.
4. The "Shatter Fold" Finishing
Add the 150g chopped Oreos and 170g white chocolate chips. Stir by hand with a sturdy spatula.Note: You want large chunks of cookie for that rustic, bakery look.
5. Shaping and over High heat Baking
Scoop into balls and place on the tray. Bake at 190°C (375°F) for 10 minutes until the edges are just set. Note: They will look slightly underdone in the middle; this is correct.
For those days when you don't want to turn on the oven at all, you can try a No Bake Cookie recipe that offers a similar chocolatey satisfaction.
Fixing Common Cookie Texture Issues
Even the best bakers run into trouble sometimes. The most common hurdle with this specific dough is managing the temperature of the butter and the size of the cookie chunks.
Thin Spreading Issues
If your cookies come out like thin pancakes, the butter was likely too warm before it hit the oven. This happens if the kitchen is hot or if you creamed the butter for too long, generating friction heat.
Dough Discoloration Fix
If your dough starts looking grey, it means the Oreos were chopped too finely or mixed too aggressively. The fine cocoa dust from the cookies bleeds into the pale dough, losing that beautiful high contrast look.
| Problem | Root Cause | Solution |
|---|---|---|
| Cookies are flat | Butter was too soft | Chill dough balls for 30 minutes before baking |
| Dough is grey | Over mixing the cookies | Fold in large chunks by hand at the very end |
| Hard cookies | Over baked or too much flour | Use a scale and pull them when centers are soft |
Common Mistakes Checklist
- ✓ Don't over process the Oreos; you want shards, not sand.
- ✓ Ensure your baking soda is fresh (test a pinch in vinegar).
- ✓ Use a cool baking sheet for every batch; never put dough on a hot pan.
- ✓ Let the cookies rest on the pan for 5 minutes before moving to a rack.
- ✓ Check your oven temp with a thermometer to ensure it's truly 190°C.
Delicious Twists on the Classic
Once you have the base down, you can start experimenting with different flavors. It’s a great way to adapt the recipe for different holidays or cultural exchanges within your friend group.
- Dark Mode Version: Replace 50g of the all purpose flour with dark cocoa powder for a deep, chocolate on-chocolate experience.
- Minty Fresh: Use Mint Oreos and add a drop of peppermint extract to the dough for a refreshing holiday twist.
- Golden Variation: Swap the standard chocolate cookies for Golden Oreos and use milk chocolate chips instead of white.
Chef's Tip: If you want that perfect "Crumbl" look, press a few extra Oreo shards and white chips into the top of the dough balls right before they go into the oven. It makes the final result look much more professional.
Proper Storage and Keeping Fresh
To keep that "just baked" feel, you need to protect the cookies from the air. These are moisture rich treats, so they will soften over time if not stored correctly.
Storage: Keep them in an airtight container at room temperature for up to 4 days. If they start to get a bit firm, tuck a small piece of plain white bread into the container. The cookies will pull moisture from the bread and stay velvety.
Freezing: You can freeze the raw dough balls for up to 3 months. Bake them straight from the freezer, adding 2 minutes to the total bake time. If freezing baked cookies, wrap them individually in plastic wrap before placing them in a freezer bag.
Zero Waste Tip: If you have a few cookies that have gone truly stale, don't toss them! Crush them up and use them as a base for a cheesecake crust or as a topping for vanilla bean ice cream.
Ideal Pairings for Dessert Time
Serving these cookies is all about the "Cookies and Cream" theme. They are fantastic on their own, but a few thoughtful pairings can make them feel like a full dessert course.
- Ice Cold Milk: The classic choice. The fats in the milk help cleanse the palate from the sweet white chocolate.
- Espresso or Strong Coffee: The bitterness of a dark roast perfectly balances the high sugar content of the white chips.
- Vanilla Bean Gelato: Make a cookie sandwich by smushing a scoop of gelato between two warm cookies.
If you enjoy the contrast of a crunchy cookie and a creamy filling, you might want to see my Buttery Shells recipe for a more delicate French inspired treat.
Myths About Baking with Cookies
One common misconception is that you need to remove the cream filling from the Oreos before mixing them in. In reality, that cream melts slightly and adds to the fudgy texture of the surrounding dough.
Another myth is that brown sugar is just for flavor; it actually provides the acidity needed for the baking soda to react, giving the cookies their necessary lift. Finally, many people think "more is better" with mix ins, but over loading the dough can cause the cookies to fall apart because there isn't enough dough "glue" to hold the chunks together.

Recipe FAQs
Can I substitute butter with oil in this recipe?
No, you should not substitute butter with oil. Butter provides essential structure and flavor through its fat content and water content; swapping for oil will cause the cookies to spread too thinly and become greasy.
How to prevent the crushed cookies from turning the dough grey?
Fold in the crushed cookies gently at the very end. Overmixing causes the dark cocoa powder in the wafers to bleed into the pale dough, destroying the contrast; use a spatula and only fold until barely combined.
Is it necessary to chill the dough before baking?
Yes, chilling is highly recommended for better texture. Chilling for at least 30 minutes solidifies the fat, which slows down the spread in the oven, resulting in a thicker, chewier cookie.
What is the optimal baking temperature for thick cookies?
Bake at 190°C (375°F) for 10 minutes. This higher initial temperature sets the edges quickly before the cool butter melts completely, helping the center stay plump and soft.
How to ensure the white chocolate chips don't burn?
Press a few extra chips onto the top of the dough balls just before baking. The chips buried inside insulate against direct heat; for handling dough consistency, see how the same principles of balancing solid vs. liquid fat help in our Classic Peanut Butter recipe.
Can I use baking powder instead of baking soda?
No, you must use baking soda here. Baking soda reacts with the acids naturally present in the brown sugar, providing the necessary lift and spread; baking powder offers less immediate chemical reaction.
What is the best way to make these cookies soft days later?
Store them with a slice of plain white bread in an airtight container. The bread releases moisture slowly, which the cookies absorb, keeping them velvety soft for several days past baking.
Cookies And Cream Cookies Recipe
Ingredients:
Instructions:
Nutrition Facts:
| Calories | 280 kcal |
|---|---|
| Protein | 3.0 g |
| Fat | 13.6 g |
| Carbs | 36.5 g |
| Fiber | 0.6 g |
| Sugar | 20.2 g |
| Sodium | 238 mg |
