Crispy Chicken Delight: the Buttermilk Fillets with a Proper Crunch
- Introducing The Ultimate Crispy Buttermilk Fillets: A Proper Crunch
- Essential Components and Ingredient Swaps for Your Crispy Fillets
- Mastering the Preparation of Your Crispy Chicken Delight
- The Science of the Proper Crunch: Buttermilk and Double-Dredging
- Troubleshooting Your Fry: Expert Tips for Consistent Results
- Keeping the Delight Alive: Reheating and Storage
- Elevating Your Crispy Chicken Delight: Serving Pairings
- Recipe FAQs
- 📝 Recipe Card
Introducing The Ultimate Crispy Buttermilk Fillets: A Proper Crunch
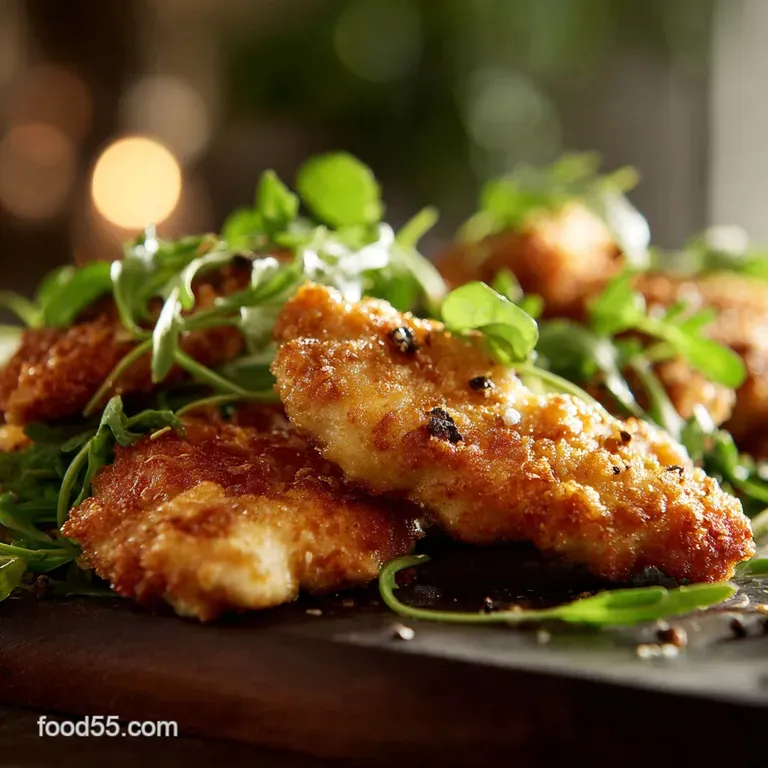
Can you hear that? That perfect, satisfying shatter is the sound of truly spectacular, homemade fried chicken, otherwise known as our beloved "Crispy Chicken Delight." Forget those sad, soggy take out containers that promise a crunch but deliver disappointment.
This recipe delivers a deep golden crust that holds tight to the unbelievably juicy fillet inside, guaranteeing that proper crunch every single time.
This isn’t just a weekend project; this method is a weeknight lifesaver if you plan ahead. The marinade does all the heavy lifting for you, transforming basic strips into succulent, tender morsels. Seriously, all you need are a few basic pantry spices and a solid high temp oil.
We’re ditching all the guesswork today and focusing on the science: the buttermilk soak tenderizes the meat, and the crucial double dredging technique creates those craggy, shattery bits that define a superior fry. Ready to master the ultimate homemade fried chicken? Let’s crack on.
Moving Past Soggy Take Out: The Definitive Homemade Method
I spent years messing this up, ending up with burnt exteriors and raw interiors (or, worse, a crust that slid right off). The key breakthrough was ditching the guesswork and embracing precision.
The buttermilk is our acidic secret weapon, ensuring the internal moisture stays locked in, which is crucial for a juicy result.
The definition of a great fry lies entirely in temperature management. You must invest in a good digital thermometer. I know, I know, another gadget, but trust me on this one.
Maintaining a steady oil temperature between 325°F and 350°F (160°C to 175°C) is the only way to cook the fillet through without burning the coating or letting the oil soak in and turn everything greasy.
The Secret to a Shattery, Golden Crust
This incredible texture comes down to two components: cornflour and the double dip. Cornflour (or cornstarch) is brilliant because it inhibits the development of gluten in the flour mixture, leading to a lighter, crispier, and much less chewy coating. It makes a huge difference.
What Makes This the Best "Crispy Chicken Delight"?
It's all about maximizing surface area. That second dip back into the buttermilk briefly re-wets the first coat, allowing the final layer of flour to clump up into rugged, textured pieces. When these pieces hit the hot oil, they fry up instantly into those wonderful, shatteringly crunchy flakes we crave.
This is how you achieve a restaurant quality "proper crunch" at home.
Essential Components and Ingredient Swaps for Your Crispy Fillets
Every successful recipe starts with fantastic ingredients and knowing exactly what to do when you’re missing something crucial. This section breaks down the basics.
Building the Ultimate Dry Seasoning Blend
I used to just season the meat and forget the flour, resulting in a bland crust huge mistake. You need to heavily season the dredge! My blend leans heavily on smoked paprika for colour and depth, garlic powder, and just enough cayenne for a background warmth.
If you don't have smoked paprika, regular paprika works fine , but you lose that gorgeous smoky colour, so maybe add a tiny pinch of chili powder for complexity.
Liquid Assets: Choosing the Right Buttermilk
Buttermilk is non-negotiable for flavour and tenderness. The acid does two things: it breaks down the proteins in the meat, making it unbelievably soft, and it helps the coating stick like glue. No buttermilk?
Easy fix: mix 1 ½ cups of whole milk with 1 ½ tablespoons of white vinegar or lemon juice and let it stand for 10 minutes until it looks curdled and thick. Done.
Flour Power: Notes on the Best Dredging Mediums
We use all-purpose flour mixed with cornflour for the ultimate coating stability. If you need this recipe to be gluten-free, swap the all-purpose flour for a good quality cup-for-cup gluten-free blend. Make sure to keep the cornflour ratio the same, as it’s essential for crispness.
Healthy Swaps for the Frying Oil
For deep frying, you need an oil with a high smoke point that doesn't lend a strong flavour. Rapeseed (Canola) or vegetable oil are my go-to’s because they are cheap and neutral.
If you’re trying to use less oil, you can absolutely use the air fryer variation outlined in the tips section! It's not quite the same, but it still delivers a great texture.
Mastering the Preparation of Your Crispy Chicken Delight
Getting the technique right is everything here. Don't skip the resting period it's absolutely critical for success.
Phase One: The Buttermilk Soak (Time Critical)
Slice your fillets uniformly. This is important for even cooking! Toss them immediately into the buttermilk, hot sauce, and basic salt/pepper mix. The longer they sit, the better, up to 8 hours. At the minimum, give it two hours. This step gives you the tender result you're after.
Phase Two: The Double Coating Technique for Maximum Texture
Once your dry mix is ready, pull the soaked fillets straight from the buttermilk let the excess drip off but do not pat them dry. Give them a firm, full coat in the flour.
Then, dip them back into the remaining buttermilk for a quick one-second bath, then immediately back into the flour. Really squeeze and press the coating on here to create those rugged flakes that guarantee a proper crunch.
Phase Three: Achieving the Perfect Fry Temperature
Heat your oil slowly to 325°F (160°C). This slow, steady heat is much safer than slamming the hob to high. Only fry 3 or 4 fillets at a time. Overcrowding drops the oil temperature too fast, leaving you with cold, greasy chicken.
Fry them for about 4– 6 minutes until they are gorgeously golden and cooked through.
Finishing Touch: Draining and Seasoning Post Frying
Chef’s Note: Never drain fried food on paper towels! Paper traps steam, making the underside instantly soggy. Drain immediately on a wire rack set over a baking sheet, and sprinkle a tiny pinch of salt over them while they are still blazing hot.
That bit of extra seasoning makes the flavour pop.
The Science of the Proper Crunch: Buttermilk and Double Dredging
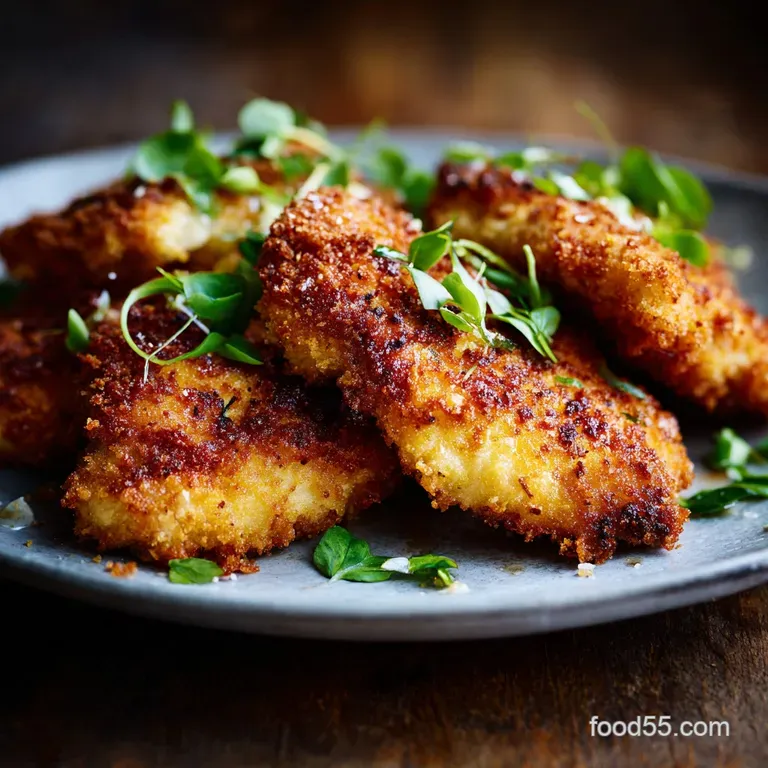
The magic really happens during the second dredge. The buttermilk provides residual moisture, turning patches of the dry mix into a sticky paste. When the fillet is returned to the flour, this paste grabs handfuls of the mix, resulting in the deep valleys and high peaks that guarantee the maximum crispy texture.
The cornflour ensures these fragile peaks don't absorb too much oil. It’s a beautiful, simple process.
Troubleshooting Your Fry: Expert Tips for Consistent Results
I’ve had enough crust failures to write a whole cookbook on what not to do. Here are the top three mistakes I see time and time again.
Dredging Pitfalls: Why Your Coating Might Be Falling Off
If your coating separates and floats away the second it hits the oil, you didn’t rest the chicken long enough. After the double dredge, the fillets must rest for 15 minutes on the rack at room temp.
This allows the moisture in the buttermilk to bond with the flour, setting the crust so it adheres perfectly during frying. Skipping this step is disastrous.
How to Ensure the Fillets Cook Through Evenly
If you cut your chicken fillets into strips of various sizes, the thinner ones will burn while the thicker ones remain raw inside. Uniformity is key here. If you are dealing with very thick fillets, you can butterfly them slightly before marinating.
Always use a meat thermometer; 165°F (74°C) is the magic number for safe, juicy eating.
The Oil Is Too Cold: Preventing a Greasy Crust
If the oil temperature drops below 320°F (160°C), the chicken coating acts like a sponge and sucks up the fat instead of forming a quick, tight crust. Only add a few pieces at a time and wait until the oil temperature recovers before adding the next batch.
Cold oil equals heavy, greasy chicken every time.
Keeping the Delight Alive: Reheating and Storage
But does it freeze well? You bet it does, if you do it right!
Safe Storage Times for Cooked Fillets
If you have leftovers (a rare occurrence, I know), store them in an airtight container in the fridge for up to 3 days. Make sure they are completely cool before covering, or you'll generate steam that ruins the crunch.
Maintaining Crispness: Reheating Methods That Work
Never, ever microwave your crispy fillets unless you are actively looking for a steamed, rubbery outcome. The air fryer is the ultimate tool for revival. I use it for everything from this recipe to my [Air Fryer Caramel Apple Wontons: Easy, Ultra Crispy Fall Dessert].
Heat the fillets in a preheated air fryer at 375°F (190°C) for 4– 6 minutes. Alternatively, use a conventional oven at 400°F (200°C) for 8– 10 minutes. The high, dry heat is what restores the glorious crunch.
Elevating Your Crispy Chicken Delight: Serving Pairings
These buttermilk fillets are brilliant served simply, perhaps with some slaw and proper chips, but they also lend themselves to a little creativity.
We often slice these up and toss them with a sticky, savoury glaze, similar to the method in my recipe for [Cashew Chicken: The Best Sticky, Restaurant Quality Stir Fry]. The crunch holds up surprisingly well!
For a fantastic comfort dinner, serve them alongside something zingy and carb heavy, like a lemon herb side dish. If you are feeling ambitious, maybe try them with a batch of my [Chicken Meatballs with Orzo: Zesty, Creamy One-Pan Dinner] (just serve the orzo on the side, not mixed). Either way, get dipping!
A simple honey mustard or a smoky chipotle ranch is all you truly need.

Recipe FAQs
Why is my crispy coating falling off or turning soggy?
This usually occurs if the chicken fillets were not allowed to drip excess buttermilk before the final dredge, creating a wet layer. Additionally, overcrowding the fryer dramatically drops the oil temperature, which prevents the crust from setting immediately.
Ensure you let the chicken rest for five minutes after the second dredge and fry in small, manageable batches to maintain oil heat.
What if I don't have buttermilk for the soak?
You can create an effective substitute by combining 1 cup of whole milk with 1 tablespoon of white vinegar or fresh lemon juice. Stir the mixture gently and let it sit for about 10 minutes until it visibly curdles and thickens slightly.
This provides the necessary acidity and protein structure needed to tenderize the chicken as buttermilk does.
Can I bake or air fry the chicken instead of deep frying?
Yes, for a healthier alternative, you can achieve a great crunch through dry-heat methods. For air frying, generously spray the dredged fillets with cooking oil and cook at 375°F (190°C) for 12-15 minutes, flipping halfway.
If baking, place the chicken on a wire rack over a baking sheet and bake at 400°F (200°C) until golden brown and the internal temperature reaches 165°F (74°C).
My chicken is crispy, but the meat itself is dry. What went wrong?
Dry meat is typically a result of overcooking or frying for too long at too low a temperature. Always use a high-quality thermometer to ensure your oil is consistently around 350°F (175°C) before dropping the chicken.
If using very thick fillets, consider pounding them slightly thinner and more uniform before the buttermilk soak to ensure they cook through evenly and quickly.
Can I prepare the buttermilk soaked chicken ahead of time?
The buttermilk soaking stage is actually ideal for advanced preparation and can be done up to 24 hours before cooking, storing the covered chicken in the refrigerator. However, do not perform the final flour dredging until just moments before you plan to fry the fillets.
If the dredged chicken sits for too long, the moisture will seep out, dissolving the flour and resulting in a pasty crust.
What is the best way to store and reheat leftovers to maintain the crunch?
Store cooked, cooled chicken in an airtight container in the refrigerator for up to three days. To best restore the crispness, reheat the fillets using an air fryer set to 350°F (175°C) for 4-6 minutes, or use a conventional oven at 375°F (190°C) until fully warmed.
Never use a microwave, as the steam generated will completely ruin the beautiful crispy crust.
How can I make this "Proper Crunch" recipe gluten-free?
To successfully adapt this recipe, substitute the all-purpose flour in the dredging station with a measure for-measure gluten-free flour blend, which often includes necessary stabilizers like xanthan gum.
For an even lighter, shattery crust, you can use a mix of rice flour and potato starch instead of a commercial blend. The buttermilk soak itself is naturally gluten-free.
Crispy Chicken Delight Buttermilk Fillets

Ingredients:
Instructions:
Nutrition Facts:
| Calories | 480 kcal |
|---|---|
| Protein | 57.9 g |
| Fat | 8.4 g |
| Carbs | 43.4 g |
