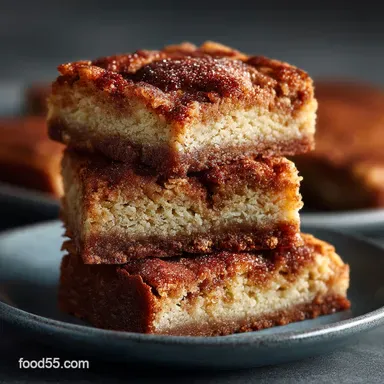
Chewy Classic Snickerdoodle Bars the Quick Bake
- The Ultimate Bar Conversion: Why Sliceable Snickerdoodle Treats Win
- Building Blocks for the Best Snickerdoodle Bars
- Mixing, Baking, and Cooling: Your Step-by-Step Snickerdoodle Bar Guide
- Extending the Freshness and Flavor of Your Bake
- Nutritional Snapshot and Serving Suggestions
- Recipe FAQs
- 📝 Recipe Card
The Ultimate Bar Conversion: Why Sliceable Snickerdoodle Treats Win
There’s nothing quite as comforting as the familiar warmth of a classic Snickerdoodle, but when time is short or you are baking for a crowd, dealing with dozens of individual dough balls can be cumbersome. This is where the simple genius of the bar dessert comes into play.
Converting the traditional drop cookie into a sliceable sheet transforms a potentially long, multi batch operation into a single, effortless bake. These rich, buttery Snickerdoodle Bars provide all the soft chew and signature tang of the original, baked into a magnificent slab that requires minimal fuss and guarantees uniform results every time.
They are the ideal solution for anyone needing a crowd pleasing, high yield dessert.
Ditching the Dough Ball Drama: Speed Baking Your Favorite Cookie
The most compelling reason to embrace the Snickerdoodle Cookie Bars format is efficiency. Our Easy Snickerdoodle Bars Recipe eliminates the time consuming processes of scooping, rolling, chilling, and repeated pan cycles that define Snickerdoodle Cookies Easy .
This recipe is rated as delightfully easy precisely because the dough, once mixed, is simply pressed into the prepared pan. With just 15 minutes of active prep time, you can move straight to the oven.
The total hands-on effort required is vastly reduced, allowing you to achieve that nostalgic comfort food flavour faster, making this a truly practical Bar Desserts Recipe staple.
The Signature Snickerdoodle Tang: What Makes Cream of Tartar Essential
The characteristic flavor profile of a Snickerdoodle is immediately recognizable thanks to a unique ingredient: acid. Specifically, Snickerdoodle Bars with Cream of Tartar . This acidic powder, a byproduct of winemaking, serves two critical functions.
First, when paired with baking soda, it provides a powerful chemical leavening, ensuring the bars rise to a soft height. Second, and perhaps more importantly, it prevents the sugars in the dough from crystallizing during baking, resulting in that supremely soft texture.
On top of that,, the cream of tartar imparts a distinct, subtle tangy finish that cuts through the sweetness and elevates the entire experience far beyond a simple cinnamon sugar cookie.
Achieving Perfect Chewiness in Every Square
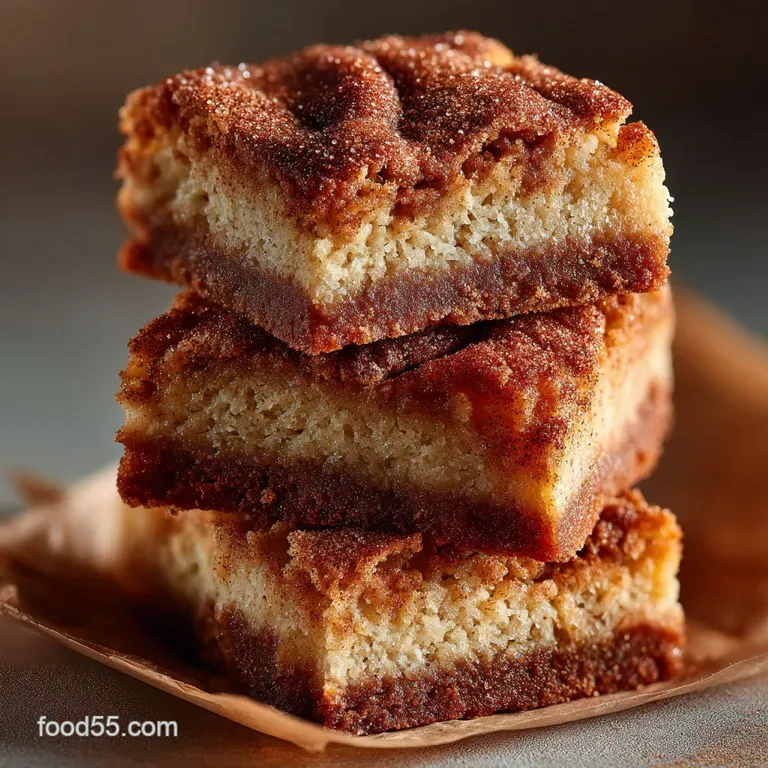
The desired texture for truly great Chewy Snickerdoodle Bars lies in mastering both the dough structure and the baking duration. This specific formulation is designed to be slightly sticky and dense, ensuring it remains moist.
Baking these in an 8x8 inch pan at 350° F ( 175° C) for 30 to 35 minutes ensures the edges set up lightly golden while the center remains slightly yielding. The secret weapon in achieving that coveted soft, dense chew, however, is patience.
Once baked, the bars must cool completely an essential two-hour minimum on the wire rack before cutting. This allows the internal heat to finish the cooking process gently and permits the fats and starches to fully solidify, guaranteeing clean cuts and perfect structural integrity.
Building Blocks for the Best Snickerdoodle Bars
Transitioning from the abstract idea of a great dessert to actually producing the best results depends entirely on having the right tools and understanding ingredient science. While the process itself is simple, attention to detail here ensures success.
Ensuring Accuracy: Essential Kitchen Tools for Success
For this recipe, simplicity is key. You will need standard measuring cups and spoons, a wire rack for cooling, and, most importantly, a robust electric stand mixer (or a reliable hand mixer) to handle the dense dough properly.
The vessel itself is also crucial: we are using an 8x8 inch metal baking pan, which yields 16 generous squares. While this recipe is perfectly suited for the 8x8, those wishing to bake a larger batch might adapt the quantities for Snickerdoodle bars 9x13 pan, remembering that the baking time will need slight adjustment for the larger, shallower area.
Utilizing parchment paper with an overhang is non-negotiable for effortless removal of the entire slab post cooling.
Ingredient Temperature Matters: Achieving Fluffy Batter
A golden rule in baking is temperature control, particularly for ingredients like butter and eggs. This recipe calls for one cup (two sticks) of unsalted butter and two large eggs, all of which must be at true room temperature.
Cold ingredients refuse to emulsify properly with the sugar, leading to a denser, heavier result. By ensuring the butter is softened, not melted, it can trap maximum air during the creaming process with the 1 1/4 cups of granulated sugar.
This thorough aeration which should take 3 to 4 minutes until the mixture is visibly light and pale is what guarantees a tender, lofty dough structure.
The Secret to the Perfect Cinnamon Sugar Swirl Topping
The signature element of any Snickerdoodle is its spicy, sweet coating. For these bars, we create an equally irresistible topping blend using 1/4 cup of granulated sugar mixed vigorously with 2 teaspoons of ground cinnamon.
Unlike cookies, where the dough is rolled into the mixture, for these bars, the topping is applied generously and evenly after the dough is pressed into the pan but before baking.
As the dough bakes, the topping slightly caramelizes, creating a beautiful crackled texture and a pungent aroma that fills the kitchen, locking in that classic flavour punch.
Related Recipes Worth Trying
- The Ultimate Chewy Snickerdoodle Bars Recipe No Rolling — Skip the rolling pin for these outrageously soft Chewy Snickerdoodle Bars Get that classic tangy flavour in a fussfree pan bake Simple and nostalgic
- Foolproof Maple Cranberry Pecan Oat Bars Recipe — Whip up these robust Maple Cranberry Pecan Oat Barsa betterthanbakery flapjack featuring toasted oats and real maple syrup Perfect for teatime
- Chewy Banana Split Quinoa Oat Bars Recipe Healthy Treat — Forget the ice cream headache These Banana Split Quinoa Oat Bars pack classic flavour into a chewy wholesome bake Perfect for breakfast or a cuppa
Mixing, Baking, and Cooling: Your step-by-step Snickerdoodle Bar Guide
Following a precise sequence ensures that all the effort you put into selecting quality ingredients translates into perfect results.
Preparing Your Pan for a Clean Release
Before any mixing begins, the oven should be preheated to 350° F ( 175° C). Next, prepare the 8x8 inch pan. To ensure absolutely no sticking and a smooth transition to the cutting board, line the pan with parchment paper.
Allow a generous overhang on two opposing sides these will act as handles for lifting the cooled baked goods. As an added precaution, a light spritz of non-stick spray beneath the parchment paper helps it adhere smoothly to the pan bottom.
Mastering the Creaming Process for Light Texture
The foundation of any chewy bar is the creaming stage. Using the stand mixer fitted with the paddle attachment, cream the room temperature butter and sugar until the mixture achieves that critical light and fluffy consistency.
Next, incorporate the two room temperature eggs, one at a time, followed by the vanilla extract. In a separate bowl, ensure the dry ingredients the 2 3/4 cups of flour, 2 teaspoons of cream of tartar, 1 teaspoon of baking soda, and 1/2 teaspoon of salt are thoroughly whisked together.
When combining the wet and dry mixtures, shift the mixer to low speed and add the dry components gradually. Stop immediately when no streaks of flour remain; overmixing is the single fastest way to develop gluten and ruin the tender chew, turning the bars tough.
Testing for Doneness: Avoiding Overbaked Edges
Once the dough is pressed smoothly into the prepared pan and topped with the cinnamon sugar mix, it is ready for the oven. Bake for 30 to 35 minutes. Crucially, resist the urge to wait until the bars look entirely golden brown.
The goal is a center that looks set but is still slightly pale, rather than wobbly or sunken. The edges should be lightly browned, but the center will firm up completely during cooling.
A reliable test is inserting a toothpick: it should emerge with moist, sticky crumbs clinging to it, signaling ideal chewiness, not wet batter or dry, clean cake.
Extending the Freshness and Flavor of Your Bake
These Chewy Snickerdoodle Bars are best when they are fully cool and sliced, but knowing how to store them is essential for enjoying them over several days.
Smart Storage Solutions: Keeping Your Bars Chewy
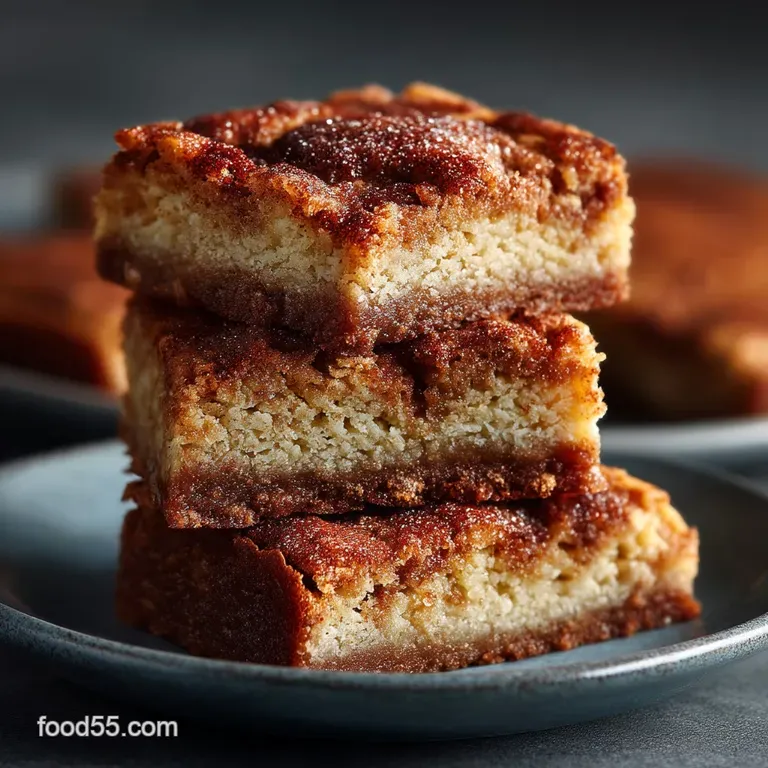
To maintain that highly desirable chewiness, airtight storage is paramount. Once the bars are completely cool and sliced into 16 squares, store them in a container layered with wax or parchment paper to prevent sticking. They will maintain their perfect texture at room temperature for up to four days.
For longer storage, the bars freeze exceptionally well. Wrap individual squares tightly in plastic wrap, then place them in a freezer safe bag. They can be frozen for up to two months and are best thawed overnight at room temperature to retain all their moisture and flavour.
Quick Swaps and Flavor Variations
While the classic version is beloved, these Snickerdoodle Bars Recipe is highly adaptable. For an immediate upgrade, try the Brown Butter Base : gently brown the 1 cup of butter before mixing. This adds a sophisticated, nutty depth.
Alternatively, fold in 1/2 cup of melted white chocolate before pressing the dough for a rich White Chocolate Swirl variation. For an autumnal twist, replace a portion of the granulated sugar with maple sugar and fold in 1/2 cup of chopped pecans for a Maple Pecan Snickerdoodle.
Navigating Dietary Needs: gluten-free and Vegan Modifications
Adapting this recipe for specific dietary requirements is straightforward thanks to modern substitutions. For those seeking a gluten-free option, use a reputable 1:1 gluten-free baking blend that includes xanthan gum in place of the 2 3/4 cups of all-purpose flour.
Since GF flours can sometimes absorb liquid differently, you may need to add a tablespoon or two of extra milk if the dough appears overly crumbly. For a vegan friendly version, high fat vegan butter sticks can be substituted 1:1 for the unsalted butter.
If you find yourself without cream of tartar, a mixture of 1/2 teaspoon of baking soda and 1 teaspoon of white vinegar or lemon juice (added with the wet ingredients) can provide the necessary acid, though the signature tangy flavor will be slightly less pronounced.
Nutritional Snapshot and Serving Suggestions
Understanding the content and how best to present these bars completes the baking experience.
Nutritional Snapshot
Based on slicing the 8x8 pan into 16 servings, each square provides an estimated 250 to 280 kcal. They contain a moderate amount of protein (around 3 grams) and total fat (12 14 grams), primarily saturated fat derived from the butter.
While these are certainly a celebratory indulgence, their robust flavor means that a single, satisfying square is often enough to curb a sweet craving.
Serving Suggestions
The versatility of Snickerdoodle Bars allows them to transition seamlessly from a simple afternoon snack to a decadent dessert. For the ultimate pairing, serve a warm square alongside a scoop of premium vanilla bean ice cream and a drizzle of homemade caramel sauce the contrast of warm, chewy bar and cold, melting ice cream is heavenly.
Alternatively, for a sophisticated afternoon treat, cut the bars into smaller sticks and pair them with a robust, spiced beverage like chai tea or a simple black coffee. They also make excellent dippers when served next to a sweet cream cheese glaze or a simple chocolate fondue at gatherings.
Recipe FAQs
Why do I need cream of tartar for these Snickerdoodle Bars? Can I just leave it out?
Cream of tartar is truly the secret ingredient here it's what gives Snickerdoodles their signature tangy 'zing' and helps create that wonderful, soft chew. It's an acidic component that reacts with the baking soda, giving the dough a quick, beautiful lift without allowing it to spread too flat while baking.
If you skip it, you'll still get a tasty bar, but it will be much denser and closer to a standard sugar cookie, missing that essential nostalgic flavour. Think of it as the star of the show; leaving it out would be a bit like turning up to Wimbledon without a racket!
My bars came out dry and cakey instead of perfectly chewy. What went wrong?
This is often down to one of two things: overmixing or overbaking. When incorporating the dry ingredients, mix only until the flour streaks disappear overworking the dough develops gluten, which makes the bars tough and dense rather than soft.
Secondly, keep a keen eye on the clock! The bars should come out when the edges are set and lightly golden, but the centre still looks slightly soft. They continue to set up as they cool; if you wait until they look fully baked in the oven, you've gone too far.
How should I store leftover Snickerdoodle Bars, and how long do they stay fresh?
Once completely cooled, store the cut bars in an airtight container at room temperature. For the best flavour and texture (that classic chew!), aim to finish them within 3 to 4 days.
For longer storage, these bars freeze brilliantly! Wrap the individual squares tightly in cling film or foil, place them in a freezer bag, and they’ll keep well for up to three months. Just thaw them on the counter when that craving hits.
I only have a 9x13 inch pan will that work, or should I double the recipe?
The 9x13 pan has significantly more surface area than the 8x8 called for in this recipe, so using the standard batch will result in thin bars a bit too thin, perhaps, like a cracker! To maintain the ideal chewy thickness, we strongly recommend scaling the recipe up by 50% (using 1.5 times the ingredients).
If you use the smaller amount in the 9x13 pan anyway, reduce the baking time by 5-8 minutes, as thinner bars cook very quickly. Watch them like a hawk to prevent burning!
Can I make these bars gluten-free or use brown butter for an extra kick?
Yes, absolutely! To make them gluten-free, substitute the all-purpose flour 1:1 with a reliable gluten-free baking blend that includes xanthan gum the final texture should be quite similar, though perhaps a tad more fragile when warm.
For a fantastic flavour upgrade, try browning the butter first! Melt the butter slowly until it develops a nutty aroma and brown flecks, then allow it to cool slightly so it returns to a thick, soft consistency before creaming with the sugar. This adds a sophisticated caramel depth that is simply magnificent.
Easy Chewy Snickerdoodle Bars Recipe