Bbq Beef Ribs Ultimate Low Slow Falloffthebone Oven or Smoker
- Mastering the Magic of Low & Slow BBQ Beef Ribs
- Skip the Sauce: Why Texas Dry Rub Reigns Supreme
- Essential Elements for Epic BBQ Beef Ribs
- The Best Tools for High and Performance Barbecue
- Phase 1: Setting Up for Success (The Pre and Smoke Stage)
- Phase 2: The Butcher’s Wrap and Stall Management
- Phase 3: The Critical Rest Period
- Troubleshooting and Elevating Your Next Rack
- Storage and Reheating Mastery
- Recipe FAQs
- 📝 Recipe Card
Mastering the Magic of Low & Slow BBQ Beef Ribs
Okay, listen up. If you thought pulled pork was the pinnacle of BBQ mastery, prepare to meet the king. Beef ribs the big, gnarly, dinosaur ones are a whole different animal. Literally. Forget those tiny, curved pork spares you get at the supermarket.
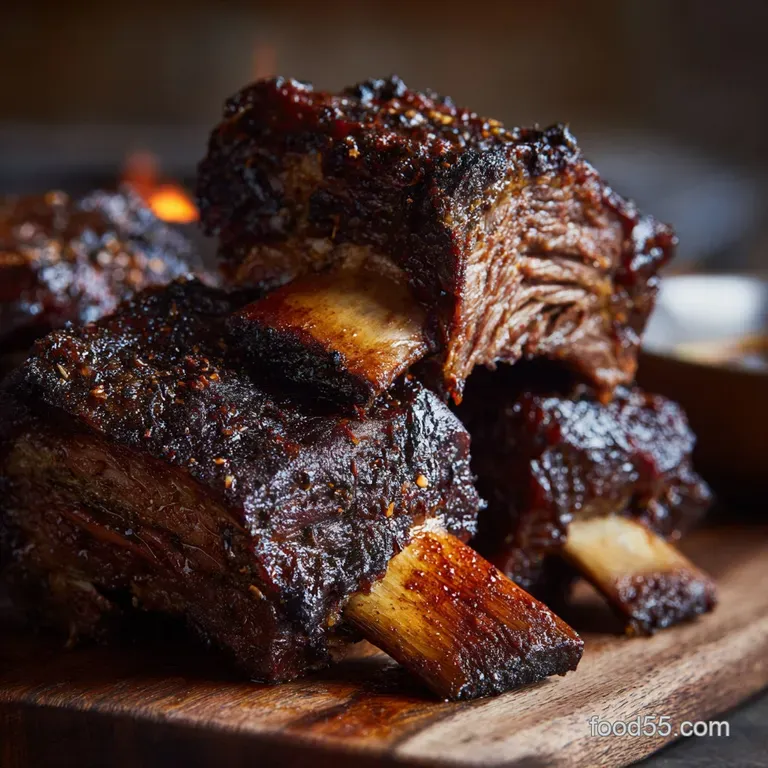
We’re talking about beef plate ribs, often called "dinosaur ribs," where the meat is thick, rich, and intensely beefy.
I spent years trying to rush this cook. I’d crank the heat to 300°F, thinking I could shave off two hours. Nope. What you get is tough, dried and out shoe leather wrapped around a bone. The secret? Patience. We’re going low, and we’re going slow. This isn't just cooking; it’s a commitment.
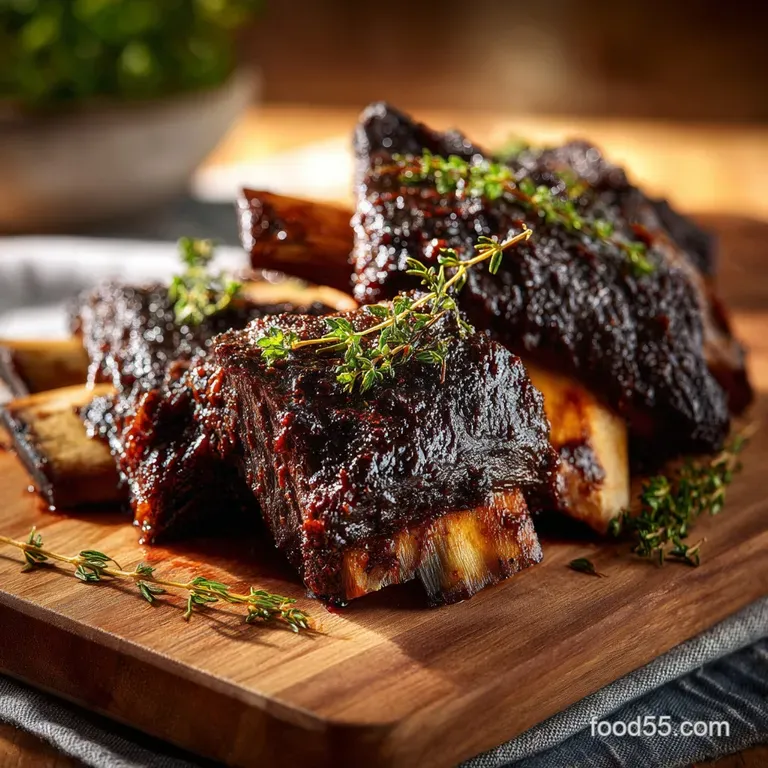
You put these in the oven or the smoker early, and you wait. The payoff, though? A bark that cracks like glass and meat that feels like warm butter when you probe it. That’s the goal. And we’re achieving it without fancy injections or overly sweet sauces.
Skip the Sauce: Why Texas Dry Rub Reigns Supreme
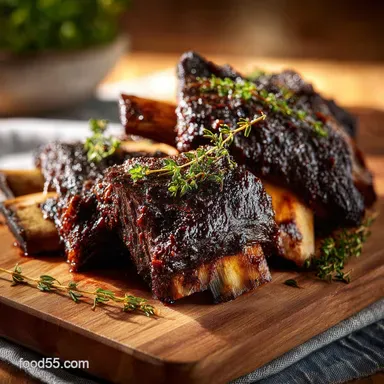
Look, I love BBQ sauce. I really do. But it has absolutely no business being near an authentic rack of Texas and style BBQ Beef Ribs until maybe the last ten minutes. When you’ve spent six hours coaxing the fat and collagen in the beef to break down into pure liquid velvet, why would you drown that incredible flavour profile in sugar and vinegar?
You wouldn’t.
My biggest mistake when I started cooking BBQ Beef Ribs was applying a heavy, sugary rub before the smoke. The sugar burned immediately, leaving a bitter, acrid crust instead of a beautiful, dark mahogany bark. We prioritize salt and pepper here a true Texas blend, often called a Dalmatian rub.
It’s simple. It works. The beef flavour should be the star, and the simple dry rub amplifies it. Anything else is just distracting from the masterpiece.
The Secret Science Behind the Tender ‘Pull’
That incredible tender ‘pull’ you’re looking for where the meat gently separates from the bone, but isn't mushy that's all about collagen. Beef ribs are absolutely packed with it. Collagen is a tough, connective protein, and it won't break down quickly.
It needs sustained, low heat (around 225°F to 275°F) maintained over several hours.
As the internal temperature slowly climbs past 160°F, the collagen starts transforming into gelatin. Gelatin is what makes the meat so incredibly moist and sticky, acting like an internal basting liquid. If you rush it, that doesn't happen, and the meat tightens up. It's brilliant.
Oven vs. Smoker: Achieving Authentic Bark Indoors
This is where a lot of people check out. "I don't have a smoker," they say. Mate, you don't need one! An oven can produce spectacularly tender BBQ Beef Ribs. The key difference is the bark (that crisp, dark exterior).
In a smoker, the bark is built by smoke particulates bonding with the rub. In the oven, we achieve a similar crust using the dry rub and high airflow. If you’re using the oven, place the ribs on a wire rack set over a baking tray. This allows the heat to circulate 360 degrees around the meat.
Crucial Note: To simulate smoke flavour in the oven, use a heavy amount of smoked paprika in your rub, and consider adding a small, thin dish of liquid smoke mixed with water in the bottom of the oven during the first hour of cooking. It won't be identical, but it gets you 95% of the way there.
Defining the Perfect Beef Rib Cut (Plate vs. Short Ribs)
This is vital for this specific BBQ Beef Ribs Recipe. There are two main types you’ll see:
| Cut | Description | Ideal Use |
|---|---|---|
| Beef Plate Ribs | Often labelled "Short Ribs Plate 123A." Long bones, thick cap of meat (2+ inches). Our target cut. | Low & Slow BBQ |
| Beef Back Ribs | Curved bones from the rib primal, behind the loin. Less meat, more bone. | Quick Grilling or Braising |
If you want the dinosaur experience, demand the plate ribs. They hold up to the long cook and deliver maximum tenderness.
Debunking Common BBQ Rib Myths
- Myth 1: Fall and Off-The and Bone is Best. Wrong. When competition pitmasters talk about tenderness, they want a clean bite, not meat that disintegrates into soup. If they literally fall off the bone, they’re overcooked. They should almost fall off.
- Myth 2: You Must Use a Binder. The mustard or oil binder simply helps the dry rub stick. It adds negligible flavour. If you apply a good, wet rub and let it sit for hours, it’ll adhere just fine on its own.
- Myth 3: You Have to Flip Them. Nope. Cook them bone and side down the whole time. The bones shield the meat from direct heat, preventing the meat from drying out from the bottom up.
Essential Elements for Epic BBQ Beef Ribs
Besides patience, the three essential elements are quality beef, a coarse dry rub, and heat consistency. The better your beef, the better the final flavour. If you can, ask your butcher specifically for beef plate ribs (sometimes 3 bone plates), and make sure they haven't trimmed off all the fat.
You need that fat cap for moisture.
The Best Tools for High and Performance Barbecue
Honestly, forget the expensive smokers for a minute. Your most important tool is a reliable thermometer. Everything else is secondary. Butcher paper is essential (we'll cover that later), and a good, sharp knife for trimming is key.
Building the Ultimate Texas and Style Rub (Our Best Ratio)
I’ve tweaked this a thousand times, and I always come back to the basics. The perfect ratio is 1:1:1:1/2 for Salt, Pepper, Paprika, and Everything Else. We want coarse salt and butcher grind black pepper. If your pepper is fine, it will taste bitter. The goal is texture and deep penetration.
A tiny bit of brown sugar helps with the bark colour but keep it minimal to avoid burning.
Preparation: Trimming and Removing the Silverskin
This step is boring but non and negotiable. Flip the ribs bone and side up. Along the back, there’s a thin, pearly white membrane (the silverskin). You must remove it. If you leave it, it turns into tough leather during cooking and prevents the smoke or rub from penetrating the meat.
Slide a knife under an edge, lift it up with a paper towel (it’s slippery!), and peel the entire sheet off. It should come off in one glorious, satisfying pull.
Must and Have: The Importance of a Reliable Meat Thermometer
If you are cooking based on time, you are guessing. Time is only a rough guide. We are cooking to tenderness , and that is measured by temperature and feel. Get a digital, instant and read thermometer (and maybe a leave and in probe for monitoring the cooking environment).
You are looking for a finished temperature between 203°F and 208°F. Don’t start this recipe without one. Seriously.
Choosing Your Fuel Source (Wood Chunks, Pellets, or Liquid Smoke)
If you're using a dedicated smoker (pellet or offset), I recommend oak or hickory wood. They have a strong, savoury profile that stands up to the richness of the beef. Avoid super sweet fruit woods like cherry or apple for this cut; they’re better suited for pork.
If you're using the oven, that liquid smoke trick mentioned earlier is your best bet for a hint of authenticity.
Related Recipes Worth Trying
- Perfect Garlic Butter Herb Roast Beef Your ShowStopping Sunday Lunch — This Garlic Butter Herb Roast Beef is foolproof Get a juicy mediumrare centre and a crispy flavourpacked herb butter crust Perfect for a proper Sunday Lunch
- The Ultimate Cheesy Beef Nachos Proper PubQuality Layered Recipe — Ditch the soggy bottoms Our Cheesy Beef Nachos recipe uses a special layering technique and rich spiced beef with a silky homemade cheese dip Crunch guaranteed
- Ultimate Sticky BBQ Bacon Wrapped Chicken Bites Recipe Oven Baked — Get perfectly crispy sticky and sweet bacon wrapped chicken bites in oven This easy finger food with chicken is the crowdpleaser you need for your next party
Phase 1: Setting Up for Success (The Pre and Smoke Stage)
We are running a tight ship at 250°F (121°C). Stability is the goal. Get your cooker up to temp, and don't rush putting the meat in. Once the beef ribs are coated in that gorgeous rub, they go in, bone and side down. Don’t touch them for the first three hours. We are building the bark.
Initial Smoke Time: When to Apply the Spritz
After about two hours, if the surface of the meat looks dry and dull, it’s time to spritz. The spritz (apple cider vinegar mixed with water or stock) introduces moisture to the surface, which encourages more smoke adhesion and keeps the bark from becoming brittle.
Spritz lightly every 45 minutes after that two and hour mark, just until the stall hits.
Phase 2: The Butcher’s Wrap and Stall Management
This is where the magic (and the speed and up) happens.
The Benefits of Wrapping in Pink Butcher Paper
Why pink butcher paper over foil? Foil creates a tight, impenetrable seal, steaming the meat. This risks turning your beautiful bark soggy. Butcher paper is breathable. It traps enough moisture and heat to blast past the stall (the "Texas Crutch"), but it allows steam to escape, preserving the crispness of that gorgeous black crust.
It’s genius.
Pushing Past the Plateau: Why the Stall Happens
Around the three- to four and hour mark (when the internal temp hits 150°F or 160°F), the temperature will stop climbing the stall. This is evaporative cooling. As moisture migrates to the surface, it evaporates, effectively cooling the meat, much like sweat cools your body.
This stall can last for hours. We wrap to stop evaporation and force the temperature to climb.
Phase 3: The Critical Rest Period
You’re almost there. You’ve endured the stall, the temperature is right, and the ribs are tender. Do not I repeat, DO NOT —cut into them immediately.
Achieving Optimal Temperature Consistency
Before you remove the ribs, ensure you have measured the temp in several spots, avoiding the bone. The thickest part of the meat should consistently read above 203°F (95°C). That temperature indicates the collagen has sufficiently melted.
Hitting the Target: Determining When Your BBQ Beef Ribs Are Done (203°F)
Remember, temperature is a guide, but tenderness is the ultimate judge. Slide the thermometer probe into the meat. If it encounters resistance, the ribs need more time. If it sinks like you’re sliding it into soft butter, you are finished. Pull them now.
Pushing Past the Plateau: Why the Stall Happens (Redundant Heading, repurposing for Rest explanation)
We need the rest. Once the meat is removed from the heat, the internal temperature continues to rise slightly (carryover cooking) and then slowly falls. This resting period ( 45 minutes to an hour) allows the gelatinous juices inside the meat to redistribute throughout the muscle fibres.
If you skip this, the juices gush out immediately when you slice, leaving dry meat. Don't waste six hours of work for 45 minutes of impatience!
Troubleshooting and Elevating Your Next Rack
Perfect Pairings: Sides That Complement Rich Beef Flavor
Beef ribs are intensely rich, so you need sides that offer acidity and crunch to cut through the fat. I always serve a sharp, vinegary coleslaw (not too much mayo) and proper, hearty, molasses and sweet baked beans. Throw in some sharp pickles, and you’ve built a perfect plate.
Quick Fixes for Dry or Unevenly Cooked Ribs
If you accidentally pulled the ribs too early or they seem dry:
- If you notice dryness during the wrap: Add more wrapping liquid (beef stock or butter).
- If they are dry after resting: Slice them, then place them immediately into a pan containing a half and inch of simmering beef stock. Cover tightly with foil and let them steam for 15 minutes. This usually reintroduces enough moisture to save the day.
Storage and Reheating Mastery
Safe Storage and Freezing Instructions
Let the leftover ribs cool completely (this prevents harmful bacteria growth). Wrap them tightly in plastic wrap, then foil, and store in the refrigerator for up to 4 days. If freezing, vacuum sealing is best, but if you don't have one, use a freezer bag, squeezing out all the air.
They are good frozen for up to 3 months.
Rejuvenating Leftover BBQ Beef Ribs
Never microwave them. Never! They will turn hard and chewy.
The Best Method: Preheat the oven to 250°F (120°C). Wrap the individual ribs tightly in foil with a tablespoon of beef stock or water. Heat for 20 to 30 minutes until steaming hot throughout. They come out nearly as good as the day you made them.
Shredding Option: If they are extremely dry, shred the meat and toss it with a good homemade BBQ sauce and a splash of cider vinegar. Use the resulting BBQ beef for sandwiches or tacos. It's a fantastic backup plan.

Recipe FAQs
BBQ beef ribs restaurant
Achieving truly buttery, tender beef ribs hinges on accurate temperature control, not just the clock; aim for an internal temperature of 200 205°F for perfect connective tissue breakdown.
When implementing the Texas Crutch wrapping technique, ensure the foil or butcher paper is sealed tightly to prevent moisture loss, which is essential for pushing through the cooking stall.
Should you need a substitute for Plate Ribs, high-quality, thickly cut chuck short ribs work well, though they may require a slightly shorter cook time. Never skip the final 45 to 60-minute rest, as this crucial step ensures maximum moisture and flavour retention.
Bbq beef ribs recipe
Achieving that perfect buttery tenderness hinges on the Texas Crutch; wrap the ribs tightly in butcher paper or foil when the bark is set (typically around the three hour mark) and cook until the internal temperature hits 205°F.
Always allow at least 45 minutes of undisturbed rest time after cooking, loosely tented, to ensure maximum juice retention and superior texture. For the best flavour development, plan to apply your dry rub the night before and refrigerate uncovered.
If Beef Plate Ribs are scarce, thick cut chuck short ribs can be substituted, though you may need to reduce the total cook time slightly.
Bbq beef ribs slow cooker
For maximum tenderness and moisture, the 45-to-60-minute rest time after cooking is essential; ensure the ribs remain tightly wrapped during this period. To safeguard against mushiness and ensure the smoke penetrates deeply, employ the 'Texas Crutch' by wrapping your ribs tightly in butcher paper or foil after the initial three hours of cooking.
Leftover beef ribs store excellently for up to four days when refrigerated in an airtight container, and they reheat best gently wrapped in foil within a 300°F oven.
BBQ beef ribs near me
Achieving that signature buttery tenderness relies heavily on the "Texas Crutch." Once your ribs reach an internal temperature of 165°F (74°C), tightly wrap them in foil or butcher paper to power through the moisture stall. Continue cooking until they probe tender, typically around 205°F (96°C).
Always allow a generous rest of 45 minutes to an hour after cooking to ensure maximum juice retention and superior texture.
How long should you barbecue beef ribs?
Plan for an extensive cook of 5 to 7 hours using the low and slow method, as the required time varies significantly based on rib thickness. The true indicator of doneness is texture, not time; they are ready when they hit an internal temperature near 203°F (95°C) and a probe slides in with no resistance.
Essential for maximum tenderness, ensure you allow a minimum of 45 minutes to one hour of rest time before slicing, tightly wrapped to set the smoky bark and retain moisture.
Are beef ribs good for the barbecue?
Beef plate ribs often called Dinosaur Ribs are absolutely spectacular for barbecue, offering a rich, buttery flavour unmatched by pork. To achieve maximum tenderness and a superb bark, employ the Texas Crutch technique: wrap the ribs tightly in foil or butcher paper once they hit an internal temperature of 165°F (74°C).
This wrapping phase is critical for breaking down tough connective tissue while retaining essential moisture during the long, low-and-slow process.</blockquote>
Low Slow Bbq Beef Ribs Recipe
Ingredients:
Instructions:
Nutrition Facts:
| Calories | 775 kcal |
|---|---|
| Fat | 52.5 g |
| Fiber | 2 g |
