Mini Beef Wellington Bites the Crown Jewels of Canapés
- Why Mini Beef Wellington Bites Are the Ultimate Party Upgrade
- The Ultimate Showstopper: Why Mini Beef Wellington Bites Win Every Time
- Sourcing Excellence: Ingredients That Define the Wellington Standard
- Step and by-Step Assembly Guide for Your Mini Beef Wellington Bites
- Sear, Chill, and Bake: Achieving the Ideal Medium and Rare Centre
- Expert Tips and Troubleshooting for Success
- Future and Proofing Your Feast: Making Ahead and Freezing Solutions
- Recipe FAQs
- 📝 Recipe Card
Why Mini Beef Wellington Bites Are the Ultimate Party Upgrade
Right then, let's roll up our sleeves and tackle a proper showstopper. Forget those sad, soggy sausage rolls; we’re making something truly magnificent. This is the dish that says, "I know my way around a kitchen," without forcing you to cook a whole fillet for hours.
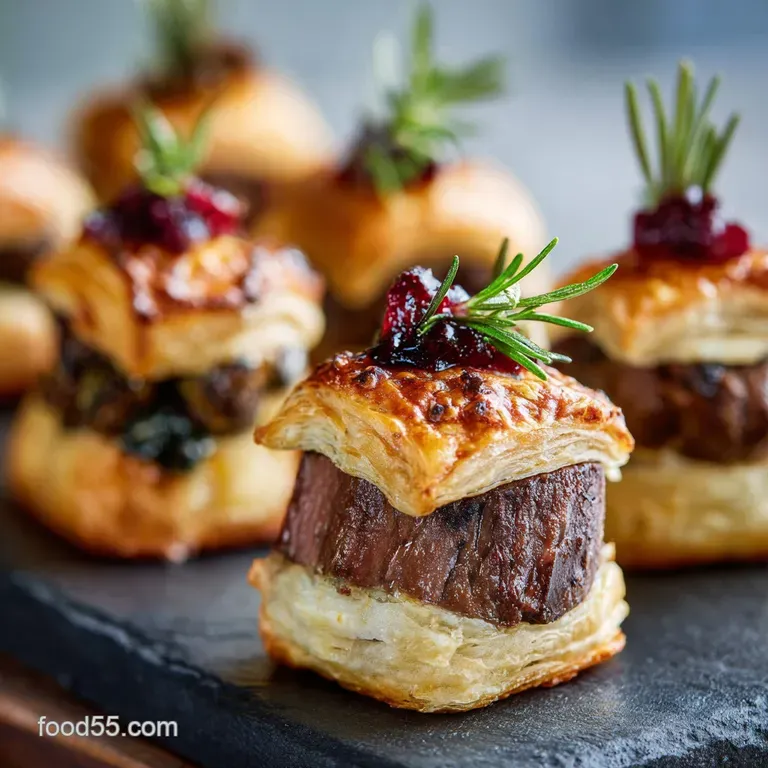
These Mini Beef Wellington Bites are the crown jewels of any canapé spread. I swear, the first time I served these, my friend Sarah nearly cried. They’re impressive, sure, but they’re also just… perfectly sized for a single, glorious mouthful.
I used to be terrified of making Wellington. The sheer expense of the fillet and the pressure of timing it perfectly felt too much for a casual dinner party. But scaling it down changes everything.
You get all the luxurious flavour that tender beef, the earthy duxelles, the crisp, buttery pastry in an elegant package. And because they're bite and sized, the intense flavours work perfectly as Beef Party Appetizers .
Trust me, once you master these, every dinner party or holiday gathering (hello, NYE Bites) gets instantly upgraded.
The Ultimate Showstopper: Why Mini Beef Wellington Bites Win Every Time
The reason the mini version works so much better for entertaining isn't just about size; it's about control. When you cut a huge Wellington, the steam escapes and the whole thing can deflate a bit. But with these little packages, you get isolated perfection every single time.
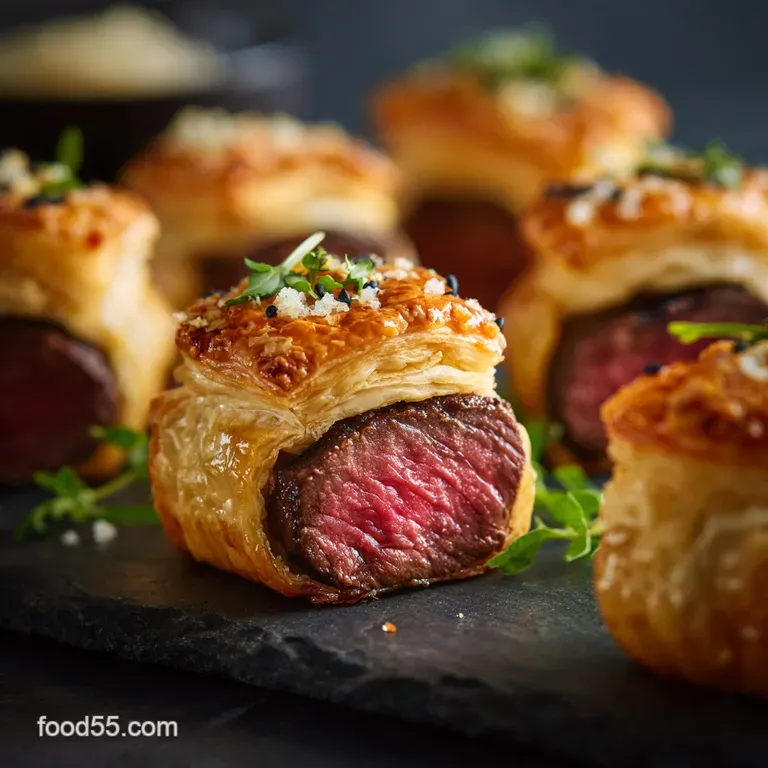
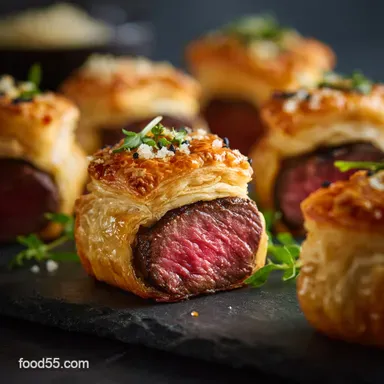
Every guest gets that perfect puff, that lovely golden colour, and a perfectly cooked piece of tenderloin.
The Art of Achieving Flaky Pastry Perfection
The fear is real, isn't it? The fear of the soggy bottom. We've all been there, pulling a pastry from the oven only to find the underside is tragically pale and damp. The key to successful Mini Beef Wellington Bites with Puff Pastry is ruthless moisture control.
Crucial Note: If the mushroom duxelles is wet, the pastry will be ruined. You must cook the duxelles down until it is so dry it looks sticky and stiff, not soft. This is non and negotiable.
Also, we’re borrowing a classic trick: the barrier. We’re wrapping the beef and duxelles in prosciutto before the pastry even touches it. This thinly sliced ham acts like a waterproof shield, blocking any residual moisture from the duxelles or the beef juices from destroying that delicate puff pastry layer.
It’s brilliant.
Balancing Texture and Intensity in Miniature Form
You have three distinct textures in these bites, and they need to sing together. First, the incredibly flaky, buttery crack of the outer shell. Second, the soft, intensely savoury layer of the mushroom and shallot duxelles. Third, the melt and in-your and mouth tenderness of the seared fillet mignon.
Since we are dealing with Mini Wellington Appetizers , we need bold flavour. Don't be shy with the salt and pepper on the beef, and don't skimp on the depth of the duxelles.
That little bit of Madeira or dry sherry (cooked down completely, obviously) adds a layer of complexity that makes these feel genuinely luxurious.
Essential Prep Timeline for Seamless Entertaining
I’m a maniac about timelines, especially when I’m having people over. These bites require chilling at two separate, crucial stages. Fail to chill, and your beautiful little packages will slump and sag in the oven. That’s just science.
- Duxelles: Must be completely cooled, ideally made the day before.
- Beef: Must be seared, then chilled to stop the cooking and ensure it stays rare when wrapped.
- Assembly: Once wrapped, the entire package needs a mandatory 25 minute nap in the fridge. This keeps the butter in the pastry solid, guaranteeing the best possible "puff." Seriously, skip the extra glass of wine and put the tray in the fridge first.
Sourcing Excellence: Ingredients That Define the Wellington Standard
The beauty of this recipe is that while it only uses a small amount of beef, you must make that beef count. There’s nowhere to hide mediocre ingredients when the portion is this small.
Choosing the Perfect Cut of Fillet Mignon
The only way to go here is beef tenderloin, specifically the center cut (fillet mignon). Why? Because it’s the most tender muscle on the cow. Since these are Mini Meat Appetizers , we are going to sear them for about 60 seconds total and then bake them for 15 minutes.
If you use a tougher cut, even if sliced thinly, it will be chewy and ruin the texture contrast. We need that buttery, fork and tender texture. I aim for medallions about the size of a quarter (in diameter) and maybe three and quarters of an inch thick.
Crafting the Deeply Savory Mushroom Duxelles
Duxelles sounds fancy, but it’s just fancy French for "super and concentrated mushroom paste." For years, I just diced the mushrooms. Big mistake. You need to use a food processor to pulse them until they resemble coarse sand. This ensures they dry out efficiently and create a smooth, spreadable layer.
| Bad Duxelles Habit | The Fix |
|---|---|
| Hand chopping coarsely | Pulse until fine sand and like texture in a processor. |
| Using high and moisture mushrooms | Use cremini or button, and cook until they stick to the spoon. |
| Adding too much fat | Use only a small knob of butter for flavor, the rest is evaporation time. |
Beyond Salt and Pepper: The Secret Seasoning Ensemble
We season twice: first, aggressively on the beef before searing, and second, within the duxelles. But don't underestimate the power of thyme. Fresh thyme gives the duxelles a beautiful, subtle woodiness that just belongs with beef.
If you’re feeling extra daring, add a tiny pinch of cayenne to the duxelles mixture after it’s dry. It doesn't make it spicy, but it just wakes up the umami notes.
Required Tools for Precision Rolling and Cutting
You don't need a professional pastry kitchen, but a few things make life easier. The instant and read thermometer is your best friend here, especially if you’re aiming for medium and rare (and you should be!).
Also, a sharp knife for cutting the pastry is essential, or a simple 3 inch round cookie cutter works perfectly for uniform circles. No one wants to serve lopsided Elegant Dinner Party Food .
Related Recipes Worth Trying
- Mini Margherita Pizza Appetizer Easy Flaky Puff Pastry Bites — Mini Margherita Pizza Appetizer are the perfect finger foods for any party Use our puff pastry shortcut for flaky authentic Margherita pizza bites ready in...
- Beef Ragu Pasta The Proper SlowCooked Sunday Supper Recipe — Beef Ragu Pasta delivers deeply savory meltinyourmouth comfort This easy pasta dish uses cheap cuts of beef slowsimmered for the best Sunday dinner ideas
- BBQ Beef Ribs Ultimate Low Slow SmokerOven Recipe — Our definitive BBQ Beef Ribs recipe delivers falloffthebone tenderness using a Texas Crutch technique Master the ultimate low slow method for the smoker or oven
Step and by-Step Assembly Guide for Your Mini Beef Wellington Bites
Let’s crack on. This is where your mise en place pays off. You have your three components: the chilled, dry duxelles; the chilled, seared beef medallions; and the thawed, cold puff pastry. Having everything ready to go is the secret to getting through the assembly quickly and keeping things cold.
The most important physical step is sealing the pastry completely around the beef. If there’s an opening, the precious beef juices will steam out, leaving you with dry beef and a greasy baking sheet. We want tightly swaddled little presents.
Sear, Chill, and Bake: Achieving the Ideal Medium and Rare Centre
Prepping the Beef: The Crucial Sear and Chill
When you sear these small pieces of beef, we are looking for colour, not cook. I heat my pan until it is absolutely screaming hot. A heavy and bottomed cast iron pan is perfect here. You toss the seasoned medallions in, maybe 30 seconds per side, tops.
We just want that beautiful crust (the Maillard reaction) for flavor. Pull them immediately, place them on a wire rack not on a plate where they will steam and stick them in the fridge. This halts the cooking process cold.
Laying the Foundation: Spreading the Duxelles Layer
This is where the prosciutto comes in. You lay down the pastry square, then the prosciutto slice (cut lengthwise so it’s long enough to wrap around the beef slightly). Then, you spread about a teaspoon of that dry duxelles onto the prosciutto.
You’re essentially building a moisture and proof foundation for the beef to sit on.
Tight Wrapping Techniques for Uniform Bites
When you put the chilled beef on top, you fold the sides of the prosciutto up first, securing it around the beef. Then, you gather the pastry. Brush the edges with egg wash (just the edges!) and pull the four corners of the pastry up and over the beef, pinching them together tightly at the top.
You want a little purse shape. Trim off any huge excess pastry up top so you don't end up with a huge lump of raw dough.
Egg Washing and Scoring for Professional Presentation
The egg wash gives us that deep, golden and brown colour. Whisk one egg with a splash of water. When you brush it on, try to avoid letting the wash pool at the seams. That can seal the pastry layers together, restricting the puff.
For extra presentation points, you can use the back of a small paring knife to lightly etch a crisscross or curved pattern into the top of the pastry. This is a subtle touch that makes these look truly professional.
Expert Tips and Troubleshooting for Success
Here are the hard and won lessons from my kitchen:
- Puff Pastry Temperature Check: If your kitchen is hot (mine is always cranky in the summer), roll and cut the pastry in batches and keep the unused portions in the fridge. Warm pastry equals flat, sad pastry.
- Don't Overcrowd the Pan: When searing, work in batches. If you crowd the pan, the temperature drops, and the beef steams instead of searing. We want intense heat.
- Salt is Your Friend: Because these are small Luxurious Appetizers , the flavor has to hit immediately. Be generous with the pre and sear seasoning.
- Resting Time: Five minutes of rest after baking is essential. It lets the juices redistribute and settle, ensuring the beef is succulent when you bite into it.
Future and Proofing Your Feast: Making Ahead and Freezing Solutions
This is great news for party planning. You can assemble these completely, right up until the point of the egg wash, and freeze them.
Wrap the baking tray tightly in plastic wrap (unbaked) and freeze until solid. Once frozen, transfer the bites to an airtight container. When ready to bake, place them directly onto a prepared baking sheet, brush with egg wash, and bake from frozen.
You'll need to increase the baking time by about 8– 10 minutes (so, 23– 28 minutes total).
Ideal Internal Temperatures and Resting Times
I'm aiming for medium and rare, which allows for some residual cooking once the bites leave the oven.
- Target Temperature (Pulled from Oven): 125°F (52°C).
- Resting: 5 minutes. (The temperature will coast up to 130 135°F / 54 57°C).
If you must cook them medium, aim for 135°F (57°C) when pulling them out. Don’t go past that, or the beef will be tough.
Pairing Suggestions: Sauces and Wine for the Ultimate Bite
Because these are so rich, you need something sharp to cut through the fat and savory complexity.
The perfect pairing is a bowl of homemade Horseradish Cream. It’s just crème fraîche, a squeeze of lemon, and prepared horseradish. It’s light, creamy, and provides that delightful, sharp kick. You don’t need much, just a dab.
As for wine, steer clear of anything too delicate. You need a robust red. I usually go with a good, earthy Cabernet Sauvignon or perhaps an aged Rioja. For a truly festive moment, a dark, well and chilled Porter or Stout also holds up beautifully against the richness of the duxelles and beef.
Creative Variations on the Classic Duxelles
Ready to get fancy?
- Truffle Bliss: Add a drop or two of white truffle oil to the duxelles after it’s cooled, just before assembly. It adds incredible aroma.
- Foie Gras: For the truly decadent, smear a tiny bit of seared foie gras pâté onto the beef before wrapping it in the prosciutto. This takes the Mini Beef Wellington Bites Recipe to a whole new, possibly expensive, level.
Nutritional Snapshot: Calorie Breakdown per Canapé
Look, this is not diet food. It's celebration food. But for planning purposes, if you stick to the 16 bite portion size, you are looking at approximately 170 190 calories per bite. Mostly protein and good fats, which means they keep your guests feeling full and happy. Enjoy every single bite!
These are worth every bit of effort.

Recipe FAQs
These look like proper effort can I prepare these Mini Beef Wellington Bites ahead of time for a party?
Absolutely, they are ideal for making ahead; assemble the bites completely (up to the egg wash stage), cover loosely, and chill them for up to 24 hours before baking, as baking them cold ensures the best puff.
My pastry base always seems to go soggy; how do I guarantee a crisp bottom, not a soggy one?
The key to avoiding a soggy bottom is two-fold: ensure the mushroom duxelles is cooked until it is bone dry and use the layer of prosciutto as a crucial waterproof barrier between the filling and the pastry.
I prefer my beef a bit more done than rare. How do I adjust the baking time without burning the pastry?
For medium doneness, slightly lower the oven temperature to 375°F (190°C) and add 2 3 minutes to the total baking time, checking with an instant read thermometer for an internal temperature around 140°F (60°C) before resting.
I’m fresh out of prosciutto. Is there another way to keep the duxelles moisture away from the pastry?
If you lack prosciutto, a very thin smear of strong English mustard (like Coleman's) can act as a moisture barrier and adds a lovely flavour contrast, or alternatively, use thinly sliced cooked crêpes.
Can I freeze the assembled Mini Beef Wellington Bites, or is that just asking for trouble?
You can freeze them unbaked; simply flash freeze the assembled bites on the tray, transfer them to an airtight container, and bake them straight from frozen, adding approximately 5 8 minutes to the baking time.
Mini Beef Wellington Bites Recipe
Ingredients:
Instructions:
Nutrition Facts:
| Calories | 874 kcal |
|---|---|
| Protein | 31.3 g |
| Fat | 44.8 g |
| Carbs | 68.2 g |
