Homemade Caramels: Proper Chewy Sea Salt Butter Caramels
- Proper Chewy Sea Salt Butter Caramels: The Sticky Treat You’ve Always Dreamed Of
- Pantry Essentials: Detailed Notes on Ingredients and Substitutions
- The Method: How to Make Classic Homemade Caramels
- The Science of Soft Candy: Why Temperature Matters for Perfect Homemade Caramels
- Troubleshooting and Expert Tips for Your Next Batch
- Wrapping and Keeping Them Fresh: Storage Guidelines
- Beyond the Wrapper: Creative Ways to Use Your Chewy Caramels
- Recipe FAQs
- 📝 Recipe Card
Proper Chewy Sea Salt Butter Caramels: The Sticky Treat You’ve Always Dreamed Of
Stop scrolling. Seriously, pause whatever you are doing and just imagine the scent that is about to fill your kitchen: melted butter, toasted sugar, and deep, dark vanilla notes swirling together.
These homemade caramels are everything the cheap, packaged stuff wishes it could be. They have that perfect, satisfying chew that pulls away clean from your teeth, but still melts slowly on your tongue.
I know what you're thinking candy making is scary, right? That’s totally the mistake I made for years. Turns out, making chewy homemade caramels isn't about magic; it's about following the darn thermometer.
If you can boil water and own a reliable thermometer, you can absolutely nail this recipe, and it’s way cheaper than buying fancy artisan sweets.
This isn't just a recipe; it’s the foolproof method I finally settled on after several grainy, rock hard, or soup like failures. We’re going to focus on the small, critical details that ensure you get a silky smooth, buttery chew every single time.
Let’s crack on and make some perfect homemade caramel candies.
What Makes a Caramel Truly 'Chewy'?
The secret to a chewy texture versus a brittle snap is simple: the final cooking temperature. We are aiming for the high end of the "soft ball" stage, landing precisely at 248°F (120°C).
Hitting this mark ensures enough moisture has evaporated to concentrate the sugars, but not so much that the resulting candy becomes rigid and hard once cooled. This 248° F target is non-negotiable for a soft, malleable, and incredibly satisfying chew.
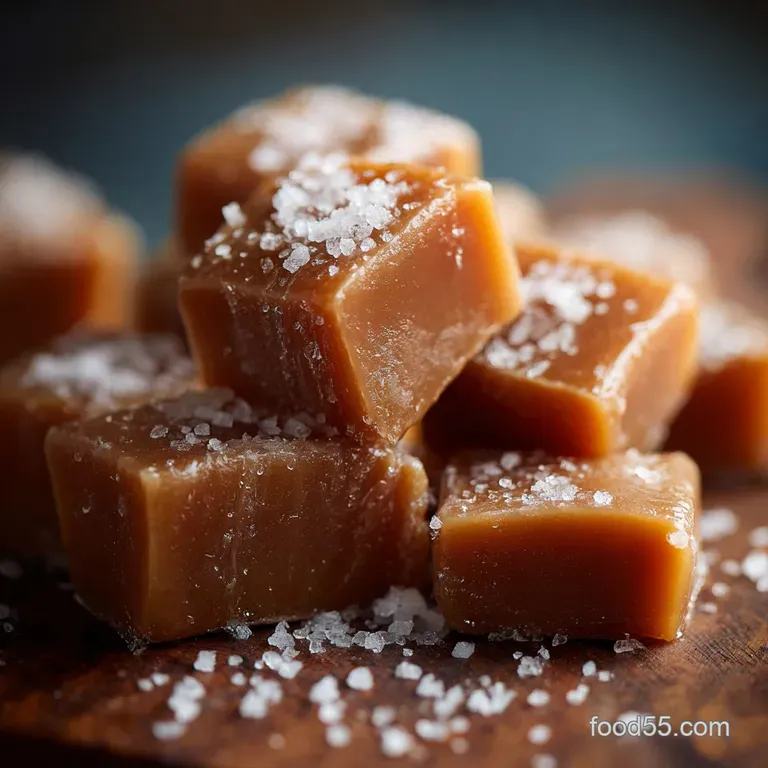
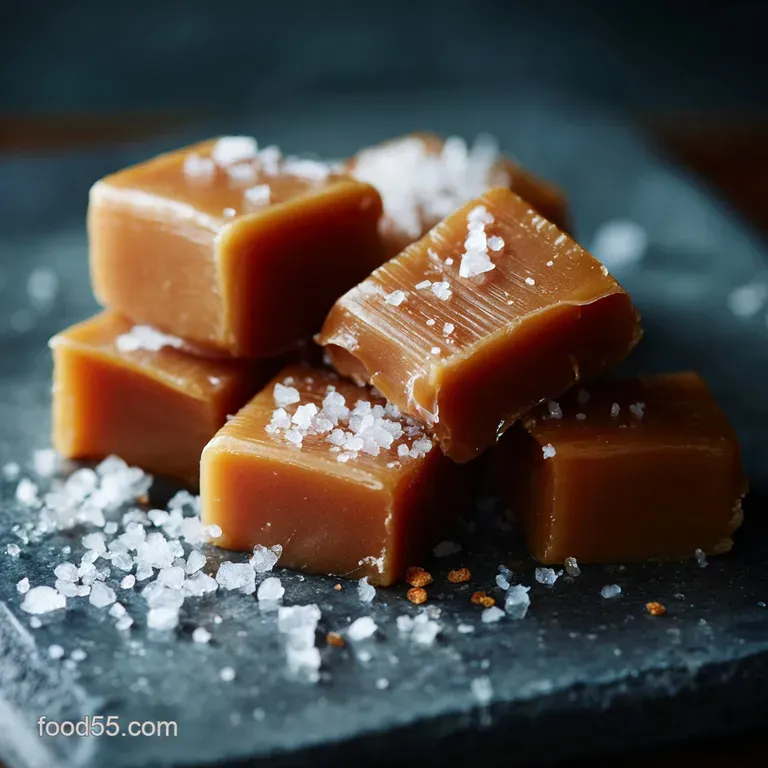
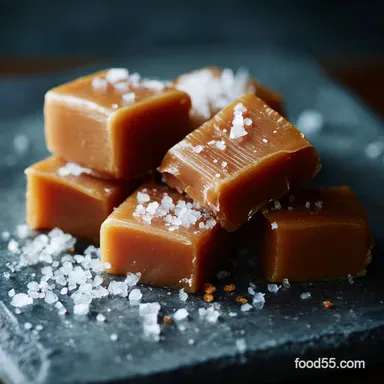
Why Flaky Sea Salt is Non-Negotiable for Balance
You need that hit of salt to cut through the incredible richness of the cream and butter. We actually use salt twice in this recipe. Fine sea salt gets stirred into the hot mixture at the end to enhance the flavor from the inside out. Then, we finish the top with flaky sea salt (like Maldon).
Those crunchy little crystals hit your palate first, giving an immediate, vibrant contrast to the intensely sweet caramel beneath.
The Essential Candy Making Equipment Checklist
This is not the recipe to eyeball or try in a thin bottomed pot. You need the right gear for success, period.
- Heavy Bottomed Saucepan: This is vital. A thin pot will create hot spots and burn the sugar mixture immediately on the bottom. Go heavy or go home, seriously.
- Candy Thermometer: It needs to clip securely to the side and accurately read the temperature.
- 8x8-inch Pan: Lined with parchment paper and lightly greased.
- Pastry Brush: For washing down crystals.
Pantry Essentials: Detailed Notes on Ingredients and Substitutions
Precision is paramount in candy making, so measure everything exactly before you turn on the heat. I mean, measure the butter cubes, measure the corn syrup, measure the cream. You know the drill.
Selecting the Right Cream and Butter Fat Content for Richness
We need the highest fat content available for that incredible, decadent mouthfeel. High fat content equals deep richness and a smoother final product.
| Ingredient | Role | Viable Substitution |
|---|---|---|
| Heavy Cream (35% fat) | Provides the rich, creamy base; prevents graininess. | Evaporated Milk (use 10% less liquid); Do not use low-fat milk. |
| Unsalted Butter | Adds flavor depth and chewiness. | Salted Butter (but you must omit the fine sea salt mixed in). |
Sugar Choices: Granulated vs. Brown Sugar for Depth of Flavor
We rely on white granulated sugar for consistency and to ensure we can clearly monitor the color change as the caramel darkens. If you try to use mostly brown sugar, you’ll struggle to see the true color development, and the result can sometimes be too dark or burnt.
The Role of Corn Syrup (or Substitute) in Preventing Crystallization
This is perhaps the most critical ingredient outside of the cream. Corn syrup (or glucose syrup) is an invert sugar. It physically prevents the granulated sugar from bonding back together and forming large, grainy crystals. Do not skip this ingredient.
It’s the insurance policy for smooth caramels.
| Ingredient | Role | Viable Substitution |
|---|---|---|
| Light Corn Syrup | Essential anti crystallization agent. | Golden Syrup (slightly richer flavor) or Honey (can overpower the flavor, use sparingly). |
| Granulated Sugar | Main source of sweetness and structure. | N/A (Essential) |
Metric vs. Volume Measurements: The Importance of Weight
Always use a scale if you have one. Sugar, especially, can compact easily in cups, leading to inconsistencies. If you must use volume (cups), make sure you level your measurements precisely.
Chef's Note: Warm the Cream! Before you start cooking the sugar, put the cream and butter into a small saucepan and heat gently until the butter is just melted and the cream is hot to the touch. Adding cold dairy to hot sugar causes a shock reaction and extends the cooking time, which increases the chance of scorching.
The Method: How to Make Classic Homemade Caramels
Making homemade caramels is a three stage process: prep, boiling, and cooling. Stick to these steps exactly and you’ll be golden literally.
Prep Stage: Lining and Greasing Your Pan Like a Pro
First things first, get your gear ready. Line your 8x8-inch pan with parchment paper, leaving generous overhang on two sides that overhang is your "sling" for lifting the giant caramel slab later. Lightly butter the parchment paper itself.
Phase 1: Boiling the Sugar and Liquid Base to Activation
In your heavy pot, combine the granulated sugar, corn syrup, and water. Stir it just once to combine, then stop. Bring this mixture to a rapid boil over medium high heat. As the sugar dissolves and it begins boiling, use a pastry brush dipped in water to frequently wash down the sides of the pan.
Any little stray sugar crystals clinging to the sides need to be washed back into the liquid, otherwise they will seed crystallization and your caramels will be grainy.
Phase 2: Achieving the Perfect Color and Soft Ball Temperature
Attach your candy thermometer and continue cooking, without stirring , until the mixture hits 240°F (115°C). The mixture will still be clear at this point. Once 240°F is achieved, reduce the heat to medium low, and slowly pour in the warm cream and butter mixture.
It will bubble violently and drop in temperature.
Now the fun begins. Stir constantly and gently with a wooden spoon, scraping the bottom and sides to prevent scorching. Cook until the mixture reaches exactly 248°F (120° C) . This usually takes about 10 to 15 minutes of constant stirring.
Immediately remove the pan from the heat, and quickly stir in the fine sea salt and vanilla extract (if using).
The Crucial Cool Down and Cutting Stage
Pour the caramel into your prepared 8x8-inch pan. Avoid scraping the very bottom of the pot; if anything has scorched, it’s hanging out down there, and you don’t want it in your perfect batch. Sprinkle the top immediately with flaky sea salt.
Let the caramel set completely at room temperature for 2 to 3 hours. I once put a batch in the fridge to speed things up and ended up with a slightly crystalline, sad texture don’t do it!
Once set, use the parchment paper sling to lift the caramel block out. Use a sharp, oiled knife to cut into 1 inch squares. Wrap them tightly in squares of wax paper or cellophane twist wrappers, or devour them instantly.
The Science of Soft Candy: Why Temperature Matters for Perfect Homemade Caramels
Temperature isn't just a suggestion when making candy; it dictates the final texture of your homemade caramels. We boil the sugar mixture to concentrate the sugar molecules. The longer we cook, the more water evaporates, and the harder the final candy becomes.
We stop right at 248°F (120°C) because that water concentration results in a soft, pliable, and perfectly chewy texture. Go five degrees higher, and you get harder taffy. Go five degrees lower, and you get sticky pudding.
Troubleshooting and Expert Tips for Your Next Batch
Even seasoned candy makers can hit snags. These are the top reasons people mess up homemade caramels, and how to fix them.
Mastering the Soft Ball Stage (The Critical 240°F Mark)
The initial 240°F (115°C) mark before adding the cream is important because it ensures the base sugars are fully dissolved and activated. If you add the cream too early, you end up cooking the mixture for way too long, which increases the risk of scorching the dairy solids.
Use that wet pastry brush method faithfully during this initial boiling stage.
Preventing Grainy Texture (Crystallization Issues)
Grainy caramel means your sugar crystallized. It’s usually caused by three things: stirring the syrup too early, stray sugar crystals on the side of the pot falling in, or cooling too rapidly.
Use the corn syrup , use the wet pastry brush , and do not stir the mixture until the cream is added.
Why Your Caramels Are Too Hard (Overcooked Temperature)
If your finished caramels chip your teeth or are extremely firm, you cooked them past 250°F. If you know you overshot the temperature, try adding about 1/4 cup of warm cream back to the mixture immediately off the heat. Stir vigorously; this might save the batch by reducing the sugar concentration.
Wrapping and Keeping Them Fresh: Storage Guidelines
Once you've done the hard work, you want them to last (or at least, pretend you want them to last).
How to Store Homemade Caramels at Room Temperature (And for How Long)
After cutting, wrap each homemade caramel tightly in wax paper, cellophane, or even small squares of parchment paper. Store them in an airtight container in a cool, dark pantry. They will easily keep for 2 to 3 weeks at room temperature.
Heat and humidity are their enemies, so avoid storing them near the stove.
Can You Freeze Homemade Caramels? (Freezing Method)
But does it freeze well? You bet! Once wrapped, place the caramels in a freezer safe zip-top bag, pressing out all the air. They can be frozen for up to 3 months . To thaw, simply take the bag out and leave it on the counter for a few hours.
Do not unwrap them until they are completely thawed ; this prevents condensation from making the wrapper stick painfully to the candy.
Beyond the Wrapper: Creative Ways to Use Your Chewy Caramels
While eating these chewy sea salt butter caramels straight out of the wrapper is peak bliss, they are also incredibly versatile.
Turning Caramels into a Decadent Sauce or Filling
If you have a batch that came out just a touch too soft (maybe you pulled it at 245°F instead of 248°F), don't panic! That batch is perfect for transforming into a spectacular caramel sauce. Just melt 1 cup of the prepared caramels gently with 2 tablespoons of heavy cream. This makes a phenomenal topping for ice cream, or you could even drizzle it over fresh apple slices almost like the texture of my Homemade Caramel Dip: Ultimate Silky Smooth Recipe for Apples .
They are also amazing when chopped and stirred into cookie dough before baking, or layered inside a chocolate tart as a surprise gooey center. They really make any dessert feel instantly fancy.
P.S. If you want a slightly tarter sweet for balance after all that richness, you should totally check out my recipe for Cranberry Sauce Recipe: Easy, Homemade Cranberry Orange Compote . It’s vibrant and balances everything out!

Recipe FAQs
Why did my caramels turn out too hard and brittle instead of perfectly chewy?
This issue is almost always caused by overcooking the mixture. The difference between chewy perfection and a hard candy is only a few degrees, so ensure you are using a reliable candy thermometer. Remove the caramel immediately when it hits the specified Soft Ball stage, usually around 245°F (118°C).
My finished caramels feel grainy or gritty. How can I prevent this?
Graininess results from sugar crystals forming and propagating throughout the mixture. To prevent this, avoid stirring the sugar while it is dissolving initially; instead, swirl the pan gently to mix the ingredients.
You can also carefully wipe down the sides of the pot with a wet pastry brush during cooking to dissolve any stray crystals.
Do I absolutely need a candy thermometer for this recipe?
Yes, a reliable candy thermometer is crucial for consistent results in making caramels. The precise temperature dictates the final texture (chewy, firm, or hard), and trying to gauge this by sight or timing alone is highly unreliable. Investing in a good digital thermometer will guarantee success.
Why did the butter and cream separate while I was cooking the caramel?
Separation often occurs if the cold cream is added too quickly to the hot sugar base, causing a drastic temperature shock. To prevent this, always warm your cream slightly before incorporating it into the caramelized sugar.
Stir gently and continually until the mixture completely emulsifies and returns to a smooth, uniform texture.
How should I store the finished caramels, and what is their shelf life?
Once cooled and individually wrapped in wax paper or cellophane, store the caramels in an airtight container at cool room temperature. They generally keep well for up to 3 weeks at room temperature, or up to 6 weeks if kept refrigerated in an airtight container.
Can I add flavorings like vanilla extract or espresso powder to this recipe?
Flavorings should be added at specific times to maintain their integrity. If using vanilla extract, stir it in only after removing the caramel from the heat, as cooking the extract will cause the flavor to dissipate.
For dry ingredients like espresso powder or spices, dissolve them directly into the cream before incorporating the cream into the sugar base.
Proper Chewy Homemade Caramels Recipe
Ingredients:
Instructions:
Nutrition Facts:
| Calories | 90 kcal |
|---|---|
| Protein | 0.0 g |
| Fat | 4.0 g |
| Carbs | 15.0 g |
