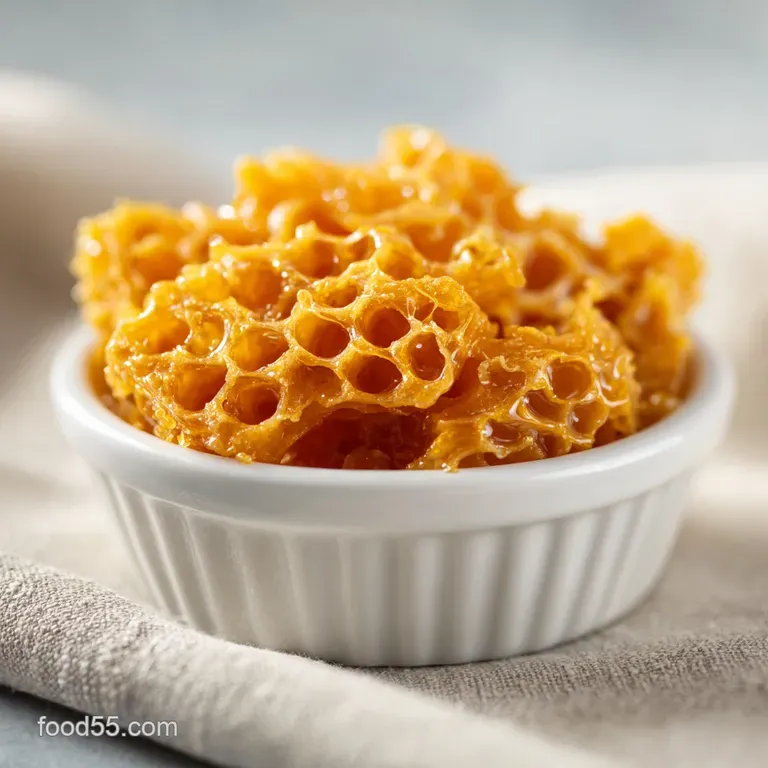
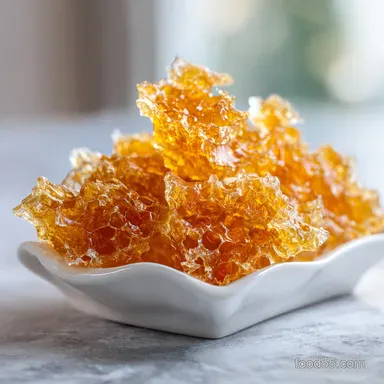
Salted Maple Honeycomb Candy
- Time: Active 10 minutes, Passive 15 minutes, Total 25 minutes
- Flavor/Texture Hook: Aerated maple toffee with a brittle, glass like shatter
- Perfect for: Holiday gifting, coffee pairings, or topping vanilla bean ice cream
- Master the Ultimate Salted Maple Honeycomb
- Why This Golden Crunch Works
- Ingredient Science and Component Analysis
- The Elements You Will Need
- Essential Tools for Candy Success
- The Step by Step Process
- Solving Common Candy Making Mishaps
- Creative Flavor Variations to Try
- Proper Storage and Reheating Tips
- Perfect Pairing and Serving Ideas
- Recipe FAQs
- 📝 Recipe Card
Master the Ultimate Salted Maple Honeycomb
The first time I tried making this, I was standing in my tiny apartment kitchen, clutching a candy thermometer like a lifeline. The kitchen was filled with the heavy, sweet scent of boiling sugar, but then I added the maple syrup.
Suddenly, the aroma shifted it became woody, rich, and unmistakably like a forest in autumn. When that final spoonful of baking soda hit the pot, the mixture erupted into a pale gold volcano that looked like liquid magic.
I’ll never forget the sound of that first piece breaking. It didn't just snap; it performed a clean, musical shatter that revealed a perfect, bubbly interior. Since then, I’ve ruined a few batches by being impatient or ignoring the humidity, but those mistakes taught me exactly how to get that "honeycomb" structure every single time.
You’re going to love how the salt cuts through the intense sweetness of the maple. It’s one of those treats that brings people together because nobody can eat just one shard you’ll find yourself standing over the counter with your friends, snapping off pieces and marveling at the bubbles.
This Salted Maple Honeycomb is more than just candy; it’s a science experiment you can eat.
Why This Golden Crunch Works
Understanding the "why" helps you avoid a sticky mess. Making Salted Maple Honeycomb is all about controlling sugar crystals and gas.
- Thermal Aeration: Heat breaks down the baking soda, releasing carbon dioxide gas that gets trapped in the viscous sugar.
- Inversion Prevention: The cream of tartar acts as an acid to prevent the sugar from recrystallizing into a grainy texture.
- over High heat Volatility: Pure maple syrup contains natural impurities that caramelize at lower temperatures than white sugar, adding depth.
- Vapor Control: Boiling the mixture to exactly 300°F ensures all water is evaporated, leaving only a brittle, glass like structure.
Comparison of Maple Flavor Sources
| Flavor Source | Texture Impact | Flavor Profile | Best For |
|---|---|---|---|
| Pure Maple Syrup | Adds moisture/chew | Deep, woody, authentic | High end gourmet gifts |
| Maple Extract | No texture change | Strong but slightly floral | Quick batches/Shortcuts |
| Maple Sugar | Drier, more brittle | Concentrated sweetness | Professional pastry work |
Using pure maple syrup is the way to go here. While an extract is a decent shortcut, it lacks the velvety mouthfeel that real syrup provides when it blends with the granulated sugar. If you are looking for other cozy treats to bake alongside this, my Grandmas Applesauce Bread recipe is a perfect companion for a fall themed gift basket.
Ingredient Science and Component Analysis
Every ingredient in this Salted Maple Honeycomb Candy Recipe has a specific structural job to perform.
| Ingredient | Science Role | Pro Secret |
|---|---|---|
| Granulated Sugar | Structural base | Don't use "raw" sugar; it burns too fast. |
| Baking Soda | Aerating agent | Always sift it to prevent bitter clumps. |
| Pure Maple Syrup | Flavor & Inversion | Grade A Dark has the most "maple" punch. |
| Cream of Tartar | Crystal inhibitor | A tiny pinch keeps the candy clear and glassy. |
The Elements You Will Need
We are keeping things simple but high-quality for this Homemade Salted Maple Honeycomb.
- 200g granulated white sugar: Why this? Provides the clean sweetness and structural backbone of the candy.
- 80ml pure maple syrup: Why this? Adds the signature autumnal flavor and helps prevent crystallization.
- 30ml honey: Why this? Honey adds a floral note and extra insurance against graininess.
- 60ml water: Why this? Dissolves the sugar evenly so it doesn't burn on the bottom.
- 0.25 tsp cream of tartar: Why this? The acid ensures a smooth, non grainy finish.
- 15g baking soda, sifted: Why this? The "engine" that creates the bubbles through chemical reaction.
- 1 tbsp flaky sea salt: Why this? Balances the sugar and makes the maple notes pop.
- 0.5 tsp pure vanilla bean paste: Why this? Adds a velvety aroma that complements the toasted maple.
Essential Tools for Candy Success

Don't try to wing this without a thermometer. Precision is the difference between a brittle shatter and a tooth cracking rock.
Must Have Gear
You’ll need a deep, heavy bottomed saucepan. This is non negotiable because the mixture will quadruple in size in about three seconds once you add the soda. A digital candy thermometer is your best friend here.
I also recommend a over high heat silicone spatula (the kind that won't melt at 300°F) and a 9x9 inch baking pan lined with parchment paper.
Secondary Gear
A fine mesh sieve is vital for sifting your baking soda. Any tiny clumps of soda that don't dissolve will leave bitter, orange spots in your beautiful candy. You’ll also want a wire cooling rack to help the pan cool evenly from the bottom.
The step-by-step Process
Let’s get into the rhythm of candy making. It moves fast at the end, so have everything ready.
- Prep the landing zone. Line a 9x9 inch pan with parchment paper, leaving an overhang on the sides. Note: Do not grease the paper; the candy needs to grip slightly to stay aerated.
- Combine the base. In your deep pot, whisk together the 200g sugar, 80ml maple syrup, 30ml honey, 60ml water, and 0.25 tsp cream of tartar.
- Dissolve the crystals. Heat over medium, stirring gently until the sugar is fully dissolved and the liquid is clear.
- Stop stirring. Once it reaches a boil, stop stirring entirely. Note: Stirring now can cause the sugar to "seed" and turn the whole batch grainy.
- Monitor the heat. Watch the thermometer carefully as the mixture bubbles. Wait until the aroma shifts from sweet to a toasted marshmallow scent.
- Reach the stage. Boil until the thermometer reads exactly 300°F (Hard Crack stage). The bubbles will become smaller and more uniform.
- Add the flavor. Remove from heat immediately and whisk in the 0.5 tsp vanilla paste.
- The Magic Expansion. Dump in the 15g sifted baking soda and whisk vigorously for 3-5 seconds until the mixture pales and foams up like a volcano.
- The Pour. Quickly pour the foam into the prepared pan. Do not spread or smooth it, or you will pop the precious bubbles.
- The Finish. Sprinkle the 1 tbsp flaky sea salt over the top while it’s still warm. Let it sit for at least 1 hours 30 mins until it is cool to the touch and hard as glass.
Chef's Tip: If you're making this for a holiday party, it pairs beautifully with the flavors in a Homemade Caramel Dip recipe. The salt and maple together are a dream.
Solving Common Candy Making Mishaps
Candy can be finicky, but most problems come down to two things: temperature and moisture.
My Honeycomb is Chewy
If your candy sticks to your teeth like taffy, it didn't reach a high enough temperature. Even 5 degrees makes a difference. Ensure your thermometer isn't touching the bottom of the pot, which gives a false high reading.
There are Bitter Clumps
This happens when the baking soda wasn't sifted or wasn't whisked in fast enough. Those orange ish spots are pure sodium bicarbonate not a great flavor. Always sift through a fine mesh strainer.
The Candy Deflated
If you try to "level" the candy in the pan with a spatula, you’re squashing the gas bubbles. Pour it in and let gravity do the work. Also, don't move the pan while it's cooling!
| Problem | Root Cause | Solution |
|---|---|---|
| Grainy texture | Stirring during boiling | Keep the spoon out once it boils. |
| Sticky surface | High humidity | Make this on a dry day or use a dehumidifier. |
| Burnt flavor | Past 310°F | Pull from heat exactly at 300°F. |
Common Mistakes Checklist
- ✓ Sift the baking soda twice to ensure zero lumps (prevents bitter spots).
- ✓ Use a pot that is 3x larger than the liquid volume (prevents overflows).
- ✓ Ensure the thermometer bulb is fully submerged but not touching metal.
- ✓ Never make honeycomb on a rainy or highly humid day (it will turn into a puddle).
- ✓ Resist the urge to spread the candy in the pan; let it foam naturally.
Creative Flavor Variations to Try
Once you've mastered this Easy Honeycomb Candy Recipe, you can start playing with the profile.
The Canadian Gold
Once the candy is fully cooled and shattered, dip half of each piece into tempered dark chocolate. The bitterness of the chocolate against the Salted Maple Honeycomb is incredible. It’s like a sophisticated version of a Crunchie bar.
Spiced Maple Twist
Add 0.5 tsp of ground cinnamon and a pinch of cayenne pepper to the sugar mixture at the start. The heat from the cayenne builds slowly and works perfectly with the maple. This is a great one to pair with a Classic Chewy Chocolate recipe for a varied dessert platter.
Proper Storage and Reheating Tips
Storing Maple Honeycomb Candy is all about fighting moisture. Sugar is "hygroscopic," meaning it sucks water right out of the air.
Storage: Place the shattered pieces in a strictly airtight container immediately after they cool. If you live in a humid climate, throw a food safe silica gel packet in the container. It will stay crisp for up to 2 weeks at room temperature.
Do not refrigerate, as the condensation will turn it into a sticky mess.
Freezing: You can freeze honeycomb! Wrap the pieces in parchment, then place in a freezer bag. It lasts for 2 months. Eat it straight from the freezer for an extra cold snap.
Zero Waste Tip: Don't throw away the "dust" and tiny crumbs at the bottom of the pan. Save them in a jar to sprinkle over morning oatmeal, yogurt, or even into a latte. It’s essentially maple flavored sugar gold.
Perfect Pairing and Serving Ideas
This candy is intense, so it needs partners that can stand up to the sugar or provide a refreshing contrast.
Serving Size Calculator
| Servings | Sugar Amount | Pan Size | Best Occasion |
|---|---|---|---|
| 8 people | 100g | 4x4 inch | Date night dessert |
| 16 people | 200g | 9x9 inch | Standard family batch |
| 32 people | 400g | Two 9x9 pans | Holiday gift boxes |
The woody notes of the maple make this a natural fit for a dark roast coffee or a glass of bourbon. If you're serving a crowd, try crumbling a few shards over a platter of sliced apples or pears. The fresh fruit provides a crisp, tart contrast to the deep caramelization of the candy.
It also makes a stunning garnish for a maple frosted cake or even a simple bowl of vanilla bean ice cream. Whatever you do, make sure to share it this Salted Maple Honeycomb is much too good to keep to yourself!
Honeycomb Myths
- Corn syrup is a requirement: Many recipes insist on corn syrup, but honey and maple syrup provide enough "invert sugar" to prevent crystallization while adding way more flavor.
- The bubbles come from the boiling: The bubbles are actually a chemical reaction between the acid in the syrup/cream of tartar and the base (baking soda). The boiling just sets the stage.
- You can't over whisk the soda: You absolutely can. Whisking too long after adding the soda will actually deflate the foam you're trying to create. Five seconds is all you need.

Recipe FAQs
Can I substitute regular granulated sugar for the maple syrup in this recipe?
No, this will fundamentally change the texture and flavor. Pure maple syrup is essential here because it provides both the signature taste and the necessary moisture to create a manageable syrup base before the sugar crystallizes.
What is the ideal temperature to pull the sugar mixture off the heat for a perfect shatter?
Reach exactly 300°F (149°C) for the hard crack stage. Pulling it early results in a chewy, sticky candy, while going too high can cause the maple sugars to scorch, leading to a bitter taste.
How to prevent the honeycomb from turning sticky if I live in a humid climate?
Make the candy on the driest day possible, or use a dehumidifier. Sugar is extremely hygroscopic; humidity introduces moisture which prevents the final structure from achieving a brittle, glass like hardness.
Is it true that you should never stir the sugar mixture once it starts boiling?
Yes, you must stop stirring once the boil begins. Stirring after the sugar dissolves introduces turbulence that encourages large sugar crystals to form, which will result in a grainy, rather than smooth, honeycomb texture.
How do I achieve the massive aeration effect when the baking soda is added?
Whisk the sifted baking soda in vigorously for only 3 to 5 seconds maximum. This rapid mixing ensures the carbon dioxide gas is distributed quickly through the molten sugar before it has time to escape, creating the honeycomb structure. If you master this gas trapping technique, you will find similar principles apply when making soft doughs, like in our Soft and Fluffy recipe.
What is the role of cream of tartar in this otherwise simple sugar recipe?
Cream of tartar acts as an acid to inhibit graininess. It helps invert some of the sucrose molecules, stabilizing the syrup and ensuring the final candy remains clear and glassy instead of becoming dull and crystalline.
How long should the honeycomb cool before I can break it apart for serving?
Allow the candy to cool undisturbed for a minimum of 90 minutes at room temperature. The structure needs this time to completely harden and set; attempting to break it too soon will result in soft, taffy like pulls instead of clean snaps.
Salted Maple Honeycomb Candy
Ingredients:
Instructions:
Nutrition Facts:
| Calories | 74 calories |
|---|---|
| Protein | 0 grams |
| Fat | 0 grams |
| Carbs | 19 grams |
| Fiber | 0 grams |
| Sugar | 19 grams |
| Sodium | 617 milligrams |
