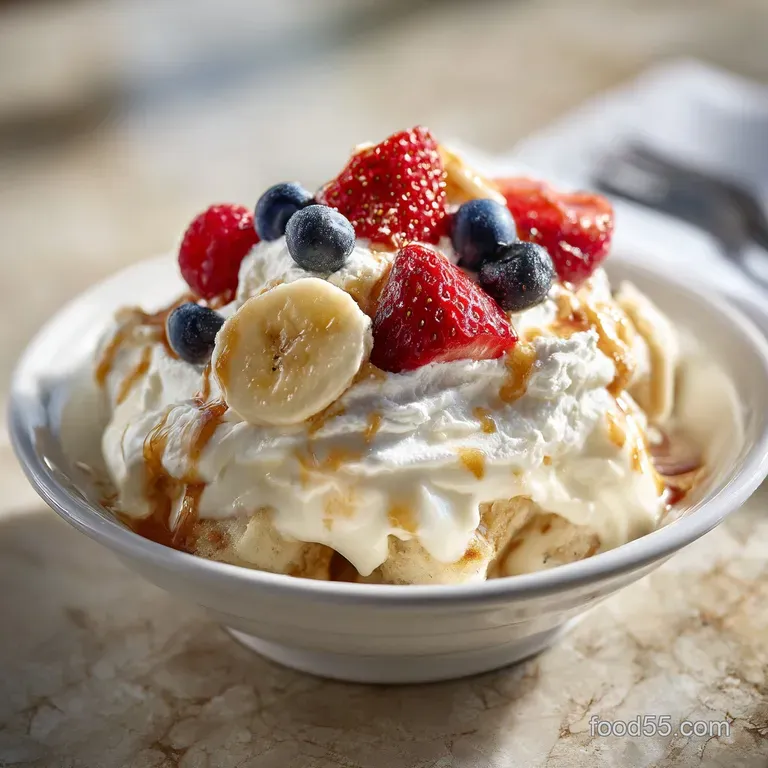
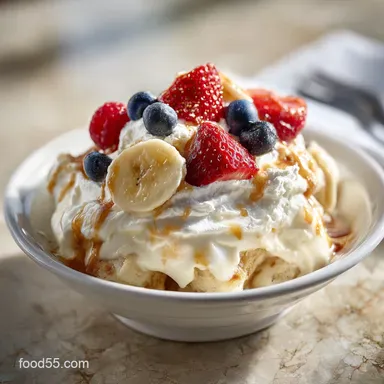
Southern Banana Pudding: Silky and Traditional

- Time: Active 260 minutes, Passive 15 minutes, Total 275 minutes
- Flavor/Texture Hook: Silky vanilla custard with shatter crisp wafers and creamy fruit layers.
- Perfect for: Family reunions, Sunday dinners, and celebratory shared meals.
- Crafting the Best Banana Pudding Recipe
- Reasons This Classic Dessert Works
- Essential Components for Perfect Texture
- Necessary Tools for Kitchen Success
- Detailed Step-by-Step Instructions
- Fixing Common Pudding Mistakes
- Dietary Swaps for Every Guest
- Storage and Zero Waste Tips
- Perfect Pairings for Sweet Treats
- Debunking Common Pudding Myths
- Recipe FAQs
- 📝 Recipe Card
Crafting the Best Banana Pudding Recipe
Imagine a humid July afternoon in the South, the kind where the air feels like a warm hug and the sound of cicadas provides a steady rhythm to the day. Every family reunion I've ever attended had one constant centerpiece: a massive, sweat beaded glass bowl filled to the brim with layers of cream, wafers, and fruit.
It wasn't just a dessert, it was a signal that we were all home, gathered under the shade of the oak trees to share stories and a heavy scoop of something sweet.
I remember my grandmother standing over a small saucepan, whisking with a focus that made her look like a chemist. She didn't use the instant stuff from a box because she believed that taking the time to cook a real custard was an act of love.
When you taste the difference between a starch thickened homemade base and a chemically set mix, you realize she was right. There is a depth to a cooked custard that "instant" simply cannot replicate, especially when those Nilla wafers begin to soften just enough to lose their crunch but retain their soul.
This particular recipe is designed to be the bridge between that old-fashioned stovetop nostalgia and the modern, airy whipped toppings we love today. We are going for a texture that is dense enough to hold its shape on a plate but light enough to feel like a cloud.
It is about the contrast of the velvety pudding against the slight snap of a wafer that hasn't quite given up the ghost yet. Let's walk through how to make this masterpiece so you can be the hero of your next gathering.
Reasons This Classic Dessert Works
- Starch Gelatinization: Cornstarch acts as a thickener by trapping water molecules in a network when heated, creating a firm but spreadable consistency.
- Yolk Emulsification: Egg yolks provide lecithin, which binds the fats from the milk and butter into the water based custard for a silky mouthfeel.
- Sugar Bananas Interaction: The granulated sugar in the custard draws a tiny bit of moisture from the sliced bananas, creating a natural syrup that fuses the layers.
- Fat Stabilization: Adding cold butter at the very end stops the cooking process and adds a glossy sheen that prevents a skin from forming.
- Osmotic Softening: The wafers absorb moisture from the custard over 4 hours, transforming from a hard cookie into a cake like texture.
| Method | Prep Time | Final Texture | Flavor Profile |
|---|---|---|---|
| Instant Mix | 10 minutes | Jelly like | Artificial vanilla |
| Traditional Cooked | 260 minutes | Velvety and rich | Deep dairy and vanilla |
| Frozen Style | 30 minutes | Icy and firm | Muted sweetness |
While the instant version is faster, the cooked method allows the vanilla extract to bloom and the sugar to caramelize slightly against the heat. This creates a profile that isn't just "sweet," but complex and comforting. If you are looking for more stovetop comfort, you might also enjoy a creamy rice pudding which uses a similar milk to starch ratio for that perfect spoonable set.
Essential Components for Perfect Texture
| Ingredient | Science Role | Pro Secret |
|---|---|---|
| Egg Yolks (4 large) | Provides fat and protein for a rich, stable structure. | Use room temperature yolks to prevent curdling during tempering. |
| Cornstarch (35g) | The primary thickening agent that prevents the pudding from being runny. | Always whisk into cold sugar first to avoid stubborn lumps. |
| Whole Milk (720ml) | The liquid base that hydrates the starch and provides dairy fats. | Don't use skim milk, the lack of fat will make the pudding watery. |
| Heavy Cream (480ml) | Creates the airy, stable topping that balances the dense custard. | Keep the bowl and whisk attachment in the freezer for 10 mins first. |
Selecting the right ingredients is the difference between a "good" pudding and one people talk about for years. For the fruit, look for bananas that are yellow with just a few brown freckles. If they are too green, they will be starchy and lack that floral sweetness.
If they are too black, they will turn into mush and make the layers look unappealing. You want that middle ground where the fruit is sweet but still has enough structural integrity to be sliced cleanly.
Necessary Tools for Kitchen Success
- Heavy bottomed Saucepan: This is non negotiable for custard. Thin pans have hot spots that will scorch your milk and leave burnt black flecks in your beautiful yellow pudding.
- Whisk: A sturdy balloon whisk helps incorporate the cornstarch and ensures the egg yolks are tempered smoothly without scrambling.
- 9x13 Glass Dish: Using glass allows your guests to see those beautiful, iconic layers of wafers and bananas. It also stays cold longer once removed from the fridge.
- Offset Spatula: This tool is the secret to getting a flat, professional looking surface on your custard layers and that final whipped cream topping.
- Stand Mixer or Hand Mixer: While you can whip 480ml of heavy cream by hand, your arm will likely give out before you reach those beautiful stiff peaks we need for stability.
Detailed step-by-step Instructions
- Whisk dry ingredients. In a heavy bottomed saucepan, combine 200g granulated sugar, 35g cornstarch, and 0.5 tsp fine sea salt until no lumps of starch remain. Note: This prevents the starch from clumping when the liquid hits it.
- Heat the milk. Gradually pour 720ml whole milk into the pan while whisking constantly over medium heat until the mixture begins to steam and release a sweet aroma.
- Temper the yolks. Slowly drizzle one cup of the hot milk mixture into the 4 whisked egg yolks in a separate bowl while stirring vigorously. Note: This gently raises the yolk temperature so they don't scramble.
- Thicken the custard. Pour the egg mixture back into the saucepan and cook for 2-3 minutes until the custard bubbles and coats the back of a spoon.
- Finish with flavor. Remove from heat and whisk in 45g unsalted butter and 2 tsp pure vanilla extract until the surface is glossy and smooth.
- Create the base. In your 9x13 glass dish, lay down 11 oz Nilla Wafers followed by a layer of 3 sliced bananas.
- Add the custard. Pour half of the warm custard over the fruit and wafers, spreading it to the corners with your offset spatula.
- Repeat the layering. Add another layer of wafers, the remaining 3 sliced bananas, and the rest of the custard, ensuring the fruit is fully covered to prevent browning.
- Whip the topping. Combine 480ml heavy whipping cream, 30g powdered sugar, and 2 tbsp sweetened condensed milk in a cold bowl. Whip until the peaks stand straight up when the whisk is lifted.
- Final chill. Spread the whipped cream over the cooled pudding and refrigerate for 4 hours until the wafers have softened into a cake like texture.
Chef Tip: To prevent the bananas from turning brown, make sure they are completely submerged or covered by the custard. The custard acts as a vacuum seal, keeping oxygen away from the fruit and preserving that bright yellow color.
Fixing Common Pudding Mistakes
Fixing a Runny Pudding Consistency
If your pudding looks more like a soup than a custard after it has cooled, the starch didn't reach a high enough temperature. Cornstarch needs to hit a light boil to fully "activate" and create those thick bonds.
Another culprit could be the bananas themselves, if they are extremely overripe, they release more moisture into the dish as it sits.
| Problem | Root Cause | Solution |
|---|---|---|
| Lumpy Texture | Adding milk too fast | Whisk sugar and starch first, then add milk in a slow stream. |
| Scrambled Eggs | Skipped tempering | Always add hot liquid to yolks slowly before returning to the pan. |
| Metallic Aftertaste | Thin aluminum pan | Use stainless steel or enamel coated pans for dairy based sauces. |
One mistake I once made was trying to rush the cooling process by putting the hot custard directly into the freezer. This caused condensation to form on the underside of the plastic wrap, which then dripped back into the pudding, making it watery. Patience is your best friend here. If you want to dive deeper into the nuances of this specific style, checking out a Southern banana pudding recipe can give you even more context on the "Magnolia" style whipped topping.
Common Mistakes Checklist
- ✓ Never stop whisking while the milk is heating to prevent scorching the bottom.
- ✓ Pat the sliced bananas dry if they seem particularly moist before layering.
- ✓ Use full fat dairy for the best set, low-fat versions often result in a "weeping" pudding.
- ✓ Wait for the custard to be barely warm before adding the whipped cream topping.
- ✓ Don't skip the 4 hour chill, the wafers need this time to transform their texture.
Dietary Swaps for Every Guest
Adjusting a recipe for dietary needs shouldn't mean sacrificing that shared meal experience. If you have someone with a gluten sensitivity, the most important swap is the wafers. There are several brands that make gluten-free vanilla wafers which hold up surprisingly well in the 4 hour soak.
For dairy-free needs, full fat coconut milk (the kind in the tin) can replace the whole milk, though it will add a distinct tropical note to the finished dish.
| Original Ingredient | Substitute | Why It Works |
|---|---|---|
| Whole Milk | Oat Milk (Full Fat) | Provides a similar creamy mouthfeel without a strong aftertaste. |
| Nilla Wafers | Graham Crackers | Offers a similar crunch and sweetness, though the texture is slightly grittier. |
| Granulated Sugar | Honey (150g) | Adds a floral depth. Note: Will make the custard slightly softer. |
When scaling this recipe up for a massive party, remember that the custard behaves differently in large volumes. If you double the recipe, you might need to increase the cook time by 5-8 minutes to ensure the larger mass of milk reaches the proper thickening temperature.
However, don't just double the salt, keep it at about 1.5x the original amount to prevent the pudding from becoming overly savory.
Storage and Zero Waste Tips
Banana pudding is best enjoyed within the first 24 to 48 hours. After that, the wafers start to disintegrate too much and the bananas will inevitably begin to oxidize and turn a greyish hue, even under the protection of the custard.
Store it in the fridge with a piece of plastic wrap pressed directly against the surface of the whipped cream to prevent it from absorbing any "fridge smells" like onions or garlic.
Don't toss those banana peels! If you have a garden, soak the peels in a jar of water for 48 hours to create a potassium rich "tea" for your houseplants. Also, if you find yourself with half a bag of crushed Nilla wafers at the bottom of the box, don't throw them away.
Pulse them in a food blender with a little melted butter and press them into a pie tin for a quick no bake crust for your next dessert venture.
Perfect Pairings for Sweet Treats
Since this pudding is quite rich and sweet, it pairs beautifully with something that has a bit of acidity or bitterness to cleanse the palate. A strong, dark roast coffee or a cup of Earl Grey tea provides a sophisticated contrast to the creamy vanilla notes.
If you are serving this at a summer cookout, a tart lemonade or a hibiscus iced tea works wonders.
For a full dessert spread, I love serving this alongside something with a different structural profile. While the pudding is soft and velvety, a slice of toasted banana nut bread offers a nutty, bready contrast that reinforces the banana theme without feeling repetitive. You could even crumble a bit of the nut bread over the top of the pudding for an unconventional garnish that adds a much needed crunch.
Debunking Common Pudding Myths
A frequent misconception is that you must use "heavy cream" in the custard to make it thick. In reality, the thickness comes from the starch gelatinization and the egg proteins, not the fat content of the milk.
Using heavy cream in the base actually makes it too heavy and can leave a greasy film on the roof of your mouth. Stick to whole milk for the best flavor release.
Another myth is that you can't use "brown" bananas. While they shouldn't be completely black and fermented, a few brown spots actually mean the starches have converted to sugars, giving you a much more intense banana flavor.
The only "rule" is to avoid green bananas, which contain tannins that can leave a dry, chalky feeling in your mouth that no amount of sugar can fix.
Finally,, people often think the whipped cream will deflate if made in advance. By adding a small amount of sweetened condensed milk, as we do in this recipe, you are actually "stabilizing" the cream.
The sugars and solids in the condensed milk help the fat globules in the cream hold their structure, meaning your topping will stay fluffy and beautiful for the full 4 hour chill and beyond. Trust the process, and you'll have a dessert that brings everyone back for seconds.

Recipe FAQs
What are the ingredients for banana pudding?
You need twelve specific items to assemble this classic dessert. The list includes whole milk, granulated sugar, cornstarch, fine sea salt, egg yolks, unsalted butter, pure vanilla extract, Nilla Wafers, ripe bananas, heavy whipping cream, powdered sugar, and sweetened condensed milk.
Is it true I only need four ingredients to make banana pudding?
No, this is a common misconception. A high-quality custard base requires eleven to twelve essential components, including eggs, dairy, and thickeners, to achieve the proper texture and flavor profile.
How to keep bananas from turning black in banana pudding?
Slice them right before layering and ensure they are fully covered by the warm custard. The barrier created by the custard and the final whipped cream layer limits oxygen exposure, which helps maintain the bananas' color for up to 48 hours.
How to elevate banana pudding?
Focus on mastering the emulsion of your custard to improve the final mouthfeel. If you enjoyed perfecting the velvety texture of this pudding, you can apply the same careful attention to heat control when making our Death By Chocolate pudding.
How long should I chill the pudding before serving?
Wait exactly 4 hours before serving. This duration allows the Nilla Wafers to soften to the perfect consistency and ensures the custard sets firmly enough to hold its shape when scooped.
How to properly store leftovers?
Press plastic wrap directly against the surface of the whipped cream before refrigerating. This creates an airtight seal that prevents the dessert from absorbing odors from other items in your fridge.
How to tell when the custard is finished cooking?
Watch for the mixture to bubble and thicken significantly. This process takes 2-3 minutes of active whisking after returning the tempered egg mixture to the saucepan.
Southern Banana Pudding Recipe
Ingredients:
Instructions:
Nutrition Facts:
| Calories | 514 kcal |
|---|---|
| Protein | 4.8 g |
| Fat | 25.8 g |
| Carbs | 63.2 g |
| Fiber | 1.3 g |
| Sugar | 42.5 g |
| Sodium | 218 mg |
