Roast Turkey: Perfect Herb-Butter Method for Your Holiday Feast
- The King’s Ransom: Achieving the Perfect Roast Turkey Centerpiece
- The Science of Success: Why Dry Brining Beats Wet Brining
- Gathering Your Feast: Essential Ingredients for Herb-Butter Roast Turkey
- Detailed Instructions: Mastering the Perfect Stress-Free Turkey Roasting
- Troubleshooting Your Roast: Expert Tips and Avoiding Rookie Errors
- Handling Leftovers: Storage, Freezing, and Reheating Best Practices
- Complementary Pairings and Creating the Ultimate Pan Gravy
- Recipe FAQs
- 📝 Recipe Card
The King’s Ransom: Achieving the Perfect Roast Turkey Centerpiece
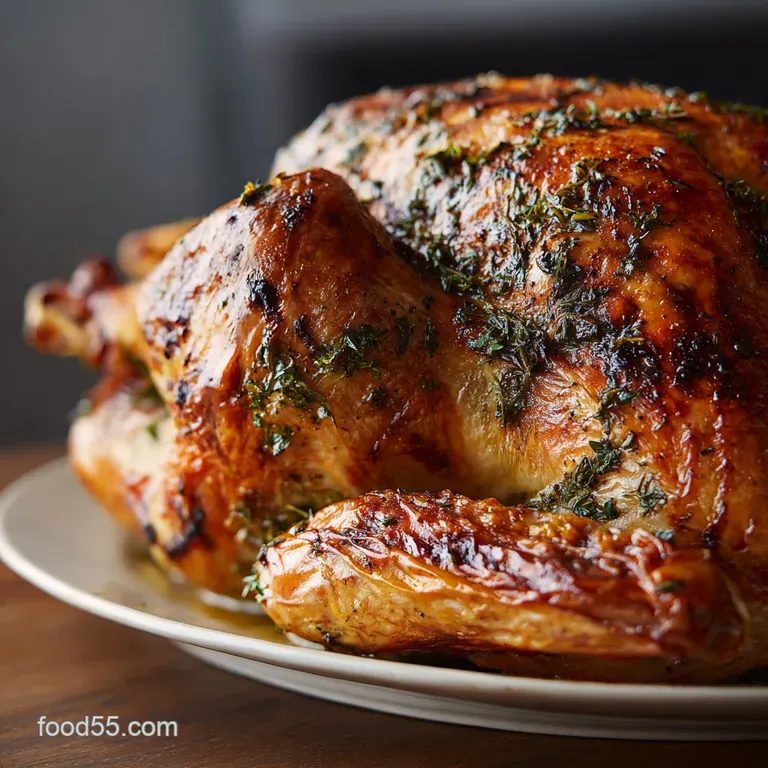
The holidays are brilliant. That moment when the roast turkey comes out of the oven, steam rising and the skin crackling? It’s magic. The house instantly smells like heaven, thanks to the heady mix of sage, thyme, and roasted garlic.
Let’s be real, cooking a big bird is terrifying for most people. We’ve all dealt with dry breast meat and sad, flabby skin that nobody wants to touch. This method, which relies on a strategic dry brine and copious amounts of herb butter, is a total game changer and it cuts down on constant oven babysitting.
I spent years making every turkey mistake known to man, including an incident where I forgot to remove the bag of giblets until it was nearly done. I finally cracked the code to juicy, flavour packed perfection, and I’m telling you to ditch the complicated basting forever.
Grab your salt; we’re making the only Thanksgiving Turkey recipe you’ll ever need.
Why Most Traditional Turkey Recipes Fail the Moisture Test
Most people try to make up for the inherent dryness of white meat by basting it endlessly. You open the oven door, the temperature drops dramatically, and all you do is steam the skin, preventing it from ever getting truly crispy. The turkey might look shiny for a second, but it’s actually a recipe for failure.
Introducing the Stress Free Method: Dry Brining for Depth
Dry brining is just a fancy way of saying "salt your turkey aggressively and leave it alone." This process seasons the meat deep into the muscle fibres, allowing the salt to dissolve and eventually pull the juices back in for incredibly tender results.
It also pulls moisture out of the skin, which is the absolute secret to achieving that deep, mahogany crispness we all crave in a holiday feast .
Crisp Skin, Moist Meat: The Herb Butter Guarantee
The breast meat always cooks faster than the legs, which is the main source of dryness. By sliding herbed, compound butter directly under the skin, we create a delicious, protective layer of fat and moisture that bastes the white meat from the inside out. If you loved the sound of this moisture guarantee, you should definitely check out my full post on the Herb Butter Turkey: Guaranteed Moist, Crispy Skin, No Basting Needed method.
The Science of Success: Why Dry Brining Beats Wet Brining
Trust me, I tried the wet brine bucket in the fridge thing once, and it was chaotic and messy. Wet brining adds water weight, which can dilute the natural, rich flavour of the turkey.
Dry brining, or salting, is cleaner and way more effective. It works through osmosis, changing the protein structure in the turkey muscle so it retains more of its own juices while cooking.
When you leave the salted bird uncovered in the fridge for 24 hours, the surface moisture evaporates completely. This guarantees that when the high heat hits the bird, you get immediate caramelization and stunningly crispy skin.
Chef's Note: Don't worry about the bird being too salty. The salt will be absorbed over time, seasoning the interior meat perfectly, and much of the excess will drip off with the fat.
Gathering Your Feast: Essential Ingredients for Herb Butter Roast Turkey
The Magic of Salt: Maximizing Muscle Moisture Retention
Kosher salt is not interchangeable with table salt; it has much larger grains and less concentrated sodium. We need the coarse grain for effective brining.
| Ingredient | Role | Substitute/Variation |
|---|---|---|
| Kosher Salt | The essential dry brine agent. | Flaky sea salt works if Kosher is unavailable, but measure by weight (mass) rather than volume. |
| Unsalted Butter | Fat layer under the skin, flavour carrier. | Use high-quality olive oil or dairy-free butter for non-dairy preparation. |
Golden Armor: How the Herb Butter Ensures Crisp Skin
We are using a blend of classic aromatic herbs, which is crucial for building that beautiful roast turkey flavour profile. Don’t skip the lemon zest; it really brightens up the richness of the butter and cuts through the fat.
Safe and Quick Roasting: The Case Against Internal Stuffing
I know grandma always stuffed the bird, but hear me out. Stuffing inside the turkey cavity drastically increases the total cook time. The stuffing needs to reach a safe internal temperature of 74°C (165°F), but by the time it gets there, your breast meat will be drier than the Sahara.
We use simple aromatic vegetables (onions, carrots, celery, citrus) only to flavour the drippings for gravy, not to eat.
Selecting Your Bird: Size and Sourcing Guide
Aim for about 1.5 pounds (0.7 kg) per person, but always round up slightly if you want leftovers for sandwiches. I highly recommend buying a free range or heritage bird if your budget allows; the texture and flavour are noticeably better, especially when cooking for an important Christmas Turkey dinner.
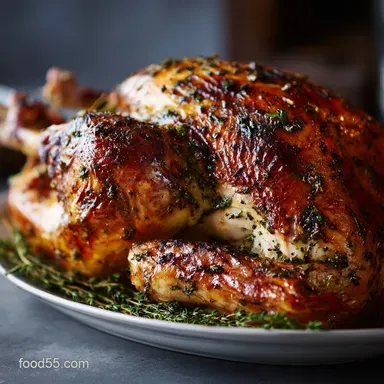
The Aromatic Arsenal: Building the Perfect Herb Blend (Rosemary, Thyme, Sage)
This blend screams "holiday." Use fresh herbs only; the dried stuff won't give you the same intense fragrance or release the oils properly into the butter. If you absolutely must use dried herbs, remember to reduce the quantity by two-thirds.
Temperature Matters: Working with Softened Butter
Your butter must be truly softened think mayonnaise consistency. If it's too cold, you won't be able to slide it easily under the skin without tearing that delicate membrane, and tearing the skin ruins the whole crisping strategy.
Detailed Instructions: Mastering the Perfect Stress Free Turkey Roasting

Phase 1: Preparation and the 24 Hour Dry Brine
Always start by removing the giblets and neck; nobody wants to accidentally roast those! Pat the turkey absolutely bone dry with paper towels, even inside the cavity. Sprinkle the coarse salt all over the bird, focusing on the meaty sections, then place the turkey uncovered on a rack in the fridge.
The air circulation is paramount, so please don't wrap it.
Phase 2: Applying the Herb Butter Under the Skin
Remove the turkey from the fridge about an hour before you plan to roast, letting the meat temperature rise slightly. This helps promote even cooking. Carefully lift the breast skin near the neck opening and gently push half of the herb butter mixture underneath, spreading it across the breast meat as evenly as possible using your hands.
Rub the remaining butter over the outside of the legs and the skin surface.
Phase 3: over High heat Start and Controlled Roasting Temperature
Preheat the oven to a hot 220°C (425°F) and get that bird in there immediately. This over high heat blast begins the crisping process and activates the butter. After 30 minutes, you must drop the temperature to 175°C (350°F) to ensure the inside cooks gently without burning the exterior.
Phase 4: Crucial Step: The Post Roast Resting Period
The biggest mistake you can make is carving the turkey immediately after it comes out of the oven. All the juices will flood out onto your cutting board, leaving you with sawdust dry meat. Remove the bird and tent it loosely with foil, then cover it with a heavy tea towel.
Let that beautiful bird rest for a full 45 to 60 minutes. The internal temperature will continue to rise during this rest, which is called "carryover cooking."
Troubleshooting Your Roast: Expert Tips and Avoiding Rookie Errors
Temperature Accuracy: When to Trust the Pop-Up Timer (And When Not To)
Never, ever trust the cheap plastic pop-up timer that comes with the bird. Those timers are notoriously unreliable and often wait until the turkey is severely overcooked before they finally engage.
You need a reliable digital instant read thermometer, ensuring the breast reaches 74°C (165°F) and the thigh reaches 82°C (180°F).
Preventing Over Browning: The Foil Tent Solution
If the skin on the breast starts getting too dark halfway through the cooking process, don’t panic! Simply tear off a piece of aluminum foil and loosely tent it over the browned areas.
This acts like sunscreen, reflecting the heat and allowing the rest of the bird (especially the dense thigh meat) to finish cooking without burning the delicious golden armor.
The Critical Role of Oven Calibration in Even Cooking
My old oven ran 20 degrees hotter than the dial said, which meant I was constantly burning things until I bought an inexpensive oven thermometer. If your oven temperature is inconsistent, you will struggle to get perfectly even cooking.
Check your calibration, or at least place a cheap oven thermometer inside your oven to monitor the true temperature throughout the roast.
Handling Leftovers: Storage, Freezing, and Reheating Best Practices
Safe Refrigeration Timelines for Cooked Poultry
Roast turkey is safe to store in the fridge for three to four days after cooking. Ensure you carve the meat off the bone and place it in airtight containers within two hours of the turkey coming out of the oven. Don't leave it out at room temperature for extended periods.
Freezing Turkey Meat for Long Term Storage
If you have a monumental amount of leftover roast turkey , freezing is your friend. Slice the meat and layer it flat in freezer bags, pressing out all the air before sealing. It will stay fresh and tasting great for up to three months. When you want to use that frozen turkey, I highly recommend making my delicious Turkey Patties Recipe Succulent PubStyle with Lemon Herbs .
Revitalizing Slices: The Best Way to Reheat Without Drying
Reheating turkey in the microwave or oven often results in dry, tough pieces. Instead, slice the turkey thinly and lay it flat in a shallow, oven safe dish. Pour a few spoonfuls of chicken or turkey stock (or leftover gravy) over the slices, cover the dish tightly with foil, and warm it in a 150°C (300°F) oven for about 15 minutes.
The steam trapped under the foil gently revives the meat without drying it out.
Complementary Pairings and Creating the Ultimate Pan Gravy
This perfectly cooked Roasted Turkey deserves sides that shine just as brightly. Don't just serve plain mashed potatoes; give your sides some flavour punch.
I love to pair this richly seasoned meat with something savory, like my Savory Roasted Sweet Potatoes: Crispy Edges Smoky Balsamic Glaze , or if you prefer a little sweetness, the sticky crunch of Maple Glazed Roasted Sweet Potatoes Easy Recipe for the Perfect Sticky Side is non-negotiable.
To make the gravy, simply strain the drippings and pan liquid into a saucepan. Skim off excess fat, create a roux with flour and butter in a separate pan, then whisk the turkey liquid into the roux until thickened and bubbling. Add a splash of stock or wine if it seems too thick. Instant flavour payoff!

Recipe FAQs
Why is my turkey breast always dry, even when I use the herb butter?
Dryness is almost always a result of overcooking the lean breast meat. Use a reliable meat thermometer and pull the bird from the oven when the breast registers 160°F (71°C), not 165°F, as carryover cooking during the resting period will safely raise the internal temperature.
The herb butter acts as an essential barrier, but timing is key for ultimate moisture.
What is a dry brine, and why is it better than a traditional wet brine?
A dry brine involves heavily salting the turkey skin 24-48 hours before roasting, which draws moisture out, creating a concentrated saline solution that is then reabsorbed into the meat.
This seasons the turkey deeply and, critically for this recipe, dries out the skin, guaranteeing a superiorly crisp exterior compared to a wet brine which often saturates the skin.
What internal temperature confirms the turkey is fully cooked and safe to eat?
The turkey is safely cooked when the internal temperature registers 165°F (74°C) in the deepest part of the thigh, avoiding the bone. We aim to remove the bird when the breast hits 160°F (71°C), as the thigh will usually reach 165°F simultaneously, and residual heat finishes the cooking process during the critical resting period.
Can I stuff the turkey using this method, or must I cook the stuffing separately?
We highly recommend cooking the stuffing separately, as placing it inside the cavity significantly increases the overall cooking time and makes monitoring safe temperatures difficult.
The stuffing must also reach 165°F, which often results in the breast meat being severely overcooked and dry before the center of the stuffing is safe. Cook it in a separate casserole dish to maintain the turkey's optimal moisture.
How should I store leftover turkey, and how long will it keep?
Cool the leftover turkey quickly it should be refrigerated in airtight containers within two hours of cooking. Properly stored cooked turkey is safe to eat for 3 to 4 days. For longer preservation, freeze the meat in a freezer safe container, where it will maintain its quality for up to three months.
My skin isn't crisping up despite the high initial heat. What went wrong?
Lack of crispness is often caused by excess moisture trapped on the skin's surface. Ensure you thoroughly dry the turkey before applying the herb butter and resist the urge to tent the bird with foil too early, as this traps steam and softens the skin.
A thorough dry brine usually resolves this issue by minimizing surface moisture.
How long must the turkey rest after roasting, and can I skip this step?
The turkey must rest for a minimum of 30 minutes, and ideally up to 45 minutes, tented loosely with foil. Skipping the rest means that all the precious internal juices will run out when you carve, resulting in drier meat. Resting allows the muscle fibers to relax and redistribute moisture evenly throughout the bird.
Stress Free Herb Butter Roast Turkey
Ingredients:
Instructions:
Nutrition Facts:
| Calories | 500 calories |
|---|---|
| Fat | 18 g |
| Fiber | 0.5 g |
