Chicken Stock: the Ultimate Kitchen Foundation
- Introduction to Liquid Gold: Why Homemade Stock Matters
- The Science of High-Gelatin Stock: Why Ours Sets
- Essential Components for a Robust Foundation
- Mastering the Simmer: Step-by-Step Recipe Directions
- Chef's Secrets and Troubleshooting Your Broth
- Preserving Your Culinary Foundation: Storage and Freezing Guide
- Elevated Uses: How to Utilize Your Freshly Made Stock
- Recipe FAQs
- 📝 Recipe Card
Introduction to Liquid Gold: Why Homemade Stock Matters
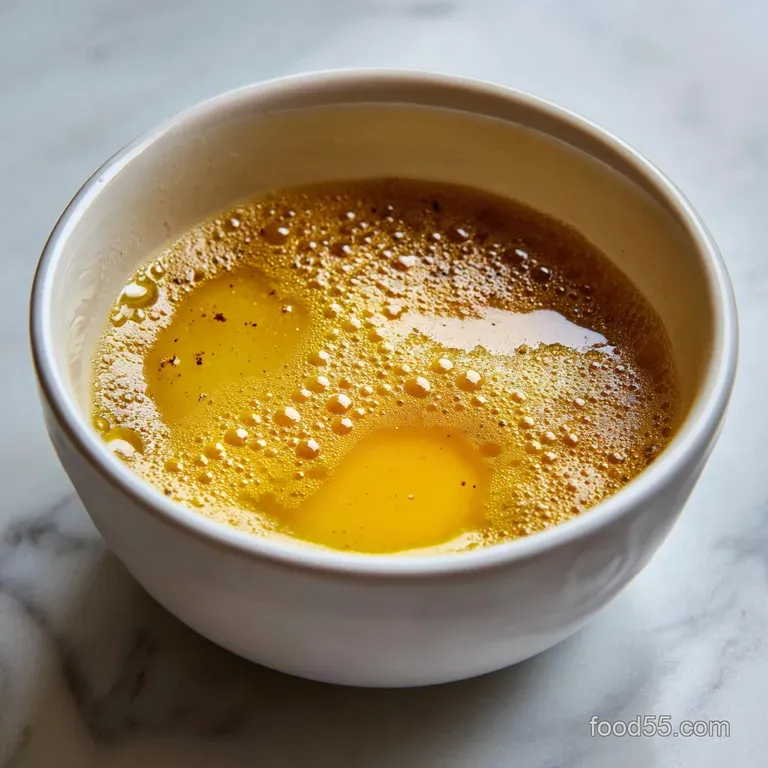
There is no better smell in my kitchen than a pot of honest-to-goodness Chicken Stock gently simmering away. It smells like pure comfort, savory and rich, filling every corner of the house. That deep golden hue and the promise of that beautiful, wobbly jelly texture once it chills?
That’s how you know you’re doing it right.
Why bother with store-bought cartons when making Chicken Stock is mostly hands off? This project is incredibly cheap, utilizing bits you’d normally throw out or buy for pennies, and it transforms every soup or sauce you ever make.
Seriously, once you taste the difference, there is no going back; it’s the definition of a kitchen essential.
I want you to stop relying on salty cubes and start building a real flavour base. We are focusing on maximum gelatin extraction and crystal clear results, giving you the foundation for everything from stunning French reductions to perfect weeknight risottos.
Let’s make the best homemade Chicken Stock you have ever tasted.
The Science of High Gelatin Stock: Why Ours Sets
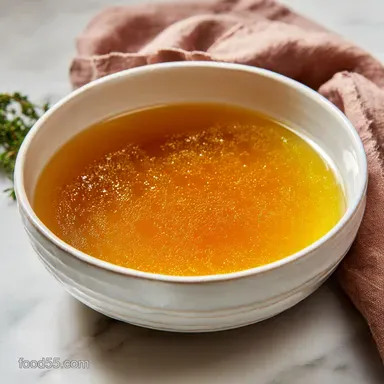
The goal here isn't just flavored water; the goal is liquid jelly. When you make high-quality Chicken Stock , it should set up firm and wobbly in the fridge, thanks to all that beautiful collagen extracted from the bones.
We achieve this by focusing solely on high collagen parts and simmering, never boiling, for several hours. This is the simple kitchen magic that turns a pedestrian meal into something spectacular.
The Difference Between Broth and Stock (And Why Gelatin is Key)
This is the hill I will die on: stock is not broth. Broth is generally made quickly with meat and already strained, often intended for immediate consumption. Stock, specifically proper Chicken Stock , is made primarily from bones, cartilage, and connective tissue, which contain collagen.
When that collagen breaks down during a long, slow cook, it becomes gelatin. That gelatin provides the body, mouthfeel, and deep richness required for proper sauces.
Difficulty Assessment: Is the Simmer Really "Easy"?
Yes, this process is conceptually easy, demanding patience rather than technique. You need basic knife skills for the mirepoix , and you need a good skimming spoon.
The hardest part of making Homemade Chicken Stock is resisting the urge to turn the heat up too high, which is more a test of discipline than skill.
Required Equipment for Best Results
You absolutely need a massive pot, ideally 8 quarts or larger, because you want plenty of surface area to simmer without boiling over. A fine mesh sieve is non-negotiable for straining. But here’s the trick: line that sieve with cheesecloth.
Trust me, running your Chicken Stock through cheesecloth is the secret weapon for getting that truly sparkling clarity.
Maximizing Collagen Extraction
To get that famous "jelly factor," you must use the right bones. Skip boneless breasts; we want chicken feet, necks, backs, or wing tips the parts loaded with cartilage. Starting everything in cold water is crucial because it allows the proteins to release slowly.
This maximizes the extraction of that glorious collagen before the heat causes the proteins to seize up too quickly.
The Importance of a Gentle Simmer (The 'Shimmering Point')
If you boil your stock aggressively, you emulsify all the fat and impurities into the liquid, making it cloudy and slightly greasy. We are aiming for the "shimmering point." That’s where the liquid is hot, but only tiny, occasional bubbles break the surface.
If you see a rolling boil, turn the heat down immediately, or risk ruining your perfect Chicken Stock .
Balancing Aromatics for Depth of Flavor
We rely on the classic French mirepoix (onion, carrot, celery) but keep the aromatics simple. We avoid strong herbs like rosemary or sage because they can overpower the delicate flavor of the stock base.
Parsley stems and thyme are perfect partners because they add an earthy, savory depth without dominating the final product.
Essential Components for a Robust Foundation
Remember, every single ingredient contributes to the final complex flavor of your finished Chicken Stock . Don't skip the step of rinsing the bones!
The Mirepoix Ratio: Perfecting the Aromatics
The traditional ratio for mirepoix is 2 parts onion to 1 part carrot to 1 part celery. We use large, rough chunks because they will cook for four hours; delicate pieces would turn to mush.
Pro Tip: Keep the onion skins on (after a quick rinse) for extra color and flavor complexity in your stock.
Water Quality Notes and Requirements
If your tap water tastes bad, your stock will taste bad; it’s that simple. Use filtered water if possible. More importantly, always start with cold water. Starting cold ensures that the proteins and impurities rise slowly, allowing you to skim them off efficiently before the simmering starts.
Ingredient Substitutions and Necessary Adjustments
| Ingredient | Substitute (If Unavailable) | Adjustment Note |
|---|---|---|
| Chicken Necks/Feet | Turkey Necks or Wings | Use slightly less due to potentially stronger flavor. |
| Yellow Onion | Leeks (white and light green part) | Use the same quantity; wash thoroughly as leeks hold dirt. |
| Carrots | Parsnips | Adds a subtle sweetness; adjust quantity slightly. |
| Bay Leaves | Omit (No good substitute) | Essential for classic flavor; try to find them if possible. |
Mastering the Simmer: step-by-step Recipe Directions

Patience is your main ingredient here. You need to commit to the time, but the reward of perfect homemade Chicken Stock is huge.
Prepping and Pre-Washing Your Components
First, place your chicken bones and carcasses in a colander in the sink. Give them a thorough rinse under cold running water to wash off any surface blood or grime; this prevents unnecessary scum from forming later.
Rough chop your vegetables we don’t need fine knife work here, huge chunks are fine since they’ll be strained out later.
The Cold Water Start Technique
Place the rinsed bones into your largest stockpot. Cover the bones completely with the cold, filtered water about 5 quarts. Bring the heat up slowly to medium high. You are watching for the moment the liquid heats up and grayish scum starts floating to the top.
CRUCIAL CHEF’S NOTE: Skim every bit of grey foam before adding the vegetables. If you don't skim, the impurities will cook into the stock, making it permanently cloudy.
Skimming and Clarifying During the Cook
Once you have skimmed the surface entirely, reduce the heat to the absolute lowest setting to maintain that gentle shimmer. Now you can add the carrots, celery, onions, peppercorns, and herb bundles. Partially cover the pot and let the magic happen for 4 to 5 hours.
The longer it simmers gently, the more collagen we pull out for our beautiful, wobbly Chicken Stock .
The Final Strain and Cooling Process
After 4 or 5 hours, remove the pot from the heat. Use tongs to pull out the largest solids first. Then, set up your fine mesh sieve lined with cheesecloth over a large, clean container. Slowly and carefully ladle the liquid through the cloth. Do not press the solids!
Pressing pushes fine, cloudy particles through and ruins your clarity.
Chef's Secrets and Troubleshooting Your Broth
I once rushed the straining step and squeezed the solids because I was tired, resulting in cloudy stock that wouldn’t set correctly. Trust me, it’s not worth it. Take your time during the strain!
Why Your Stock Might Be Cloudy (And How to Fix It)
The two biggest culprits for cloudy Homemade Chicken Stock are boiling too aggressively or squeezing the solids during the final strain. If it's already cloudy, don't worry.
You can attempt a clarification: reheat the stock gently, whisk in a couple of egg whites (which act as a raft), bring it just to a simmer, and then strain it again slowly through a clean cheesecloth.
Avoiding the Pitfall of Excessive Salt
Never season your Chicken Stock with salt until the very end, and even then, only lightly. As the stock reduces, the salt intensifies. If you season early and then reduce it for a sauce base (like for this amazing Braised Chicken Thighs: Rich White Wine Tarragon Recipe ), it will become inedibly salty. Wait until you know the intended final use.
Preserving Your Culinary Foundation: Storage and Freezing Guide
Achieving Optimal Shelf Stability
Once strained, you must cool the stock quickly to prevent bacteria growth. This is non-negotiable for food safety. Transfer the hot liquid into shallow containers (metal works best for cooling speed) and either put them immediately in an ice bath or refrigerate.
You need to get the temperature below 40°F (4°C) as fast as possible.
Cooling Safety: Getting Below the Danger Zone
If you leave a huge pot of hot Chicken Stock on the counter to cool, it will spend hours in the "danger zone" (40°F to 140°F) where bacteria multiply rapidly. Dividing it into smaller, shallow containers is your best defence against spoilage.
Always cool before covering completely to allow the steam to escape.
Best Practices for Ice Cube and Bag Freezing
For daily cooking and adding a pop of flavor to sautéed veggies, use standard ice cube trays. Once solid, pop the cubes out and transfer them to a labelled freezer bag. For larger quantities, use sturdy, freezer safe quart containers, leaving about an inch of headspace to account for expansion. This rich, gelatinous stock is perfect for making a lovely cream sauce base, like in my recipe for Creamy Chicken Breast in Spinach Parmesan Sauce: The Easy Weeknight Florentine .
How Long Does Homemade Stock Last?
Properly defatted and cooled Homemade Chicken Stock will last reliably for 5 to 7 days in the refrigerator. In the freezer, it’s good for 6 to 9 months, though I recommend using it within 3 months for the best flavor quality. Always date and label your containers!
Elevated Uses: How to Utilize Your Freshly Made Stock
Now you have a freezer full of culinary gold, you can elevate literally everything. Use it to steam vegetables, deglaze a pan, or make the creamiest risotto imaginable. It is your ultimate flavour amplifier.
This Chicken Stock is fantastic when reducing liquids for gravies. It makes the final sauce so glossy and rich that you barely need any thickener. I even use it instead of water when baking rice under my Sheet Pan Chicken and Veggies: Easy Lemon Herb One-Tin Wonder for maximum savory punch. Enjoy the rich, comforting goodness of your homemade Chicken Stock !

Recipe FAQs
How do I ensure my chicken stock is clear and not cloudy?
The crucial step is maintaining a very gentle simmer throughout the entire cooking process, never allowing the liquid to come to a rolling boil, which emulsifies the fats and proteins.
Also, avoid stirring the stock aggressively once it starts cooking, as this can break up the solids into fine particles that are hard to strain.
Which type of bones are best for achieving maximum gelatin content?
For the best body and mouthfeel, utilize bones that are rich in cartilage and collagen, such as chicken feet, backs, wings, and neck bones. Ensure you blanch or rinse the bones thoroughly before simmering to remove impurities, which also aids in achieving clarity.
Should I add salt or other strong seasonings at the beginning of the cook time?
It is highly recommended to omit salt entirely until the very end, or even after the stock is strained and cooled, especially if you plan to reduce it further for sauces. As the liquid reduces over the long simmer, the existing flavors concentrate, and adding salt too early guarantees an overly salty final product.
How long can I safely store homemade chicken stock, and can I freeze it?
Properly made stock is safe to store in the refrigerator for up to 5 days, provided it is cooled quickly after cooking. Stock freezes exceptionally well and maintains its quality for 6 to 9 months when stored in airtight containers, such as specialized freezer bags or ice cube trays for smaller portions.
Why is my stock oily or greasy, and how do I remove the excess fat?
Excessive fat is usually a result of using too many skin-on parts or stirring too vigorously while simmering. The easiest and most effective way to remove it is to refrigerate the strained stock overnight, allowing the fat to solidify into a thick, easily removable cap on the surface.
How long is the ideal simmering time for classic chicken stock?
While some lighter stocks can be done in four hours, a deeply flavored, gelatinous chicken stock benefits from simmering between 6 to 8 hours. This extended period ensures that the maximum amount of flavor and collagen is extracted from the bones and connective tissues.
Can I reuse the bones or vegetables after the first batch of stock is finished?
No, once the stock has simmered for several hours, the bones, meat, and vegetables have given up almost all their flavor and nutritional value to the liquid. For the best flavor and quality, discard the solids and start with fresh ingredients for your next batch of stock.
Ultimate Homemade Chicken Stock
Ingredients:
Instructions:
Nutrition Facts:
| Calories | 23 kcal |
|---|---|
| Protein | 1.1 g |
| Fat | 0.4 g |
| Carbs | 4.4 g |
