Heavenly Vanilla Layer Cake with Buttercream Frosting
- Bake Delicious Vanilla Layer Cake Today!
- Your Ultimate Essential Ingredients Guide
- Professional Cooking Method: Nail Your Next Cake Adventure
- Pro Tips & Secrets to Master Your Vanilla Layer Cake
- Perfect Presentation
- Storage & Make-Ahead
- Creative Variations
- Complete Nutrition Guide
- Frequently Asked Questions
- 📝 Recipe Card
Bake Delicious Vanilla Layer Cake Today!
A Slice of Nostalgia
Have you ever found yourself standing in the kitchen, just inhaling the sweet, buttery scent of a cake baking? i’m talking about that classic vanilla layer cake that instantly takes you back to childhood birthday parties.
You’d blow out the candles, make a wish, and hope for another slice. i remember my mom whipping up a fluffy vanilla cake recipe that always stole the show.
Honestly, i could still taste it just thinking about it now. if you're ready to create that same kind of joy in your own kitchen, it’s time to bake delicious vanilla layer cake today!
A Quick Look at the Cake's Journey
Vanilla layer cake has been delighting taste buds for centuries. this dessert is like a warm hug on a plate! originating in the 19th century, it has graced countless celebrations, from weddings to birthdays.
Nowadays, it’s a staple in homes across america, perfect for any joyous occasion or simply to treat yourself.
Now, don’t let the thought of baking intimidate you! while this cake has a medium difficulty level, it’s totally doable, even if you’re not a pro in the kitchen.
You’ll need about 2 hours total (with some cooling time), and trust me, the results are worth every minute.
And the cost? super budget friendly! you can whip this beauty up without breaking the bank.
Why You’ll Love This Cake
Let’s talk health, which might seem odd when discussing a cake! this moist cake recipe provides a nice balance. it’s all about enjoying indulgence while still being approachable.
The ingredients? straightforward and most likely already in that kitchen cupboard of yours!
Plus, it’s a fantastic way to celebrate special occasions. imagine your little one’s birthday party, where every kiddo is eyeing that fluffy vanilla cake like it’s the prize at the bottom of a cereal box.
It’s not just a dessert; it’s an experience!
What makes this cake stand out is its versatility. you can layer delicious frosting and experiment with flavors. want to jazz it up? go wild with seasonal cake recipes and layering techniques! this cake is all about your creativity be bold or keep it classic.
The Perfect Mix of Comfort and Flavor
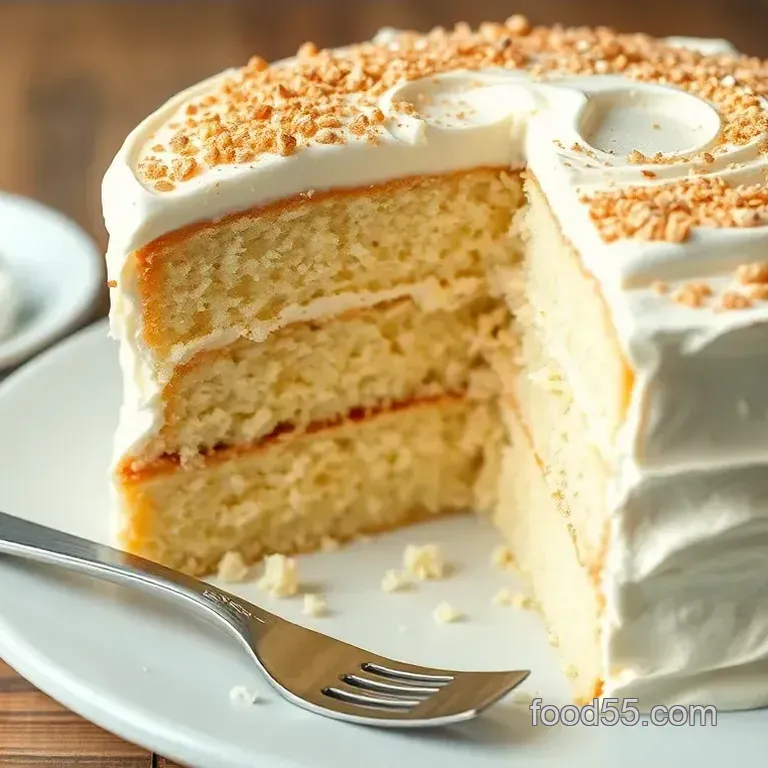
A warm, golden slice of cake drizzled in creamy buttercream frosting is the definition of a sweet treat for loved ones.
Not only does it look good, but it also tastes divine. the vanilla extract adds a comforting depth that will have everyone asking for the recipe.
You know what else is great? You can easily incorporate variations, like making it gluten-free or even vegan. Just switch up some ingredients, and voila, you've got customized cake goodness!
Wrapping It Up
So, whether you're a baking newbie or a seasoned chef, this vanilla cake recipe will be your go-to for any sweet celebration.
Just channel your inner baker and remember some essential cake baking techniques like checking baking times and temperatures, so you don't accidentally create a new type of dessert known as “cake brick!”
Once you’ve prepped your ingredients, you’ll be ready to dive into the fun! all that’s left is to gather your pans, preheat the oven, and get those mixing bowls ready.
I can't wait for you to see how amazing it feels when you proudly slice into your own homemade vanilla cake.
So, let’s roll up our sleeves and check out the ingredients section! Your very own Heavenly Vanilla Layer Cake with Buttercream Frosting is just a whisk away!
Your Ultimate Essential Ingredients Guide
When it comes to baking, having the right ingredients makes all the difference. and if you wanna bake delicious vanilla layer cake today , knowing what you need in your pantry and how to use it can elevate your sweet game like a pro!
let’s dive into some essential ingredients, sprinkle in some advice, and get you set for success.
Premium Core Components
First things first, let’s talk measurements! For your classic layer cake, you need precision, so here are some handy measurements in both US and metric:
- 2 ½ cups (312 g) all-purpose flour
- 1 ½ cups (300 g) granulated sugar
- 1 cup (226 g) unsalted butter, softened
Now that we've got the math out of the way, how do you know your ingredients are top-notch? look for quality indicators .
For instance, make sure your butter is fresh and creamy, not crumbly. and don’t even think about using expired vanilla extract! remember, fresher ingredients mean a fluffy vanilla cake that sings with flavor.
As for storage guidelines , most dry goods can hang out in your pantry, but keep that butter in the fridge.
It'll stay fresh for months! need some freshness tips? stick to whole spices and grind them at home for the best flavors.
Trust me on this; your cake will thank you later!
Signature Seasoning Blend
Every cake needs a little pizzazz! When you’re creating a vanilla cake recipe , some essential spices can turn your cake into a showstopper. Think about incorporating:
- A pinch of nutmeg or cinnamon to enhance the vanilla
- A dash of almond extract for a unique twist
For herbs, while they might seem out of place in a cake, a sprinkle of fresh rosemary can surprise your taste buds in a savory twist on desserts.
Don't forget your aromatics: vanilla beans or even citrus zest adds a delightful fragrance!
Smart Substitutions
Now, life happens, and sometimes you don’t have all the ingredients on hand. no sweat! let’s talk smart substitutions . if you’re out of eggs, try using flaxseed meal or applesauce .
It works for a gluten-free vanilla cake too!
For dedicated bakers out there, consider these common alternatives:
- Instead of whole milk, go for almond or oat milk .
And if you’re in a pinch, you can substitute baking powder with baking soda. Just remember to balance it with a little vinegar or lemon juice to get that perfect rise!
Kitchen Equipment Essentials
Don’t you dare underestimate your equipment! To achieve that perfect cake texture, you’ll need the right tools. Here’s your must have list:
- Two round 9 inch cake pans (don’t skimp on quality here!)
- An electric mixer —seriously, it’s worth it for those fluffy mixes.
- A rubber spatula for scraping every drop of that delicious batter!
If you don’t have a particular tool, don’t fret! a good ol' whisk can substitute for an electric mixer when you're feeling strong.
For prep, simple bowls will do, but have one or two large ones on hand to make life easier.
Wrapping It Up
Now that you’re armed with the essentials, you’re ready to tackle easy baking recipes like a champ! remember, baking tips and tricks can transform even the simplest dish into a crowd pleaser.
Check your ingredients, have fun playing around with flavors, and most importantly, don’t stress!
So, whether it’s for a birthday party or just a casual family gathering, making a moist cake recipe can bring smiles all around.
Don’t forget to decorate that layer cake with delightful frosting techniques! the world is your oyster when it comes to presentation!
Now let’s roll up those sleeves because it’s time to dive into the how-to of our Heavenly Vanilla Layer Cake with Buttercream Frosting ! 🍰 Are you ready? Let's bake!
Professional Cooking Method: Nail Your Next Cake Adventure
When it comes to baking, especially for celebrations, it’s all about nailing those cooking methods. Today, I’m diving deep into how you can Bake Delicious Vanilla Layer Cake Today! Yes, you heard that right! Grab your apron, and let’s get this party started!
Essential Preparation Steps
First things first, let’s talk about mise en place . this french term just means “everything in its place.” so before you even get your cake batter going, measure out your ingredients.
Having everything ready helps you avoid scrambling around looking for stuff. trust me, it’s a total game changer. it'll streamline your process and prevent mishaps.
Now, time management. it’s key in the kitchen. you’ll want to mix and bake efficiently. while the cakes are baking, you can prepare your buttercream frosting recipe .
When they come out of the oven, you’ll have ample time for cooling before slathering on that fluffy goodness.
Organize your workspace! You've gotta love a tidy counter. Keep tools close and clean as you go. No one wants a sticky disaster.
Oh, and don’t forget safety! Always use oven mitts when dealing with hot pans. Burns are not cute, and you want to keep your hands ready for more delicious baking!
step-by-step Process
Ready for the fun part? Let’s break it down step-by-step:
- Preheat your oven to 350° F ( 175° C) ; it’s all about that perfect baking temperature.
- Prep your pans : Grease and flour two round 9 inch cake pans. This ensures your cakes don’t stick!
- Mix your dry ingredients . Flour, baking powder, and salt go in a bowl. Sift ‘em if you’re fancy!
- Cream butter and sugar for about 5 minutes until light and fluffy. Seriously, this is where the texture magic happens.
- Add in your eggs one at a time. Be sure to beat well after each.
- Gradually incorporate the flour and milk , alternating until it's all just combined. Again, mix gently so your cake stays light and airy.
- Divide the batter evenly into your pans and pop ‘em in the oven.
- Bake for 25- 30 minutes . You can test doneness with a toothpick. A few moist crumbs but no gooey batter? You’re golden!
- Cool your cakes on a wire rack for 10 minutes before transferring them out of the pans.
These visuals cue you when your cake's ready. Trust your instincts!
Expert Techniques
Now let’s get all chef-y here with some expert tips. a biggie is quality checkpoints. check that your ingredients are fresh.
Old baking powder is a no-no. also, when creaming butter and sugar, ensure it’s fluffy that’s your secret to a moist cake recipe .
If you notice your frosting is too sweet, a pinch of salt can balance it out. Always have your cake baking techniques on lock!
Now, troubleshooting! If your cake domes in the middle, try reducing the oven temperature next time. Also, be mindful that baking times might vary by oven. It’s a real life fact, folks!
Success Strategies
Ah, the slippery slope of common mistakes. One big one is overmixing. You want that batter combined but still airy. Use a gentle hand like you’re on a first date!
Quality assurance? Always taste your batter and frosting. Yes, I said it. Make sure it’s what you want before slathering everything together!
Hate waiting? here’s a pro tip: you can make-ahead options by freezing the cakes after baking. just wrap ‘em tightly! take ‘em out the night before your party and frost when they’re defrosted.
Additional Information
So there you go! with this approach to baking, you’ll feel like a pro in no time. just remember these little nuggets of wisdom, and you’ll be on your way to creating delicious vanilla layer cake that knocks everyone’s socks off.
Whether it’s for a kid’s birthday or a simple sweet treat for a loved one, this method will make your classic layer cake shine.
Let’s get into the next section to explore even more tips and tricks to elevate your baking game!
Pro Tips & Secrets to Master Your Vanilla Layer Cake
When i first decided to tackle a classic vanilla cake recipe , i thought, "how hard can it be?" well, let me tell ya it’s not rocket science, but it does come with its little quirks.
Here are some of my personal insights and secrets to help you bake delicious vanilla layer cake today!
Chef's Personal Insights
Start with room temperature ingredients: trust me on this room temperature butter and eggs are your friends. this step makes everything blend smoother and creates that light and fluffy texture we all crave in a fluffy vanilla cake .
Don’t rush the mixing: sure, you might wonder why you can't just dump everything into a bowl and mix, right? but those mixing techniques matter! creaming butter and sugar until light and fluffy really does something magical for the cake.
Time Saving Techniques
Prep pans in advance: my number one time saver? prepping the cake pans while your oven preheats! a quick grease and flour job not only saves you a step later but also keeps your cake from sticking.
Flavor Enhancement Tips
Quality Counts: Use a good vanilla extract. Honestly, don't cheap out here. The flavor in your homemade vanilla cake will shine through. It’s the superstar of this show!
Experiment with Zest: Feeling adventurous? Add lemon or orange zest for a citrusy twist. It’ll elevate your cake instantly and surprise your guests!
Presentation Advice
Layer it right: when you do the layering cakes with frosting , take your time. use an offset spatula for that smooth finish, and be sure to flake or crumble the top layer for cool textures.
Believe me, it’s all about that eye candy!
Perfect Presentation
Plating Techniques
When you serve your cake, consider using a cake stand . it elevates not just the cake but your entire dessert game.
A simple white plate can really make those vibrant colors pop!
Garnish Ideas
For garnishing, think seasonal fruits or a sprinkle of edible flowers. A few fresh strawberries on top, and poof! Instant classy vibe.
Color Combinations
A pastel sheer or bright frosting works wonders too. Think light pink or mint green! They’re fun and give your cake that festive look, especially for birthday cake ideas.
Visual Appeal Tips
An easy trick? Use a bright white buttercream frosting recipe as your base. It really showcases whatever color or decor you choose!
Storage & make-ahead
Storage Guidelines
Store this beautiful cake in an airtight container at room temperature. Trust me, you want to keep that moist cake recipe fresh!
Preservation Methods
If you have leftovers what a bummer! you can wrap individual slices in plastic wrap and toss them in the fridge. They’ll last for about 3-4 days.
Reheating Instructions
Want to enjoy it warmer? Just pop that slice in the microwave for about 10-15 seconds. It’ll be like a freshly baked cake again!
Freshness Duration
Remember, cakes do have a peak freshness time. Enjoy your cake in the first couple of days for the best flavor and texture.
Creative Variations
Flavor Adaptations
Switch things up! Throw in some almond extract for a twist, or replace some of the flour with cocoa for a chocolate vanilla fusion!
Dietary Modifications
Got friends who can’t do gluten? You can totally convert the recipe into a gluten-free vanilla cake using almond or coconut flour. Let’s make sure everyone gets a slice, right?
Seasonal Twists
For summer or fall, how about a spiced vanilla cake ? Toss in some cinnamon or nutmeg for that cozy vibe.
Regional Variations
Feeling like a culinary road trip? Go for a Southern vanilla cake by adding a splash of buttermilk in your mix. It gives your cake that unique back-of-the-house charm!
Complete Nutrition Guide
Detailed Breakdown
So you want to know what’s in your delicious creation? Here's the lowdown: One slice offers about 380 calories —not too shabby for a sweet treat.
Health Benefits
Enjoying a slice of cake can be a fantastic mood booster. It's true! A little indulgence goes a long way.
Dietary Considerations
Watch your portions; have fun, but don’t go overboard!
Portion Guidance
Stick with about one slice as a serving. Trust me; it’s just the right amount to satisfy your sweet tooth without guilt.
Let’s wrap it up, friends. making a homemade vanilla cake isn’t just about baking. it’s about creating memories and sweet treats for loved ones.
So, gather your ingredients and get ready to bake delicious vanilla layer cake today ! i promise you’ll be so proud when that cake comes out of the oven, and you’ll get requests for seconds if not thirds! happy baking!
Frequently Asked Questions
How can I ensure my Vanilla Layer Cake turns out perfectly fluffy?
To bake a delicious vanilla layer cake today with a fluffy texture, ensure that your baking ingredients, such as butter and eggs, are at room temperature. Additionally, be careful not to overmix your batter once you incorporate the flour, as this can result in a dense cake.
What are some great variations I can try for this Vanilla Layer Cake?
For delightful variations, consider adding lemon zest for a fresh citrus flavor or switching to chocolate frosting for a richer dessert. You might also incorporate sprinkles or fruit purees into the frosting for added visual appeal and flavor!
How should I store the leftover vanilla layer cake?
To store your leftover vanilla layer cake, wrap it tightly in plastic wrap or place it in an airtight container and keep it in the refrigerator. This will help retain its moisture and freshness; it should last for about 3-5 days. You can also freeze slices for longer storage, up to three months.
Can I use substitutes for the ingredients in this recipe?
Yes, you can definitely substitute ingredients! For a dairy-free option, use almond milk instead of whole milk, or replace the unsalted butter with coconut oil for a vegan variant. Additionally, you can substitute half of the all-purpose flour with almond flour for a nuttier flavor.
What tips can help me decorate my Vanilla Layer Cake like a pro?
To achieve a professional look, ensure your cake layers are completely cooled before frosting. Use an offset spatula for smooth application and a cake turntable to help decorate evenly. Finally, consider using a piping bag for intricate designs or to add decorative borders around the cake for a stunning presentation.
How many servings does this Vanilla Layer Cake recipe provide?
This delicious vanilla layer cake recipe yields approximately 10-12 servings, making it perfect for gatherings or celebrations. If you're serving a smaller group, you can easily adjust the portion sizes or store leftovers for later enjoyment!
Bake Delicious Vanilla Layer Cake Today
Ingredients:
Instructions:
Nutrition Facts:
| Calories | 380 |
|---|---|
| Fat | 20g |
| Fiber | 0g |
