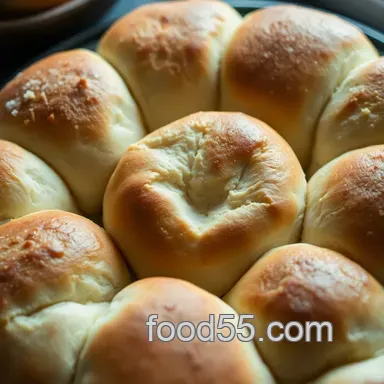
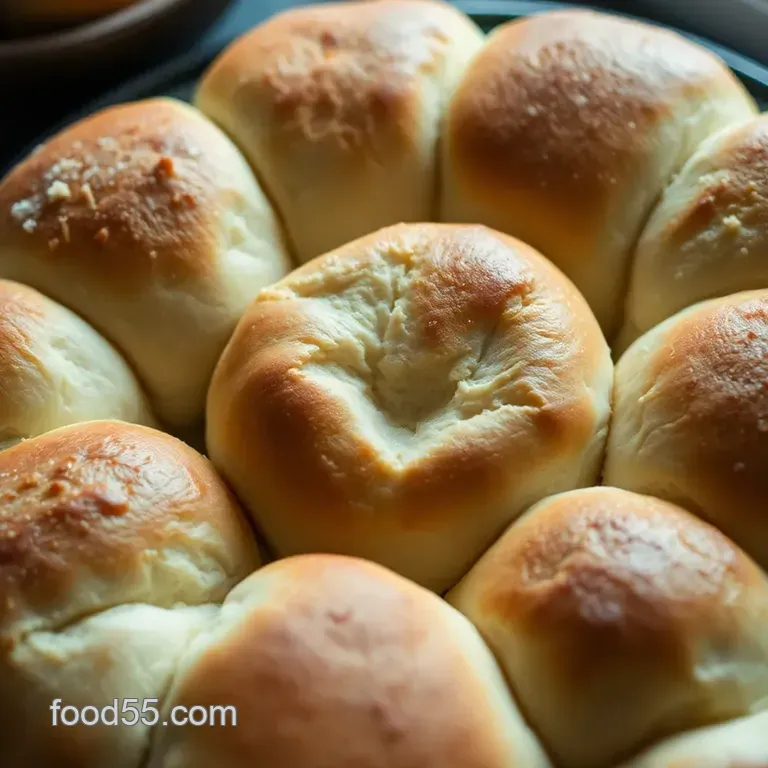
Fluffy Sourdough Dinner Rolls

- The Magic of Sourdough Dinner Rolls
- Sourdough's Flavorful Roots
- Why You’ll Love These Rolls
- Baking Your Sourdough Rolls
- Essential Ingredients Guide
- Mastering the Art of Professional Cooking with Sourdough Dinner Rolls
- Pro Tips & Secrets for Perfect Sourdough Dinner Rolls
- Perfect Presentation: Elevate Your Rolls
- Storage & Make-Ahead Strategies
- Creative Variations to Spice Things Up
- Complete Nutrition Guide
- Frequently Asked Questions
- 📝 Recipe Card
The Magic of Sourdough Dinner Rolls
Have you ever taken a bite of a warm, homemade dinner roll and felt the world just stop for a moment? i remember one holiday dinner when my grandma pulled out her fluffy sourdough dinner rolls , and honestly, it was like tasting a fluffy cloud! i mean, nothing beats that first warm bite slathered with butter, right?
if you’ve got a sourdough starter lying around, then you’re in for a real treat with this recipe.
Let’s dive into this mouthwatering journey together!
Sourdough's Flavorful Roots
The fascination with sourdough breads stretches back centuries. it dates all the way to ancient egypt, where bakers discovered the magic of wild yeast.
Fast forward to today, and you’ll find that sourdough is all the rage, with everyone embracing traditional sourdough baking . these soft bread rolls have become incredibly popular, thanks to their delectable tang and generous flakiness.
In a world of quick yeast recipes, this easy sourdough recipe adds a personal touch to any meal.
Now, let’s get real about the details. this recipe isn’t a 15-minute deal. you’re looking at about 20 minutes of active prep time, plus 4 to 12 hours of bulk fermentation.
Yup, patience is a virtue when it comes to sourdough. don’t let that scare you; it’s totally worth the wait! and you can certainly make the dough overnight.
With this recipe yielding a dozen rolls, you might want to grab a friend to share the deliciousness. trust me, a group of fluffy golden crust rolls will vanish in no time!
Why You’ll Love These Rolls
Alright, let’s talk about why these sourdough dinner rolls belong on your dinner table. first off, they pack a nutritious punch ! made from ingredients you can pronounce, you’ll feel good enjoying these rolls.
The fermentation process not only makes them fluffy but also helps improve digestion, thanks to those lovely probiotic properties from the sourdough starter .
Plus, they’re versatile enough for any occasion be it a holiday feast, a potluck, or just a cozy sunday dinner.
One of the best dinner roll recipes out there, these rolls will wow your guests! you could serve them with a rich gravy, dip them into a warm bowl of soup, or even use them as slider buns filled with all your favorite toppings.
And as a bonus, these rolls have an unrivaled texture soft, pillowy centers are balanced with a crusty exterior that’s just begging to be broken apart.
Honestly, who can resist that?
Baking Your Sourdough Rolls
As we prep for the fun part the ingredients let’s keep a few baking tips in mind. getting that ideal fluffy texture relies on proper fermentation techniques .
You’ll want to keep an eye on your dough; it should rise beautifully and double in size. and shaping? practice makes perfect! take a little time to make those rolls round and smooth.
It seriously pays off in the final product.
To get you excited, here's a sneak peek at what you’ll need: all-purpose flour , water , active sourdough starter , salt , and a little unsalted butter .
Simple, right? these ingredients are the foundation for creating your heaven-in-a-bite rolls.
So, what are you waiting for? let’s whip up some mouthwatering melt-in-your mouth rolls ! grab your sourdough starter , and stay tuned for the next section where we’ll break down the ingredients and steps for this delightful recipe.
You’re gonna love it!
Essential Ingredients Guide
When it comes to baking the best dinner roll recipe , like fluffy sourdough dinner rolls , knowing your ingredients is half the battle.
Let’s dive into the world of essential ingredients, signatures seasonings, smart substitutions, and handy kitchen equipment. believe me, understanding these fundamentals will make your sourdough baking experience so much smoother!
Premium Core Components
First things first, we need to nail down the core ingredients that make up your dough. For our fluffy sourdough dinner rolls, you’ll need:
- 4 cups (480g) all-purpose flour
- 1 cup (240ml) water, room temperature
- 1 cup (240g) active sourdough starter
- 1 teaspoon (6g) salt
- 2 tablespoons (28g) unsalted butter, melted
Quality indicators are key, people! look for flour that feels soft and fluffy. your starter should be bubbly and ready to party.
And for butter? go for unsalted, not that margarine nonsense unless you're dairy-free, of course.
Now, storage wise, keep that flour in a cool, dark place. It remains good for about a year. But if you notice any weird odors, toss it!
Freshness tip : Always give your starter a good sniff and check for any off smells. You want it to smell tangy but fresh.
Signature Seasoning Blend
Now let’s spice things up! a signature seasoning blend can really elevate those rolls. while plain is great, adding herbs or spices really enhances the flavors.
Think garlic powder, rosemary, or even a pinch of red pepper flakes. these flavor enhancers work wonders with those melt-in-your mouth rolls , adding an unexpected twist.
Don’t forget about regional variations ! in the south, you might add a little honey for sweetness. in the northeast, local farmers' market herbs could bring a fresh vibe.
Mix and match as you see fit!
Smart Substitutions
Sometimes, life happens and we need smart substitutions ! if you’re low on flour, using half whole wheat and half all-purpose can give your rolls a nutty touch.
Want to go gluten-free? look for a blend that fits your dietary needs and adjust the liquid if necessary.
Got no sourdough starter? no worries! use 1 packet of instant yeast (about 2¼ teaspoons) instead. it'll give you that rise, although it won’t have the tang of the traditional sourdough baking method.
And here’s a quick tip: If you ever need to replace butter, olive oil works like a charm, especially if you're aiming for dairy-free dough.
Kitchen Equipment Essentials
Before you get rolling (literally!), let’s chat about your kitchen equipment essentials . You don’t need the fanciest gear, but a few must haves will make your journey much easier:
- Mixing bowl
- Dough scraper
- Kitchen scale (for precise measurements)
- Baking sheet
- Clean kitchen towel or plastic wrap
Having the right tools is like having a trusty sidekick in your kitchen. They’ll help you achieve that golden crust and soft bread rolls you dream about!
And, hey, don’t stress if you don’t have a dough scraper. A spatula does the trick in a pinch. Just go with the flow!
As we wrap this up, I hope this essential ingredients guide has helped you grasp the basics. Picking the right elements makes all the difference between crusty dinner rolls and flat flour disks!
Ready to dive into the sourdough dinner rolls recipe ? let's roll up our sleeves and get started with those step-by-step instructions.
Trust me, by the end of this, you'll be serving up rolls that not even the neighbors can resist!
Mastering the Art of Professional Cooking with Sourdough Dinner Rolls
If you’ve ever bitten into a fresh, warm sourdough dinner roll , you know there’s something special about that fluffy texture and tangy flavor.
It's like a hug for your taste buds, right? and honestly, mastering this recipe is key for anyone serious about home baking.
Let's dive into the professional cooking methods that will elevate your homemade rolls to next level goodness.
Essential Preparation Steps
Before you start whipping up your dough, let’s talk mise en place . it’s a fancy french term that means “everything in its place,” and trust me, it’s a lifesaver.
Gather all your ingredients first: flour, water, active sourdough starter , salt, and melted butter. measure them out and have them ready to go.
Time management is super important. you might think, “oh, this will only take an hour,” but don’t forget about the bulk fermentation , which can take anywhere from 4 to 12 hours or even overnight! keep your schedule flexible.
Organization is everything. clean your workspace and layout your tools: mixing bowls, baking sheets, and a dough scraper. oh, and let’s not skip safety! always keep a clean kitchen and handle your equipment with care to avoid any accidents.
step-by-step Process
Now that you’re armed with everything you need, let’s break down the process:
Prepare the Dough: In a mixing bowl, combine 1 cup (240g) of active sourdough starter , 1 cup (240ml) of room temperature water, and 2 tablespoons (28g) of melted butter.
Add the Flour: Gradually mix in 4 cups (480g) of all-purpose flour and 1 teaspoon (6g) of salt until no dry flour is visible.
Knead: Turn the dough onto a floured surface and knead for about 8- 10 minutes . You’re looking for that smooth and elastic feel.
Bulk Fermentation: Transfer it to a greased bowl, cover it well, and let it rest somewhere warm for here’s that wait— 4- 12 hours . You want it to double in size.
Shape the Rolls: After the dough has risen, deflate it gently and turn it out onto a floured surface. Divide it into 12 equal pieces and shape them into balls.
Final Proof: Place your shaped rolls on a baking sheet, giving them ample space to breathe. Cover and let them rise for another 1- 2 hours until puffy.
Bake: Preheat your oven to 375° F ( 190° C) . Bake those beauties for 20- 25 minutes until they’re golden brown and sound hollow when tapped.
Cool and Serve: Brush with more melted butter, and let them cool just a bit before serving.
Expert Techniques
Here are some pro tips to keep in mind:
- Keep an eye on the temperature. Your rolls thrive best around 70- 75° F while fermenting.
- Precision is key. Make sure to weigh your ingredients for the best results. Those golden crust rolls don’t happen by accident!
- If they don’t rise as expected, don’t fret. Just practice! Each batch gets you closer to perfection.
Success Strategies
Avoiding common mistakes can save your baking day. Don’t rush the fermentation; it's crucial for that rich flavor and rise. Also, keep your dough well covered during this time to avoid drying out.
Want to guarantee perfect results? use a kitchen scale to weigh everything. and don’t forget these soft bread rolls can be made ahead of time! prepare them the night before and pop them in the oven fresh in the morning for a killer brunch.
Additional Information
So here you have it you're not just creating homemade rolls ; you're mastering the craft of baking with sourdough ! whether serving them warm with butter or using them as a base for savory sliders, these rolls are set to be the star of your table.
No need for fancy equipment or hours of training, just this easy sourdough recipe and a bit of practice. happy baking! you’ll be a pro in no time, impressing friends and family with your delicious, melt-in-your mouth rolls!
Now, if you’re looking for more tips, tricks, or variations on this recipe, keep on reading! maybe explore how to tweak flavors or perfect your shaping technique there's always more to learn in the wonderful world of baking.
Pro Tips & Secrets for Perfect Sourdough Dinner Rolls
Hey friend! let's chat about some pro tips and secrets to knock your sourdough dinner rolls recipe out of the park.
I mean, who doesn't want those buttery, melt-in-your mouth rolls that everyone raves about at the dinner table? here’s how to up your roll game!
Chef’s Personal Insights
First off, don’t rush the fermentation . trust me on this! i learned the hard way that patience pays off big time.
Letting that sourdough starter work its magic overnight can turn those rolls into fluffy delights. also, don’t skimp on the butter! after baking, brush on some melted butter for that extra rich flavor.
You’ll thank me later.
Time Saving Techniques
Busy nights? i feel you. to save time, mix up your dough the night before. just let it bulk ferment overnight, and shape those rolls in the morning.
Or, you can make your dough, shape it, and stick it in the fridge overnight for a cold fermentation . just pull them out, let them rise for an hour, and bake.
Easy peasy!
Flavor Enhancement Tips
Wanna spice things up? try adding herbs like rosemary or garlic powder to your dough. oh my gosh, the aroma! or sprinkle in some cheese for a savory twist.
You can even experiment with different seasonings based on the meal you'll serve with these fluffy bread rolls. talk about versatility!
Presentation Advice
Now, let’s make those rolls look as good as they taste! once they are out of the oven, arrange them on a nice platter.
Drizzle with a bit of olive oil or a sprinkle of sea salt for that rustic vibe. remember, we eat with our eyes first!
Perfect Presentation: Elevate Your Rolls
You know that feeling when you see a dish that just pops? It’s all about the presentation .
Plating Techniques
Place the rolls on a wooden board or a pretty serving dish. you can even create a little dipping station with herb infused oils or honeys.
It’ll make your dinner rolls the star of the show!
Garnish Ideas
Fresh herbs can be your best friend. a little sprinkle of parsley or thyme adds that pop of color and a hint of freshness.
Even a few colorful cherry tomatoes on the side can brighten the plate.
Color Combinations
Golden crust rolls always catch the eye. Think of earthy tones with your bread beside vibrant veggies. It’s all about that contrast!
Storage & make-ahead Strategies
Alright, let’s talk about keeping those rich buttery rolls fresh.
Storage Guidelines
Once they cool, store any uneaten rolls in an airtight container. they’ll last for about 2-3 days on the counter, or a week in the fridge if you want to extend the life of those beauties.
Preservation Methods
Freeze them! just wrap the rolls tightly in plastic wrap and pop them in a freezer bag. when you're ready for freshly baked rolls, let them thaw at room temperature, then warm them in the oven.
Reheating Instructions
To reheat, place them in a preheated oven at 350° F ( 175° C) for about 10 minutes. They’ll regain that fabulous crusty exterior!
Creative Variations to Spice Things Up
Not feeling one flavor? No problem! Here are some dinner roll variations to try.
Flavor Adaptations
Get creative! How about a little jalapeño for some heat? Or you can even create dessert rolls by adding chocolate chips and a sprinkle of cinnamon. Yum!
Dietary Modifications
Going gluten-free? No sweat! There are some great gluten-free flour mixes that mimic regular flour pretty closely. Just adjust your liquid as needed.
Seasonal Twists
In the fall, try pumpkin puree or spices like nutmeg. Summer? Toss in some fresh herbs or even a hint of lemon zest.
Complete Nutrition Guide
Now, I know you’re curious about the health benefits of these artisan bread rolls .
Detailed Breakdown
Each roll has approximately 150 calories. They pack about 4g of protein . That’s pretty good considering they’re such a treat!
Health Benefits
Using your sourdough starter gives you some added probiotics, which are great for the gut. Plus, the long fermentation process makes these bread rolls easier to digest than your regular rolls.
Portion Guidance
Stick to one or two rolls per serving as a side. They’re rich, and trust me, you'll want to save room for dinner!
Encouraging Conclusion
So there you have it, friends! with these tips and variations, your sourdough dinner rolls recipe will not only taste amazing, but they’ll also look like a million bucks on the table.
Don't stress about the process; baking can be a fun experience. go ahead, unleash your inner baker, and enjoy every warm, buttery bite you create.
Happy baking!
Frequently Asked Questions
What makes this sourdough dinner rolls recipe different from regular dinner rolls?
This sourdough dinner rolls recipe incorporates a sourdough starter, which not only adds a unique tangy flavor but also enhances the rolls' texture, making them fluffier and more flavorful than standard yeast rolls. The fermentation process also contributes to better digestibility and a richer taste.
How do I know when my sourdough dinner rolls are done baking?
The rolls are finished baking when they are golden brown and sound hollow when tapped on the bottom. Additionally, they should feel firm to the touch and have a slightly crusty exterior. Always ensure they are fully baked to avoid a gummy center.
Can I make these sourdough dinner rolls in advance?
Yes, you can prepare the dough in advance! After shaping the rolls, place them in the refrigerator for overnight proofing. When ready to bake, let them sit at room temperature for about an hour before preheating the oven, which helps them achieve the perfect rise.
What are some good variations for this sourdough dinner rolls recipe?
You can easily customize your rolls by adding herbs like rosemary or garlic powder to the dough for added flavor, or incorporating cheeses for a cheesy variant. For a sweet twist, try adding some cinnamon and sugar to turn them into a delightful breakfast roll.
How should I store leftover sourdough dinner rolls?
Leftover sourdough dinner rolls can be stored in an airtight container at room temperature for up to 2 days. For longer storage, freeze them in a freezer safe bag for up to 3 months. To reheat, simply wrap them in foil and warm in the oven.
Are these sourdough dinner rolls suitable for people with dietary restrictions?
This recipe can be adapted for various dietary needs. For gluten-free rolls, substitute with a gluten-free flour blend and adjust the liquid as needed. Additionally, you can replace the butter with olive oil for a dairy-free version.
Fluffy Sourdough Dinner Rolls