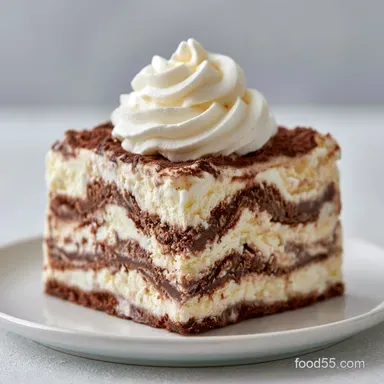
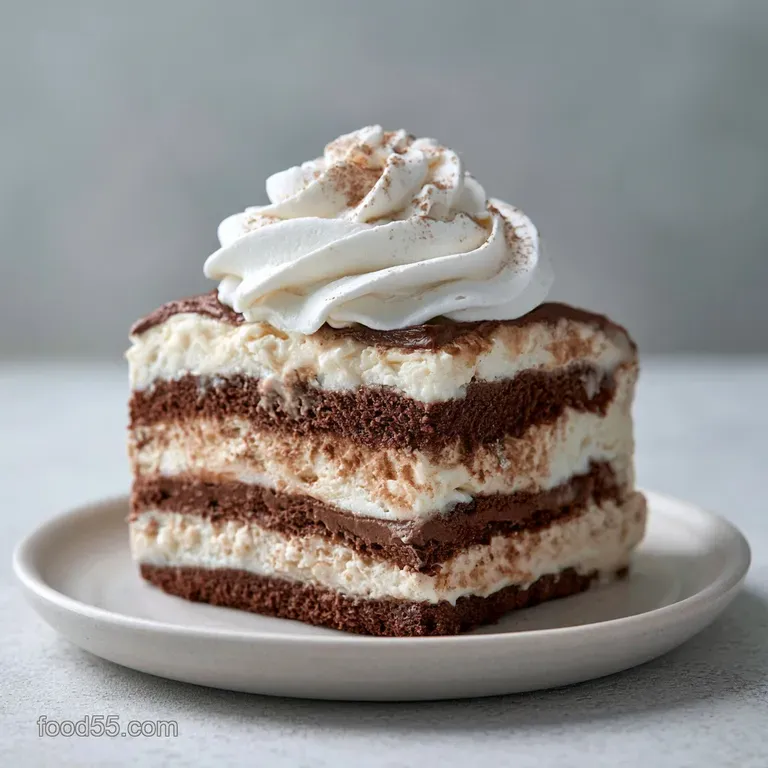
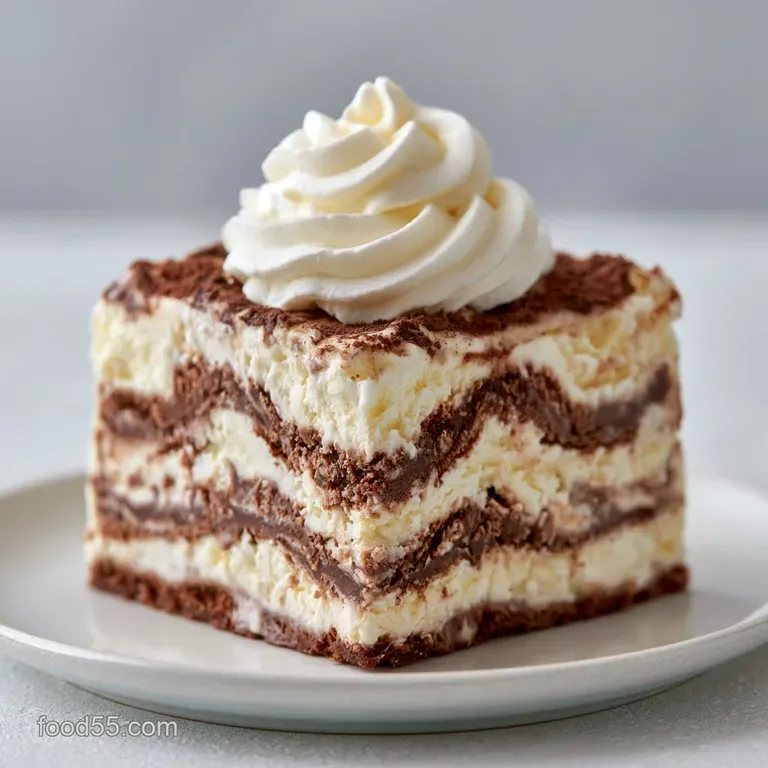
Layered Ice Cream Cake: Silky and Crisp
- Time:30 minutes active + 6 hours 30 mins chilling = Total 6 hours 30 mins
- Flavor/Texture Hook: Shatteringly crisp Oreo base paired with silky, frozen cream
- Perfect for: Summer birthdays, potlucks, or a high reward weekend project
The Layered Ice Cream Cake
That sound of an Oreo cookie snapping in half is basically the starting gun for dessert time in my house. I remember the first time I tried to assemble one of these for a family get together. I was way too impatient and tried to spread ice cream that was still rock hard.
I ended up gouging deep trenches into the crust, and the whole thing looked more like a frozen construction site than a cake. It was a total mess, but the taste was still there, which is why I knew I had to figure out the actual technique.
The real trick isn't about fancy equipment, it's all about the temperature of your ingredients. Once I realized that "slightly softened" means the ice cream should yield to a spoon but not be melty, everything changed. Now, when I slice into it, the layers are sharp and the textures are distinct.
You can expect a dessert that feels indulgent but isn't overly sweet. The bitterness of the chocolate cookies cuts through the rich vanilla and chocolate ice creams. It's the kind of treat that brings people together around a table, laughing while they try to get the biggest slice of the creamy middle.
Secrets to Stable Layers
Getting those clean lines is where most people struggle. To keep things from sliding, you have to respect the freeze times. If you rush the crust or the first layer of ice cream, you'll end up with a blurred mixture rather than a tiered look. For those who love a structured dessert, you might appreciate the precision of a Chocolate Swiss Roll, but this cake is all about the cold set.
Fat Saturation: Higher fat content in the heavy cream and premium ice cream prevents large ice crystals from forming. This keeps the texture velvety rather than grainy.
Thermal Shock: Flash freezing the crust before adding ice cream prevents the butter from soaking into the cream. It keeps the base shatter crisp.
Air Incorporation: Whipping the cream to stiff peaks creates a structural foam. This allows the topping to hold its shape without collapsing under the weight of toppings.
Temperature Gradient: Softening the ice cream slightly allows for a flush fit against the pan edges. This eliminates air pockets that can cause the cake to lean.
| Method | Prep Time | Texture | Best For |
|---|---|---|---|
| Fast (store-bought) | 15 mins | Soft, airy | Last minute guests |
| Classic (Homemade) | 30 mins | Dense, velvety | Special occasions |
| Semi Homemade | 20 mins | Mixed | Weeknight cravings |
The Essential Components
The heavy lifting in this recipe is done by the Oreo cookies. They aren't just for flavor; they provide the structural foundation. According to Serious Eats, the high sugar and fat content in processed cookies helps them maintain a snap even when frozen.
| Ingredient | Science Role | Pro Secret |
|---|---|---|
| Oreo Crumbs | Structural Base | Pulse them fine for a tighter, more professional crust |
| Heavy Cream | Aeration/Volume | Use a metal bowl chilled in the freezer for faster peaks |
| Unsalted Butter | Binder | Melt it slowly to avoid separating the milk solids |
| Ice Cream | Body/Flavor | Let it sit on the counter for exactly 10-15 minutes |
Tools for the Job
You don't need a professional kitchen, but a few specific tools make this way easier. I always use a 9x13-inch baking pan because it's the standard for a crowd. The parchment paper "sling" is non negotiable; it's the only way to get the cake out of the pan without it breaking into a million pieces.
I highly recommend an offset spatula. It's a lifesaver for smoothing out the ice cream. If you don't have one, a wide butter knife works, but you'll spend more time fighting the edges. A hand mixer is essential for the whipped cream, though a stand mixer like a KitchenAid is great if you're making a double batch.
Step by step Assembly
Right then, let's get into the actual build. This is where the magic happens. Trust me on the chilling times, even if you're starving for a slice.
Phase 1: The Foundation
- Line your 9x13-inch pan with parchment paper. Note: Make sure the paper hangs over the long sides so you can lift the cake out later.
- Mix 2 cups (225g) crushed Oreo cookies with 5 tbsp (70g) melted butter.
- Press the mixture firmly into the pan until the surface is compact and level.
- Place the pan in the freezer for 10 minutes to flash freeze.
Phase 2: The Creamy Core
- Spread 1.5 quarts (1.4L) slightly softened vanilla ice cream over the crust. Note: Use your offset spatula to push the ice cream firmly into the corners.
- Sprinkle 1 cup (150g) roughly chopped chocolate sandwich cookies over the vanilla. Press them in slightly so they don't float to the top.
- Layer 1.5 quarts (1.4L) slightly softened chocolate ice cream on top. Smooth until the surface is level.
- Freeze for at least 4 hours to set the core.
Phase 3: The Finishing Touch
- Whip 2 cups (480ml) cold heavy cream, 1/2 cup (60g) powdered sugar, and 1 tsp (5ml) vanilla extract until stiff peaks form.
- Spread the whipped cream over the frozen layers. Add your favorite toppings immediately before they sink.
- Return the cake to the freezer for another 2 hours before you attempt to slice it.
Fixing Common Cake Issues
The biggest headache with this recipe is usually the texture of the layers. If you find that your ice cream is too hard to spread, don't force it. You'll just ruin your crust. Instead, let it sit at room temperature for another 5 minutes or give it a very quick 10 second blast in the microwave.
Another common issue is "layer slide," where the top layer shifts during slicing. This usually happens if the first layer wasn't frozen enough before the second was added, or if the final freeze wasn't long enough.
Troubleshooting Common Issues
| Issue | Solution |
|---|---|
| Why Your Cake Is Icy | If you see ice crystals on top, it's usually due to freezer burn. This happens if the cake isn't sealed tightly. Use a layer of plastic wrap pressed directly onto the whipped cream (if you aren't addi |
| Why Your Crust Is Soggy | Sogginess occurs when the butter isn't fully integrated or the ice cream was too melty when added. Ensure the crust is flash frozen for the full 10 minutes. |
| Why Your Topping Collapsed | This is a result of under whipping the cream. You want stiff peaks, meaning when you lift the whisk, the cream stands straight up without drooping. |
Common Mistakes Checklist:
- ✓ Didn't use a parchment sling (cake will stick)
- ✓ Added toppings to melted whipped cream (toppings will sink)
- ✓ Skipped the 10 minute crust freeze (crust mixes with ice cream)
- ✓ Sliced immediately after removing from freezer (jagged edges)
- ✓ Used warm heavy cream (will not whip to stiff peaks)
Fun Flavor Twists
If you want to move away from the classic cookies and cream, you can get really creative here. For a minty vibe, swap the chocolate ice cream for mint chip and use Andes mints as the middle crunch layer. If you're feeling fancy, you could use a layer of Classic Cheesecake filling in the middle for a hybrid dessert.
For a nutty crunch, replace the chocolate sandwich cookies with crushed salted pecans or toasted almonds. If you want something fruit forward, use strawberry ice cream for the bottom layer and fresh sliced strawberries for the middle.
Decision Shortcut: If you want more crunch, do a double layer of crushed Oreos. If you want it less sweet, use a dark chocolate ice cream. If you want a lighter feel, double the whipped cream topping.
Scaling the Recipe
When you're feeding a massive crowd, you might want to double this. For a 2x batch, use two 9x13 pans. Don't try to make one giant, deep cake, as the middle will take forever to freeze and you'll end up with a melted center.
If you're just making a small treat for two, you can scale this down to a 1/4 batch. Use a small loaf pan or a 6 inch round springform pan. Reduce the chilling time by about 20%, but still give it at least 4 hours.
When scaling down eggs (if you add a custard layer), beat one egg and use a tablespoon of it.
| Scale | Pan Size | Time Adjustment | Note |
|---|---|---|---|
| 1/4 Batch | Loaf Pan | Reduce 20% | Watch for faster freezing |
| Full Batch | 9x13 Pan | Standard | Perfect for 12 people |
| 2x Batch | Two 9x13 Pans | Standard | Work in batches for spreading |
Truth About Frozen Cakes
There's a common belief that you need a professional ice cream maker to get a velvety texture. That's not true. As long as you buy a high-quality, full fat ice cream, the layering process maintains that texture perfectly.
Some people also think that adding a layer of cake or brownie in the middle makes it "more stable." In reality, those layers often absorb moisture from the ice cream and become gummy over time. Sticking to a cookie crust and ice cream layers keeps the textures sharp.
Keeping it Fresh
Since this is a frozen dessert, it lasts a long time, but it can pick up "freezer smells" if not stored correctly. Wrap the pan tightly in plastic wrap, then a layer of aluminum foil.
Storage Guidelines:Fridge: Not recommended. It will melt into a soup within 2 hours. Freezer: Keeps for up to 2 months.
Zero Waste Tips: If you have leftover Oreo crumbs, don't toss them. Mix them into your morning yogurt or use them as a topping for a smoothie. If you have leftover whipped cream, fold it into some fresh berries for a quick side dessert.
Best Way to Serve
To get those professional looking slices, dip your knife in hot water and wipe it dry between every single cut. This melts the ice cream just enough to glide through without dragging the layers.
Serve it on chilled plates so the cake doesn't start melting the second it hits the table. If you want to go all out, add a drizzle of warm fudge or a sprinkle of sea salt on top right before serving. It creates a gorgeous contrast between the cold cake and the warm sauce.
Recipe FAQs
How long does the cake need to freeze before serving?
Freeze for at least 6 hours total. The ice cream layers require 4 hours to set, and the whipped cream topping needs an additional 2 hours of freezing.
Why is my ice cream cake crust soggy?
The butter wasn't fully integrated or the ice cream was too melty. Make sure to flash freeze the crust for exactly 10 minutes before adding the first ice cream layer.
How to stop ice crystals from forming on the top?
Seal the cake tightly with plastic wrap. Press the wrap directly onto the whipped cream to prevent freezer burn and moisture buildup.
How to make sure the whipped cream topping doesn't collapse?
Whip the cold heavy cream until stiff peaks form. Under whipping is the primary cause of the topping losing its structure.
Is it true I should use rock hard ice cream for the layers?
No, this is a common misconception. The ice cream must be slightly softened to ensure the layers are spread evenly and the edges are flush.
How to easily lift the cake out of the baking pan?
Use the parchment paper overhang as a sling. Grasp both sides of the paper to lift the cake cleanly from the 9x13-inch pan.
Can I use a different base for a no-bake dessert?
Yes, different cookie bases work well. If you enjoyed the no-bake assembly here, see how the same principle works in our Special K bars.
Layered Ice Cream Cake