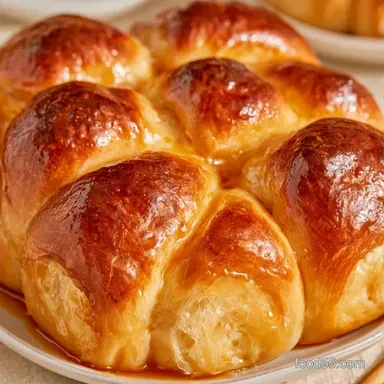
Sourdough Pull-Apart Rolls with Honey

- Time: 20 min active + 18 hours total (including rise)
- Flavor/Texture Hook: Garlic buttery crust with a soft, tangy interior
- Perfect for: Holiday dinners or a cozy Sunday brunch
The aroma of garlic butter on a hot crust is pure comfort. I remember my first attempt; I was so eager that I skipped the second proof, assuming they looked puffy enough. I ended up with dense, flat rolls that felt more like sourdough crackers.
It was a total letdown, but it taught me that you simply cannot rush sourdough.
Now, I embrace a slower pace. This patience results in a bread with a subtle tang and a crumb that practically melts. These Sourdough Pull Apart Rolls aren't about complex techniques they're just about giving the wild yeast time to work.
You'll find these far more forgiving than a standard sourdough loaf. The addition of honey and milk keeps the texture soft. They look like a professional labor of love, even though most of the magic happens while you sleep during the overnight rise.
Sourdough Pull Apart Rolls Basics
The goal here is a roll that is light but has enough structure to hold that garlic glaze. Because we use bread flour, we get a better chew than all purpose would provide. If you're planning for a big event, the overnight method is your best friend. It develops the flavor and saves you from morning stress.
When you pull one of these apart, you should see those long, airy strands of dough. That's the sign of a good rise. I've found that using a 9x13 inch pan is the sweet spot. It crowds the rolls just enough that they climb upward instead of spreading outward.
How to Actually Nail This
Lactic Acid: The acidity in the starter relaxes the gluten, which makes the rolls tender instead of chewy. Surface Tension: Rolling the dough into tight balls creates a "skin" that forces the roll to expand upward during baking.
| Goal | What to change |
|---|---|
| Extra Tangy | Use a 24 hour cold ferment |
| Lighter Crumb | Increase milk by 2 tbsp |
| Crispier Top | Brush with melted butter mid bake |
What These Ingredients Do
I use bread flour because the higher protein content supports the weight of the butter and honey. If you use all purpose, the rolls will be softer but might flatten out more. The warm milk is key here. It feeds the starter and keeps the crumb tender.
For the sweetener, honey is my go to. It adds a floral note that pairs well with the sourdough tang. If you're looking for something different, you can check out my Dinner Rolls for 15 recipe for a version that uses starter that isn't fully active.
For the Dough
- 1 cup (240g) active sourdough starter Why this? Provides lift and that signature tang
- 1 cup (240ml) warm milk Why this? Softens the crumb and hydrates the flour
- 4 tbsp (57g) unsalted butter, melted and cooled Why this? Adds richness and prevents sticking
- 2 tbsp (42g) honey Why this? Feeds the yeast and adds subtle sweetness
- 3 1/2 cups (420g) bread flour Why this? Higher protein for better height
- 1 1/2 tsp (9g) fine sea salt Why this? Controls fermentation and adds flavor
For the Garlic Butter Glaze
- 3 tbsp (42g) unsalted butter, melted Why this? Creates a rich, glossy finish
- 1 tsp (3g) garlic powder Why this? Consistent, punchy garlic flavor
- 1 tsp (1g) dried parsley Why this? Adds a pop of color and herbiness
- 1 pinch flaky sea salt Why this? Contrast to the buttery sweetness
Equipment Needed
You don't need a bakery setup for this. A large mixing bowl and a sturdy spoon will do. If you have a stand mixer, such as a KitchenAid, it makes the kneading part much easier on your arms.
A 9x13 inch baking pan is mandatory. If you use a round cake pan, the rolls in the center might stay doughy while the edges burn. I also recommend a digital scale. Measuring flour by the cup can be wildly different depending on how you scoop it.
Key Steps
- Whisk together the warm milk, active starter, 57g melted butter, and honey. Note: Ensure milk is warm but not hot to avoid killing the yeast.
- Stir in the bread flour and salt. Mix until a shaggy dough forms.
- Knead the dough by hand for 5-7 minutes or use a stand mixer on medium low. Knead until smooth and tacky.
- Place dough in a greased bowl and cover. For same day rolls, rise in a warm spot for 4-6 hours. For overnight, rise at room temperature for 2 hours, then refrigerate for 8-12 hours.
- Turn the dough onto a floured surface and divide into 12 equal pieces.
- Shape each piece by cupping your hand and rotating it counter clockwise. Press firmly against the table to create a tight skin. Place them side by-side in the 9x13 pan.
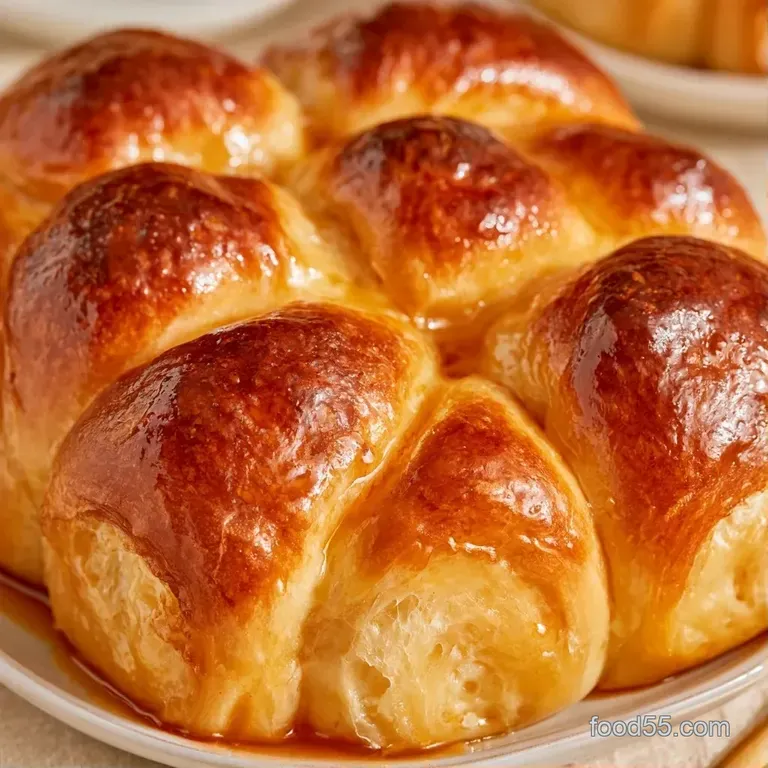
- Let the rolls proof for 1-2 hours. Wait until they merge together and look pillowy.
- Bake for 25 minutes until golden brown on top.
- Mix 42g melted butter, garlic powder, and parsley. Brush over the hot rolls and finish with flaky salt.
Common Mistakes & Troubleshooting
Fixing Flat Rolls
If your rolls didn't climb, it's usually a starter issue. If your starter isn't doubling in size within a few hours of feeding, it won't have the strength to lift the heavy butter and flour. I've learned to always check for bubbles before I start.
Preventing Sticky Dough
Sourdough hydration varies. If the dough is sticking to everything, add flour one tablespoon at a time. Don't dump in half a cup, or you'll end up with a brick. The dough should be tacky, meaning it sticks slightly but releases cleanly from your hand.
Avoiding a Hard Crust
Taking the rolls out too late or using an oven that's too hot can create a thick crust. The garlic butter glaze is actually a tool here. Brushing it on while the rolls are screaming hot helps soften the exterior and keeps them tender.
| Problem | Root Cause | Solution |
|---|---|---|
| Dense, heavy rolls | Weak starter or short proof | Ensure starter is bubbly; extend rise time |
| Rolls didn't merge | Under proofed second rise | Let them sit in the pan for another 30 mins |
| Burnt bottoms | Oven rack too low | Move rack to the center position |
| Dough didn't rise | Milk was too hot | Use milk around 105-110°F (40-43°C) |
Dietary Adaptations
To make this dairy-free, replace the butter with a premium vegan butter stick and use unsweetened almond milk. The texture stays largely the same, although the flavor is slightly less rich.
For a more savory twist, stir in a tablespoon of chopped fresh rosemary to the dough. For a sweet version, omit the garlic and parsley; instead, brush the hot Sourdough Pull Apart Rolls with a blend of melted butter, cinnamon, and brown sugar. If you prefer a lighter bread, you might like my Fluffy Sourdough Dinner Rolls for a different style of crumb.
| Method | Time | Texture | Best For |
|---|---|---|---|
| Same Day | 6-8 hours | Soft, fresh | Unexpected guests |
| Overnight | 18 hours | Complex, tangy | Planned dinners |
Make-ahead and Leftover Tips
Keep any extra rolls in a closed container on the counter for 2 days. For a longer shelf life, place them in the refrigerator for 4 days, ensuring they are wrapped securely to prevent drying.
To freeze, allow the rolls to cool entirely. Arrange them in a single layer on a tray before transferring them to a freezer bag for up to 3 months; this prevents them from clumping together.
For reheating, wrap a few rolls in foil; set your oven to 350°F (175°C) and warm them for 10 minutes. A 15-second burst in the microwave is a quicker alternative, though the oven better maintains the crust.
To minimize waste, cube any hardened rolls and toast them with garlic butter to make sourdough croutons.
How to Serve and Enjoy
For the best experience, serve these Sourdough Pull Apart Rolls piping hot from the oven. The real highlight is how the butter melts deep into the warm crumb. I prefer serving them straight from the baking pan to keep them cozy and warm on the table.
They are a wonderful accompaniment to creamy pasta or a hearty beef stew. The combination of garlic and tang also makes them a great side for roasted root vegetables. Simply set the pan in the center of the table for everyone to tear off a piece; this shared touch makes any dinner feel like a celebration.
A Note on Butter
Avoid using margarine or low-fat butter substitutes. The fat content is key to achieving that soft, rich interior. Real butter prevents the rolls from drying out too quickly and delivers a genuine bakery style flavor.
Scaling the Recipe
To make a smaller batch, halve all ingredients. Use an 8x8 inch pan and decrease the baking time by approximately 5 minutes. For the glaze or egg wash, it's more convenient to make the full quantity and use only what is necessary.
When doubling the recipe for a larger group, process the dough in batches. To avoid burning out your mixer's motor, do not attempt to knead both batches at once in a small machine. Use two 9x13 pans for baking.
Maintain the same oven temperature, but begin checking for doneness a few minutes early, as the additional pans can alter the airflow inside the oven.
Recipe FAQs
What is the process for making sourdough slider rolls?
Divide the dough into 12 equal pieces and shape them into tight balls. Place them side-by-side in a 9x13 inch pan and proof for 1-2 hours before baking for 25 minutes.
Are sourdough discard rolls healthy?
Yes, they are often easier on the gut. The fermentation process reduces phytic acid and breaks down gluten, making them more digestible than traditional yeast rolls.
Can sourdough be used to make hoagie rolls?
Yes, the dough is versatile enough for larger shapes. If you like working with this level of hydration, see how we use a similar approach for our soft sourdough sandwich bread.
Is it true that sourdough rolls always take days to rise?
No, this is a common misconception. You can achieve a perfect rise in 4-6 hours in a warm spot if you are baking them the same day.
How do I make quick sourdough discard rolls?
Mix active starter with warm milk, honey, and melted butter. Using an active starter instead of discard ensures the rolls rise quickly for a same day bake.
Why did my rolls fail to merge together?
You likely didn't proof them long enough. Ensure the shaped balls sit for 1-2 hours until they physically touch and merge before they enter the oven.
Is it a myth that you need a professional oven for a golden crust?
This one's false: A standard home oven will produce a beautiful golden brown finish if you bake the rolls for exactly 25 minutes.
Sourdough Pull Apart Rolls