Sourdough Starter Recipe with the Trick Nobody Tells You
- Time: Active 1 hours 10 mins, Passive 168 hours, Total 169 hours 10 mins
- Flavor/Texture Hook: Tangy, spongy, and wildly active
- Perfect for: Beginner bakers wanting a foolproof first culture
- Sourdough Starter Recipe with the Trick Nobody Tells You
- Why This Science Actually Works
- Component Analysis and Selection
- Essential Components for Success
- Daily Guide to Fermentation
- Avoiding Common Starter Mistakes
- Scaling Your Culture Up
- Debunking Sourdough Culture Myths
- Maintaining Your Yeast Culture
- Perfect Complements for Sourdough
- Recipe FAQs
- 📝 Recipe Card
Sourdough Starter Recipe with the Trick Nobody Tells You
I still remember the smell of my first failed starter. It was Day 4, and instead of the sweet, yeasty aroma I expected, my jar smelled like a gym locker left in a hot car. I almost threw the whole thing out, thinking I just didn't have the "baking genes." It turns out, I wasn't failing; I was just fighting a battle against bad bacteria that I didn't even know existed.
This sourdough starter recipe delivers reliably bubbly results thanks to a simple, overlooked technique. We're going to use a splash of pineapple juice. I know, it sounds weird, but trust me on this one. Most guides tell you to just mix flour and water and pray.
But by using a little acidity early on, we create an environment where the "good" yeast can thrive while the "bad" bacteria, the stuff that makes your starter smell like old socks, never even gets a chance to start.
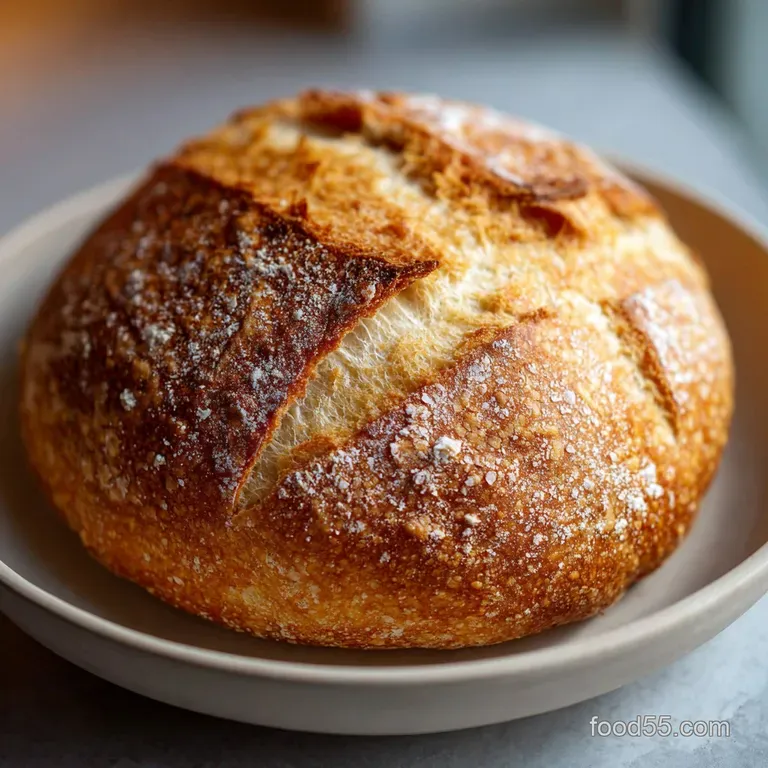
Right then, let's get into why this works. We aren't just making a "science project" in a jar; we're building a living culture that will eventually give you the most incredible, shatter crisp crust and velvety crumb you've ever tasted. Once you see those first aggressive bubbles breaking the surface, you'll be hooked.
It's a bit like magic, only you can eat it.
Why This Science Actually Works
Understanding the "why" helps you stop guessing and start knowing. We're essentially managing a tiny ecosystem inside a glass jar.
- Acidification Strategy: Pineapple juice lowers the initial pH, which stops Leuconostoc bacteria from growing. This is the "trick" that prevents the common Day 3 stall where starters often look dead or smell foul.
- Mineral Availability: Using organic rye flour provides more nutrients and minerals than processed white flour. These minerals act like a multivitamin for wild yeast, helping them multiply much faster.
- Enzymatic Breakdown: The enzymes in the whole grains help break down starches into simple sugars. This gives the yeast an immediate food source, leading to that spongy, airy texture we're after.
- Chlorine Sensitivity: Wild yeast is delicate. Filtered water ensures we aren't accidentally killing our culture with the chemicals found in standard tap water.
| Method Type | Time to Active | Success Rate | Flavor Profile |
|---|---|---|---|
| Pineapple Trick | 7 days | 95% | Bright, tangy, and consistent |
| Classic Water/Flour | 10-14 days | 60% | Variable, prone to "bad" smells |
| Commercial Yeast Boost | 2 days | 100% | Flat flavor, not true sourdough |
This comparison shows why the acidic start is such a shortcut. While the classic method eventually gets there, the pineapple juice trick creates a stable culture in nearly half the time with much less stress. It's the difference between taking the stairs and catching the express elevator to sourdough success.
Component Analysis and Selection
Choosing the right flour isn't just about what's in the pantry; it's about the microbial life living on the grain.
| Ingredient | Science Role | Pro Secret |
|---|---|---|
| Organic Rye Flour | Nutrient rich fuel | Rye carries more wild yeast than wheat, speeding up the initial "birth" of your starter. |
| Pineapple Juice | pH Regulator | The acidity mimics a mature starter, tricking the environment into staying safe for yeast. |
| Filtered Water | Hydration | Tap water minerals can be fine, but chlorine is a yeast killer stick to filtered. |
Essential Components for Success
You don't need a pantry full of exotic items for this sourdough starter recipe, but quality matters. If you use bleached flour, you're essentially starting with a sterile base, which makes it much harder for wild yeast to find a home.
- 50g organic whole rye flour: Why this? Rye is like rocket fuel for wild yeast growth.
- Substitute: Whole wheat flour (results may take 2 days longer).
- 50g unsweetened pineapple juice: Why this? Lowers pH to prevent bad bacteria growth.
- Substitute: Apple cider vinegar (use 1 tsp mixed with 45g water).
- 500g unbleached all purpose flour: Why this? Provides the structural protein for long term feeding.
- Substitute: Bread flour (makes a stiffer, more resilient starter).
- 500g filtered water: Why this? Protects the yeast from chlorine damage.
- Substitute: Bottled spring water.
Daily Guide to Fermentation

Before you start, grab a clean glass jar. A mason jar or a Weck jar works perfectly. Avoid metal lids if they aren't coated, as the acidity can react with the metal over time.
Phase 1: The Acidity Kickstart (Day 1)
- Combine 50g organic whole rye flour and 50g unsweetened pineapple juice in your jar. Note: Stir until no dry flour remains.
- Cover loosely with a lid or a cloth and let sit at room temperature (70°F–75°F) for 24 hours. until the mixture looks slightly darker.
Phase 2: The Quiet Period (Day 2 & 3)
- Add 50g unbleached all purpose flour and 50g filtered water to the existing mixture on Day 2. Note: Don't discard anything yet.
- Stir vigorously to incorporate air and let sit another 24 hours until tiny bubbles begin to form.
- Repeat the same feeding on Day 3 (50g flour, 50g water) without discarding. until you smell a faint fruity aroma.
Phase 3: The Strengthening (Day 4 - Day 6)
- Discard all but 100g of the starter on Day 4. Note: This prevents the starter from becoming too massive.
- Feed with 100g unbleached all purpose flour and 100g filtered water. until the volume increases by at least 50%.
- Repeat this 1:1:1 feeding (100g starter, 100g flour, 100g water) every 24 hours through Day 6. until the texture becomes stretchy and web like.
Phase 4: Testing for Readiness (Day 7)
- Check for activity on Day 7. Your starter should now double in size within 4–6 hours of feeding. until it looks like a frothy, bubbly mousse.
- Drop a teaspoon of starter into a glass of water. If it floats, it's ready to bake. Note: This "float test" indicates enough carbon dioxide is trapped.
Avoiding Common Starter Mistakes
Even with the pineapple trick, things can go sideways. The most common issue I see is people being too "nice" to their starter. Yeast likes to be worked! When you stir, do it aggressively to get oxygen into the mix.
Why Your Starter Has Liquid
If you see a dark, grayish liquid pooling on top, don't panic. That's "hooch." It’s just alcohol a byproduct of fermentation telling you your starter is hungry.
| Problem | Root Cause | Solution |
|---|---|---|
| Dark liquid on top | Starving yeast (Hooch) | Pour it off and feed the starter immediately. |
| Smells like vinegar | Temp too high | Move to a cooler spot and feed twice daily. |
| No bubbles on Day 4 | Too much chlorine | Switch to bottled or filtered water for the next feed. |
Common Mistakes Checklist
- ✓ Never use hot water - anything over 100°F (38°C) can kill the yeast.
- ✓ Don't use a tight fitting lid - gas needs to escape or the jar might crack.
- ✓ Avoid bleached flour - the chemicals inhibit the growth of wild cultures.
- ✓ Keep your jar away from direct sunlight - UV rays are not yeast friendly.
- ✓ Use a clean jar for every feeding if you notice mold forming on the rim.
Scaling Your Culture Up
When you're ready to bake multiple loaves or share with friends, you'll need more volume. This sourdough starter recipe is easy to scale, but keep the ratios in mind.
If you need to scale down (maybe you're a "lazy person" baker who only bakes once a month), you can keep as little as 10g of starter and feed it 20g flour and 20g water. This keeps the waste low while keeping the culture alive.
To scale up for a big bake, use a 1:2:2 ratio (50g starter, 100g flour, 100g water) the night before you plan to mix your dough. This ensures you have plenty of active "levain" without depleting your mother culture.
Chef's Tip: Freeze 50g of your active starter in a small baggie. If your main jar ever grows mold or dies, you have an "insurance policy" ready to be thawed and revived.
Debunking Sourdough Culture Myths
There's a lot of "gatekeeping" in the sourdough world, but it's simpler than people make it out to be. You don't need a 100 year old starter from San Francisco to make great bread.
One common myth is that you must feed your starter every single day or it will die. In reality, once your starter is mature (after Day 7), it's incredibly resilient. It can live in the fridge for weeks without a single feeding. Another myth is that the "discard" is useless. You can actually use that unfed sourdough starter in plenty of recipes like my Sourdough Pancake Recipe to add amazing flavor without needing the leavening power of an active starter.
Maintaining Your Yeast Culture
Keeping your starter healthy shouldn't feel like a chore. If you bake weekly, the fridge is your best friend.
Storage Guidelines: For short term storage, keep your fed starter on the counter. For long term (the "lazy person" method), store it in the fridge for up to a month. If you’re going away for longer, try freezing sourdough starter.
To revive it, just thaw it at room temperature and feed it twice a day for 48 hours. It will wake right back up.
Zero Waste Tips: Don't just wash the "discard" down the drain; it's basically flour and water that's already fermented! Use the excess to make crackers, muffins, or even pizza crust.
If you've let it go too long and it smells like pure vinegar, use that "extra sour" discard in chocolate cakes the acidity reacts beautifully with baking soda for a massive rise.
Perfect Complements for Sourdough
Once your starter is active, the world of fermentation opens up. You aren't limited to just crusty boules.
This starter works beautifully for softer bakes, too. The tang of the wild yeast pairs perfectly with butter and honey. If you want to see what this culture can really do beyond a basic loaf, try using it in my Fluffy Sourdough Dinner recipe. The fermentation adds a complexity that commercial yeast just can't touch. Whether you're making a sourdough starter recipe for the first time or the fiftieth, the joy of seeing that jar come to life never gets old. It’s the ultimate way to bring people together over a shared, handmade meal.

Recipe FAQs
What is the biggest mistake with sourdough starter?
Using tap water with high chlorine levels. Chlorine actively kills the delicate wild yeast strains you are trying to cultivate, stalling the entire process.
What is the secret to a good sourdough starter?
Controlling the initial pH with acidity. Adding a splash of pineapple juice on Day 1 creates an environment where desirable lactobacilli thrive before competing, unwanted bacteria can establish themselves.
What is the 1:1:1 rule for sourdough starter?
Feed equal parts by weight: 1 part starter, 1 part flour, 1 part water. This consistent ratio maintains manageable acidity and a hydration level perfect for vigorous activity when using standard flour.
Is Panera sourdough bread made with sourdough starter?
Yes, Panera bread uses a sourdough starter for its signature tang. They use a highly managed, fast fermenting culture to achieve that flavor profile consistently across all locations.
How do I revive a sourdough starter that has developed dark liquid (hooch) on top?
Pour off the dark liquid and feed immediately with a slightly higher ratio of flour. Hooch means the yeast is starving; increasing the flour gives the culture more food to work through, often stabilizing it.
How do I know when my starter is ready to bake with?
The starter must reliably double in size within 4 to 6 hours after feeding and pass the float test. If you are learning to control fermentation speed here, you can apply the same temperature precision when preparing dough for recipes like our Stuffing Recipe.
Is it true I must use expensive, specific organic rye flour for the initial feed?
No, this is a common misconception, but organic rye is highly recommended. Rye flour naturally carries more wild yeast spores than white flour, significantly speeding up the initial culture establishment.
Sourdough Starter Trick Revealed
Ingredients:
Instructions:
Nutrition Facts:
| Calories | 27 calories |
|---|---|
| Protein | 0.8 g |
| Fat | 0.1 g |
| Carbs | 5.7 g |
| Fiber | 0.2 g |
| Sugar | 0.1 g |
| Sodium | 1 mg |
