The Most Addictive Bread Youll Ever Eat with Garlic
- Time: Active 15 minutes, Passive 20 minutes, Total 35 minutes
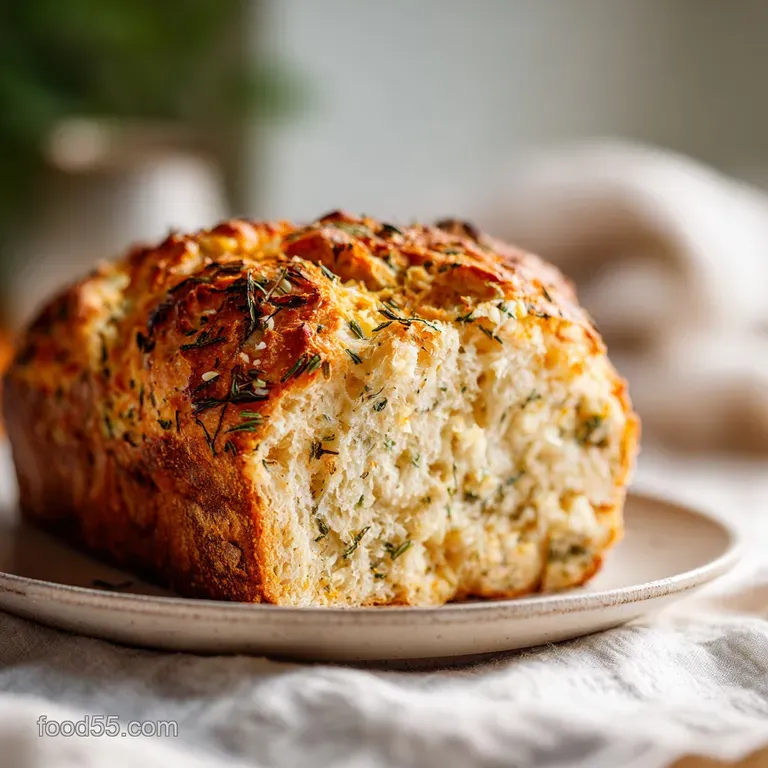
- Flavor/Texture Hook: Silky, buttery crumb with a shatteringly crisp garlic parmesan crust
- Perfect for: Impressive dinner parties or cozy Sunday pasta nights
- The Most Addictive Bread Youll Ever Eat with Garlic and Herbs
- The Science of the Perfect Rise
- Key Technical Methods for Success
- Official Recipe Specifications and Timing
- Component Analysis for Peak Flavor
- Essential Equipment for Better Baking
- Key Steps for Perfect Loaves
- Solving Common Baking Problems Fast
- Scaling Ratios for Any Crowd
- Variations and Smart Pantry Substitutions
- Myths About Yeast and Flour
- Store and Keep Bread Fresh
- Presentation Tips for Your Table
- Recipe FAQs
- 📝 Recipe Card
The Most Addictive Bread Youll Ever Eat with Garlic and Herbs
You know that specific, intoxicating scent that hits you the second you walk into a local Italian bakery? It is that heavy, savory cloud of roasting garlic and melting butter that makes your mouth water before you even see a loaf.
For years, I thought that kind of magic was reserved for professional ovens or three day fermentation cycles, but I was so wrong.
I used to settle for those frozen, pre sliced loaves from the supermarket, thinking they were "good enough" for a weeknight side. Then, one Tuesday, I ran out of the store-bought stuff and decided to experiment with some all purpose flour and a handful of garlic cloves I had rolling around the pantry.
The result was a total revelation. My kitchen transformed, and honestly, the bread disappeared before the main course even hit the table.
This recipe for "The Most Addictive Bread You'll Ever Eat with Garlic and Herbs" will have you baking irresistibly flavorful bread in no time. We are talking about a dough that is forgiving, a butter topping that is punchy, and a texture that manages to be both cloud like and substantial.
It is the kind of bread that brings people together, mostly because everyone is hovering over the cutting board waiting for the first slice.
The Science of the Perfect Rise
Understanding the "why" behind your dough makes the "how" so much easier to master. Bread isn't just a list of ingredients; it's a living chemical reaction that happens right on your counter.
- Enzymatic Activation: The honey doesn't just add sweetness; it provides immediate glucose for the yeast to consume, producing carbon dioxide faster for a rapid rise.
- Gluten Alignment: Mixing 525g of all purpose flour with 350ml of water creates a hydration level of roughly 66%, which is the "sweet spot" for a dough that is easy to handle but remains incredibly soft after baking.
- Maillard Reaction: The combination of Parmesan cheese and proteins in the flour creates that deep golden color and savory aroma when exposed to the high heat of the oven.
| Method | Time | Texture | Best For |
|---|---|---|---|
| Fresh Homemade | 35 minutes | Pillowy inside, crisp crust | Dinner parties, ultimate flavor |
| store-bought Frozen | 20 minutes | Often dry or overly greasy | Emergency last minute sides |
| Bakery Loaf | 10 minutes (reheat) | Good, but lacks fresh aroma | Saving time, losing that "wow" factor |
Choosing the fresh method is almost always the winner because you control the intensity of the herbs and the quality of the fats. If you find yourself obsessed with the scent of fresh herbs, you have to try my Classic Rosemary SeaSalt recipe.
Key Technical Methods for Success
To get that "shatter" on the crust while keeping the center velvety, we use a few specific tricks. First, we use a high activity bloom for the yeast. By keeping the water at exactly 110°F (43°C), we wake the yeast up without scalding it.
If the water is too hot, you kill the leavening; too cold, and the bread stays dense.
Next,, the way we handle the garlic matters. Instead of just tossing in chunks, we create a compound butter. This ensures every single millimeter of the crust is infused with flavor, rather than having occasional "garlic bombs" and dry spots.
It’s all about creating layers of flavor that build on each other from the first bite to the last.
Chef Tip: Freeze your 115g of salted butter for 10 minutes before you start. Grating half of it into the dry flour creates tiny pockets of fat that steam as they bake, leading to a much lighter crumb.
Official Recipe Specifications and Timing
Before we get our hands messy, let's look at the logistics. This isn't a project that requires your entire Saturday. It's a focused, high reward bake that fits perfectly into a busy evening schedule.
- Prep Time: 15 minutes (measuring, blooming, and kneading)
- Baking Time: 20 minutes at 200°C (400°F)
- Yield: 10 generous servings
- Weight Check: Your total dough weight should be around 900g before shaping.
For those who prefer a more traditional tang and have a bit more time on their hands, my Soft Sourdough Sandwich recipe is a great weekend project that explores different fermentation specs.
Component Analysis for Peak Flavor
Every ingredient in this "The Most Addictive Bread Youll Ever Eat with Garlic and Herbs" serves a structural or sensory purpose. We aren't just filling space; we are building a masterpiece.
| Ingredient | Science Role | Pro Secret |
|---|---|---|
| 525g All Purpose Flour | Provides the protein structure (gluten) | Sift it first to ensure no lumps and a lighter feel |
| 350ml Warm Water | Hydrates the starches and activates yeast | Must be 110°F; use a thermometer for precision |
| 6 Cloves Fresh Garlic | Infuses the fat with aromatic compounds | Use a rasp/Microplane to turn it into a paste |
| 0.25 Cup Parmesan | Adds salt, fat, and speeds up browning | Freshly grated melts better than the canned stuff |
The Power of Honey
Honey acts as a humectant in this recipe. Unlike granulated sugar, honey helps the bread retain moisture for days, preventing it from turning into a dry rock by the next morning. It also contributes to a more complex, floral undertone that balances the sharp garlic.
Why Dried Oregano Matters
While we use fresh parsley for that bright, green finish, the 1 tsp of dried oregano is vital. Dried herbs have a more concentrated, earthy flavor that stands up to the high heat of the oven without burning or turning bitter, providing a nostalgic "pizzeria" aroma.
Essential Equipment for Better Baking
You don't need a professional bakery setup, but a few key tools make the process seamless. A heavy duty stand mixer (like a KitchenAid) is great for the 525g of flour, but honestly, I often make this by hand just to feel the dough change from shaggy to silky.
- Digital Scale: Measuring in grams is the only way to ensure consistency.
- Cast Iron Skillet or Baking Stone: These hold heat beautifully, giving you a much crispier bottom crust.
- Microplane: This is essential for turning those 6 cloves of garlic into a fine paste that blends perfectly with the 115g of butter.
- Bench Scraper: Perfect for dividing the dough and cleaning your workspace afterward.
Key Steps for Perfect Loaves
Let's get into the flow of the bake. Remember to keep your movements confident; yeast can smell fear! Just kidding, but a steady hand does help when you're working with hydrated dough.
- Bloom the yeast. Mix 350ml warm water (110°F) with 1 tbsp honey and 2.25 tsp instant yeast. Note: Wait 5 minutes until it looks foamy and smells like beer.
- Combine dry ingredients. Whisk 525g all purpose flour and 1.5 tsp sea salt in a large bowl.
- Form the dough. Add the yeast mixture and 2 tbsp olive oil to the flour.
- Knead the mass. Work the dough for 5-8 minutes until it is smooth, elastic, and bounces back when poked.
- First rise. Cover and let rest in a warm spot for about 10 minutes while you prep the topping.
- Create garlic butter. Mix 115g softened butter, 6 cloves minced garlic, 2 tbsp parsley, and 1 tsp oregano.
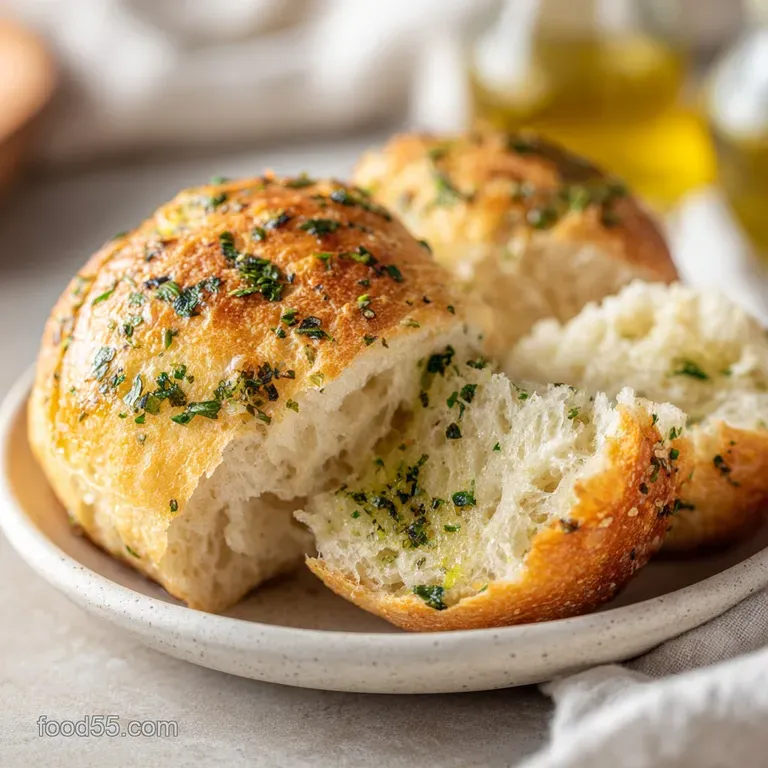
- Shape and coat. Divide dough into 10 pieces, roll into balls, and arrange in a greased pan.
- Apply infusion. Brush half of the garlic butter over the tops of the dough balls.
- Bake the bread. Slide into a 200°C oven for 15-20 minutes until the tops are deep golden and sizzling.
- Final polish. Brush with the remaining butter and sprinkle with 0.25 cup Parmesan cheese while still hot.
Solving Common Baking Problems Fast
Even the best of us have days where the dough just doesn't want to cooperate. If your kitchen is cold or your yeast is a bit older, things might move a bit slower than expected.
Why Is My Dough Too Sticky?
If your dough feels more like batter than bread, it’s usually a humidity issue. If it’s raining outside, your flour might have absorbed extra moisture. Don't panic. Just add 1 tablespoon of flour at a time until the dough clears the sides of the bowl.
It should feel "tacky" (like a Post it note) but shouldn't leave a mess on your fingers.
Why Is the Crust Hard Instead of Crisp?
A hard, tooth shattering crust usually means the bread stayed in the oven too long at a lower temperature, drying it out. Ensure your oven is fully preheated to 200°C before the bread goes in. This "heat shock" creates steam that keeps the inside soft while quickly setting the outer layer.
| Problem | Root Cause | Solution |
|---|---|---|
| No Rise | Water was too hot (>120°F) | Start over; check water temp with a thermometer |
| Dense Center | Under kneaded dough | Knead until the dough passes the "windowpane test" |
| Burnt Garlic | Garlic pieces too large | Mince or grate garlic into a paste to protect it |
Common Mistakes Checklist ✓ Check your yeast expiration date before starting; dead yeast equals flat bread. ✓ Use room temperature butter (115g) for the topping so it spreads without tearing the dough. ✓ Don't skip the honey; it's the secret to that soft, hydrated crumb.
✓ Let the bread cool for at least 5 minutes before pulling it apart to let the internal steam finish the cook.
Scaling Ratios for Any Crowd
This recipe is incredibly easy to adjust whether you are cooking for a solo movie night or a huge neighborhood block party.
Scaling Down (Making 5 Servings) Cut all ingredients in half. Use a smaller 8 inch cake pan or a small loaf tin. Since there is less mass, start checking for doneness about 3 minutes earlier than the recipe suggests.
Scaling Up (Making 20 Servings) When doubling the batch, you don't actually need to double the yeast perfectly; 4 tsp of yeast is plenty for a double batch. Use 1kg of flour and roughly 700ml of water. For the spices and salt, use 1.5x the original amount (around 2.25 tsp salt) to avoid over seasoning.
Work in two separate pans to ensure even airflow in the oven.
And if you're looking for a different kind of side for a large BBQ crowd, my My Go To Homemade Cornbread recipe is another fantastic option that scales beautifully for big groups.
Variations and Smart Pantry Substitutions
Sometimes you realize halfway through that the Parmesan is gone or you’re out of fresh parsley. Don't sweat it. This bread is a canvas for whatever you have on hand.
| Original Ingredient | Substitute | Why It Works |
|---|---|---|
| Parmesan Cheese | Shredded Gruyère | Melts beautifully with a nutty, sophisticated flavor |
| Fresh Parsley | Fresh Basil | Adds a sweet, peppery Italian flair to the crust |
| All Purpose Flour | Bread Flour | Creates a chewier, more "artisanal" texture |
If you want to go even more decadent, you can stuff a small cube of mozzarella into the center of each dough ball before baking. This creates a "stuffed crust" effect that is absolutely lethal when dipped in marinara sauce.
Myths About Yeast and Flour
There is a lot of "kitchen folklore" surrounding bread that often scares beginners away. Let's clear the air on a few things so you can bake with confidence.
First, you don't need a "proof box" or a professional humidifier to get a good rise. A simple trick is to turn on your oven for 30 seconds, turn it off, and place your dough inside. The residual heat is more than enough.
Next,, many people think you have to knead for 20 minutes to develop gluten. With 525g of flour, 5 to 8 minutes of vigorous kneading is plenty. Over kneading can actually lead to a tough, rubbery loaf that is hard to chew. The goal is elasticity, not total rigidity.
Store and Keep Bread Fresh
If you somehow have leftovers of this "The Most Addictive Bread Youll Ever Eat with Garlic and Herbs," you need to store it properly to keep that buttery magic alive.
- Fridge: Up to 3 days. Wrap it tightly in foil to prevent the bread from absorbing fridge odors.
- Freezer: Up to 2 months. Freeze the dough balls after the first rise but before the butter goes on, or freeze the fully baked loaf.
- Zero Waste: If the bread does go stale, don't toss it! Cut it into cubes, toss with a little more olive oil, and bake at 180°C for 10 minutes to make the best garlic croutons you’ve ever had. You can also pulse stale pieces in a blender for "premium" herbed breadcrumbs.
Presentation Tips for Your Table
How you serve this bread is just as important as how you bake it. Since the butter and garlic are the stars, I love serving this in the same cast iron skillet I baked it in. It keeps the bread warm and looks rustic and inviting.
Try placing a small bowl of warm marinara or a balsamic olive oil dip right in the center of the bread ring. The contrast between the red sauce and the green herbs is visually stunning.
Sprinkle a final pinch of flaky sea salt and some extra fresh parsley right as it comes to the table to give it that "just finished" professional look. Trust me, the sizzle and the aroma will do most of the work for you. Everyone will be asking for the recipe before they've even finished their first piece!

Recipe FAQs
Can I substitute the honey with maple syrup in this dough?
Yes, you can substitute it directly. Maple syrup provides similar sugars to feed the yeast quickly, but it will add a slightly earthier, deeper note to the final crumb flavor.
How to ensure the garlic doesn't burn on top during the high heat bake?
Grate the garlic finely into a paste before mixing with the butter. Larger chunks sit on the surface and char quickly; grinding it finely disperses the flavor and protects it from scorching.
Is it true I must use bread flour instead of all purpose flour for the best texture?
No, all purpose flour is ideal for this specific recipe. Bread flour creates a denser, chewier crumb, whereas AP flour, with its lower protein content, yields the desired soft, pillowy texture for this addictive loaf.
How to achieve that shatteringly crisp crust seen in the photos?
Bake on a preheated cast iron skillet or baking stone at 200°C. High, direct heat rapidly sets the exterior while the moisture inside steams the crumb open, leading to the perfect crispness.
What is the best way to store leftover bread to maintain its softness for 48 hours?
Wrap the cooled loaf tightly in aluminum foil first, then place it in an airtight container. This traps the internal moisture while blocking external air that causes staleness; this technique is similar to the moisture retention you achieve when cooking large roasts like in our Ever how to recipe.
Can I add chili flakes to the butter topping for a kick?
Yes, adding chili flakes is highly recommended for balance. Start with one teaspoon mixed into your compound butter, but if you love heat, try infusing the butter first using the method detailed in our Garlic Chili Sauce Recipe.
How long should I knead the dough if I am mixing it by hand instead of using a machine?
Knead vigorously for 8 to 10 minutes by hand until the dough is smooth. You are aiming for the dough to pass the windowpane test, meaning it stretches thinly enough to see light through it without tearing immediately.
Addictive Garlic Herb Bread

Ingredients:
Instructions:
Nutrition Facts:
| Calories | 317 kcal |
|---|---|
| Protein | 6.8 g |
| Fat | 12.9 g |
| Carbs | 43.2 g |
| Fiber | 1.5 g |
| Sugar | 2.4 g |
| Sodium | 468 mg |
