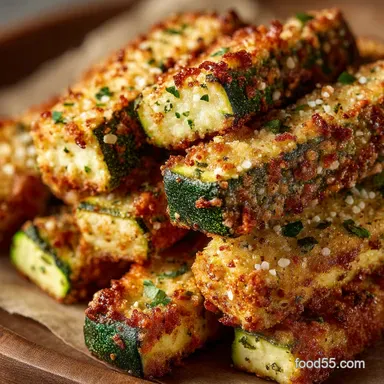
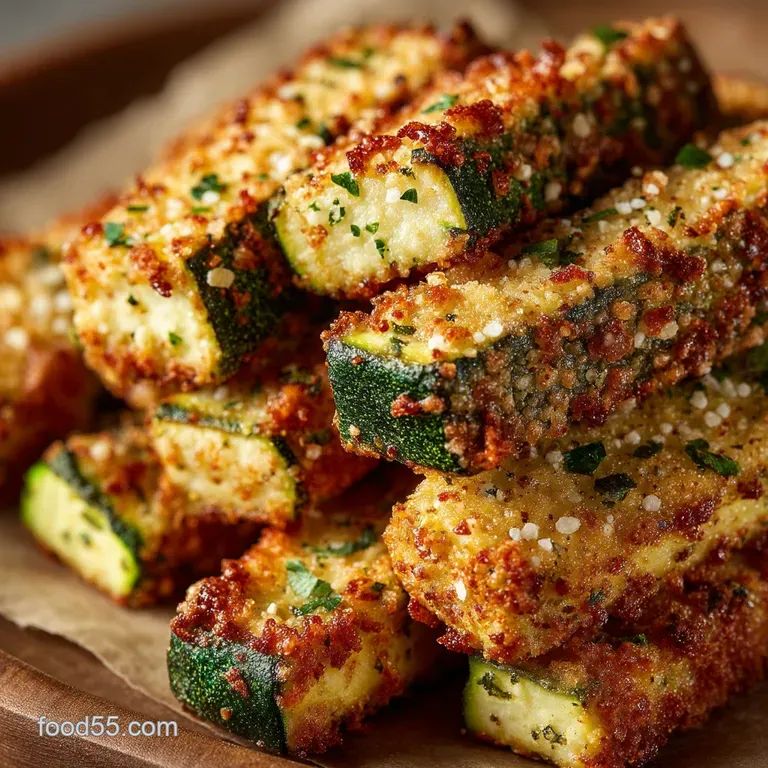
The Cheeky Courgette Crunch Wholesome Zucchini Dog Biscuits

Transforming Garden Gluts into Gourmet Pet Snacks
Summer brings a predictable bounty, and if you’ve ever grown courgettes, you know the struggle of the zucchini glut is real. While humans might tire of yet another loaf or stir fry, our beloved canine companions offer a wonderful solution: transforming that excess harvest into nutritious, crunchy treats.
This is more than just a way to clear out the vegetable crisper; it’s an opportunity to create homemade zucchini dog treats that are far superior to any store-bought alternative.
This particular bake is designed for simplicity (an easy difficulty level) and yield, resulting in approximately 40 50 small biscuits in under an hour of total time, making it an excellent investment for your dog’s snack rotation.
Why Zucchini is the Unsung Hero of Canine Nutrition
Zucchini, often overlooked as merely a filler vegetable, is actually a powerhouse of health benefits for dogs. It is remarkably low in calories, making it an ideal ingredient for guilt free snacking.
Crucially, it’s rich in water and dietary fibre, which aids in healthy digestion and promotes satiety without adding unnecessary weight. The mild flavour means dogs don’t often notice the vegetable, allowing you to sneak vital nutrients like Vitamins C and K into their diet effortlessly.
Including zucchini ensures that these healthy zucchini dog treats contribute positively to overall well being.
The Peanut Butter and Courgette Pairing: A Fussy Dog Favorite
While the courgette provides the texture and nutrition, the irresistible flavour comes from the binding agent: natural peanut butter. This pairing is a proven winner, masking the subtle vegetable taste and providing a delicious incentive that even the most discerning dog will rush to the kitchen for.
It is absolutely paramount to use a xylitol free peanut butter, as xylitol is toxic to dogs. Once the peanut butter (which provides a healthy dose of fat and protein) is combined with the finely grated courgette, it creates a flexible, flavourful base perfect for forming sturdy zucchini dog biscuits .
Ditch the Additives: The Case for Homemade Zucchini Dog Treats
The primary benefit of baking treats yourself lies in complete control over the ingredients. store-bought snacks often contain unnecessary fillers, artificial colours, and high levels of sodium or refined sugars.
When you opt for a zucchini dog biscuit recipe made in your own kitchen, you ensure every ingredient from the whole wheat flour base to the optional breath freshening dried parsley is natural, safe, and beneficial.
This process ensures these simple biscuits are tailored specifically to your pet's needs, offering maximum nutritional value with minimal fuss.
Sourcing Your Safe and Simple Biscuit Building Blocks
Before mixing, setting up your workspace and gathering your specific ingredients is essential, particularly when aiming for a successful, crunchy outcome. Accuracy in this phase prevents common dough pitfalls, such as stickiness or crumbling.
Essential Pantry Items for the Perfect Dough Consistency
These biscuits rely on a combination of pantry staples to achieve their robust texture. For the dry elements, you will need 1 ½ cups of whole wheat flour, which gives the biscuits structure, paired with ½ cup of rolled oats, adding fibre and a satisfying chewiness.
A teaspoon of baking powder provides a light lift, preventing the biscuits from becoming too dense. On the wet side, beyond the crucial zucchini and peanut butter (½ cup), one large egg acts as the primary binder.
Finally, a small amount of liquid a ¼ cup of water or low-sodium broth helps bring the dough to the right consistency.
Prepping Your Zucchini: Grating Without the Sog
The secret to a truly crisp, long lasting zucchini dog biscuit is managing the vegetable’s moisture content. You need 1 cup of tightly packed, grated zucchini, which typically equates to about one medium courgette. Do not skip the draining step.
Once grated using a box grater or food processor attachment, the zucchini must be placed in the centre of a clean, thick kitchen towel. Twist the towel firmly and squeeze out every possible drop of moisture over the sink.
This single step is the difference between a dense, potentially mouldy treat and a light, dry biscuit ready for baking.
Tools of the Trade: Rolling Pins, Sheets, and Cookie Cutters
Fortunately, preparing these zucchini dog treats recipes doesn't require specialty equipment. You will need standard mixing bowls, a reliable way to grate your zucchini, and essential measuring tools.
For the baking phase, line two large baking sheets with parchment paper or silicone mats to prevent sticking. While a knife can be used to cut simple squares (perfect for training), standard circular or bone shaped cookie cutters make the process much more enjoyable and result in uniform portions.
Finally, a rolling pin is vital for achieving the uniform ¼ inch thickness needed for even baking.
Related Recipes Worth Trying
- Foolproof Baileys Chocolate Truffles Decadent Homemade Irish Cream Treats — These meltinyourmouth Baileys Chocolate Truffles are unbelievably rich and simple to make Our secret recipe guarantees a perfectly smooth silky ganache...
- LowCarb Zucchini Pizza Boats Recipe The Ultimate Healthy Pizza Swap — These Pizza Stuffed Zucchini Boats are a brilliant healthy pizza hack Our foolproof method ensures tender courgette shells and a gooey bubbly filling A...
- Easy NoBake Fudge Snow Balls Velvety Holiday Treats — Whip up these incredibly rich NoBake Fudge Snow Ballsmoist chocolate truffles rolled in coconut snow Perfect easy Christmas baking treat
Mixing, Shaping, and Baking the Ultimate Zucchini Dog Treats
The execution phase is straightforward, provided the zucchini was properly drained. Consistency and temperature control are the keys to transitioning from soft dough to crunchy, dehydrated zucchini dog treats .
Step-by-step Dough Assembly: Achieving the Right Texture
Begin by preheating your oven to 350° F ( 175° C). In a large bowl, combine your prepared, well drained zucchini with the peanut butter and the egg. Stir this vigorously until combined, then incorporate the liquid (water or broth).
In a separate bowl, whisk your dry ingredients flour, oats, baking powder, and parsley to ensure even distribution. Add the dry mixture to the wet mixture gradually, mixing until a stiff, cohesive dough forms. The final texture should be firm enough to handle without sticking excessively to your fingers.
If the dough appears too sticky (a common issue if your peanut butter is very oily), incorporate whole wheat flour one tablespoon at a time until it is manageable and ready to roll.
Master the Roll: Tips for Uniform Treat Thickness
Transfer the dough to a lightly floured surface. Using your rolling pin, roll the dough to a consistent thickness of approximately ¼ inch (6 mm). Maintaining this uniformity is critical, as thicker sections will remain soft and moist, reducing the treat's shelf life, while thinner sections may burn.
Use your chosen cookie cutters to stamp out the shapes, placing them onto the prepared baking sheets with small spaces between each piece. Gather the dough scraps, gently re-roll them, and cut any remaining treats until all the dough is utilized.
Oven Time: Ensuring the Crunch Factor
Bake the biscuits for 30– 35 minutes, rotating the baking sheets halfway through. The objective is not merely to cook the dough, but to thoroughly dry it out. The treats are done when the edges are visibly golden brown and they feel firm and dry to the touch.
This low-and-slow baking process is what gives these zucchini dog treats homemade that satisfying snap. Once the baking time is complete, turn the oven off, crack the door slightly, and leave the trays inside for an additional 15 to 20 minutes.
This residual heat drying is the final step to achieving the perfect, professional crunch and guaranteeing a long shelf life.
Maximizing Shelf Life and Ensuring Canine Safety
Once the aroma of freshly baked treats fills your kitchen, proper handling and storage are crucial to maintain their texture and safety.
Storage Secrets: Keeping Biscuits Fresh and Crisp
After the crucial oven cooling step, transfer the biscuits to a cooling rack and allow them to cool completely this may take up to an hour before storing them. Storing warm biscuits traps residual steam and will inevitably lead to sogginess.
For immediate use, store these crunchy zucchini dog treats in an airtight container at room temperature for up to one week. If you’ve made a large batch (as this zucchini dog biscuit recipe yields), they can be refrigerated for up to three weeks or frozen for three months, making bulk preparation highly efficient.
Ingredient Swaps: Making These Treats Gluten or Grain Free
While this recipe utilizes whole wheat flour for its structural integrity, it’s easily adaptable for dogs with specific sensitivities. If you need a grain free option, you can substitute the whole wheat flour with an equal weight of finely ground oat flour or rice flour.
For owners wishing to avoid eggs, a simple flax "egg" (ground flaxseed mixed with water and allowed to gel) serves as an effective binder. Plus,, for dogs that cannot tolerate peanut butter, unsweetened pumpkin purée can replace the fat source, though you might need to add a touch more flour to achieve the desired stiffness.
Decoding Canine Dietary Needs: When to Consult Your Vet
Even when offering healthy zucchini dog treats , moderation is key. These biscuits are intended as supplementary snacks, providing fibre and flavour, but they should never replace balanced dog food.
We’ve kept the sodium content extremely low (estimated under 20 mg per treat), but if your dog has known dietary restrictions, diabetes, or kidney issues, always consult your veterinarian before introducing a new ingredient or treat, even simple homemade zucchini dog treats .
Beyond the Biscuit: Fun Shapes for Homemade Zucchini Dog Treats
For training purposes, consider ditching the cookie cutters entirely. Rolling the dough into a thin sheet and cutting it into small, pea-sized squares before baking creates perfect, low-calorie, high reward mini nuggets that are ideal for obedience work.
Alternatively, reducing the baking time to about 20 minutes and skipping the cooling-in-the-oven step will result in a softer, chewier biscuit, which is often preferable for senior dogs or puppies with delicate teeth.
Whatever shape you choose, the effort of making your own zucchini dog treats recipes will undoubtedly be rewarded with enthusiastic tail wags.
Recipe FAQs
These Zucchini Dog Treats look smashing, but how long will they actually last once baked?
Storage is crucial for homemade, low-preservative treats, so let's avoid a mouldy situation! Provided you’ve baked them until they are properly dry and crisp, they'll keep nicely in an airtight container at room temperature for about 7 10 days a fortnight in the fridge is safer, like storing a good batch of digestive biscuits.
If you've made a proper mountain of treats, stick them in the freezer where they’ll happily last for up to three months.
I’ve heard peanut butter can be dodgy for dogs. Which specific ingredients should I be keeping a keen eye on for safety?
Xylitol in peanut butter is the main bête noire; it is highly toxic to dogs, so always check the label religiously if in doubt, avoid it entirely. Beyond that, the biggest enemy of longevity is moisture, so you must squeeze every last drop of water from the grated zucchini before mixing to prevent premature spoiling.
Also, ensure you only use whole wheat flour and natural oats, as processed flours offer little nutritional benefit to your four legged friend.
My biscuits came out a bit soft and cakey what’s gone wrong, and how do I get that proper, satisfying crunch?
Ah, a classic home baker's conundrum! The secret to a proper, robust crunch is twofold: vigorous draining and thorough drying. Make sure you’ve squeezed the grated courgette until you can’t squeeze any more, and then crucially, follow the instruction to leave the biscuits in the cooling oven with the door slightly ajar for 15 20 minutes after the main bake.
This low-and-slow drying time is the magic touch that turns a soft biscuit into a resilient, crunchy treat.
Can I swap out the whole wheat flour for something else if my pup has a sensitive tum or a grain allergy?
Absolutely, you can certainly cater to a sensitive tum! Whole wheat is easy to swap for alternatives like oat flour or rice flour, which are often easier for sensitive dogs to digest.
However, be a clever cookie and substitute by weight rather than volume (180g of whole wheat for 180g of alternative) for the best results, as different flours absorb liquid at different rates. You could also replace the rolled oats with extra flour if necessary.
Are these treats low-calorie enough for training, and how many should I be giving my dog a day?
These are brilliantly wholesome, but remember they are treats, not a replacement for a balanced meal. It’s generally recommended that treats make up no more than 10% of your dog’s daily calorie intake, depending on their size and activity level.
For training sessions, the best British tip is to roll the dough thinner and cut them into tiny, pea-sized squares before baking they become high value, low-calorie nuggets perfect for high frequency rewards.
Easy Crunchy Zucchini Dog Biscuits