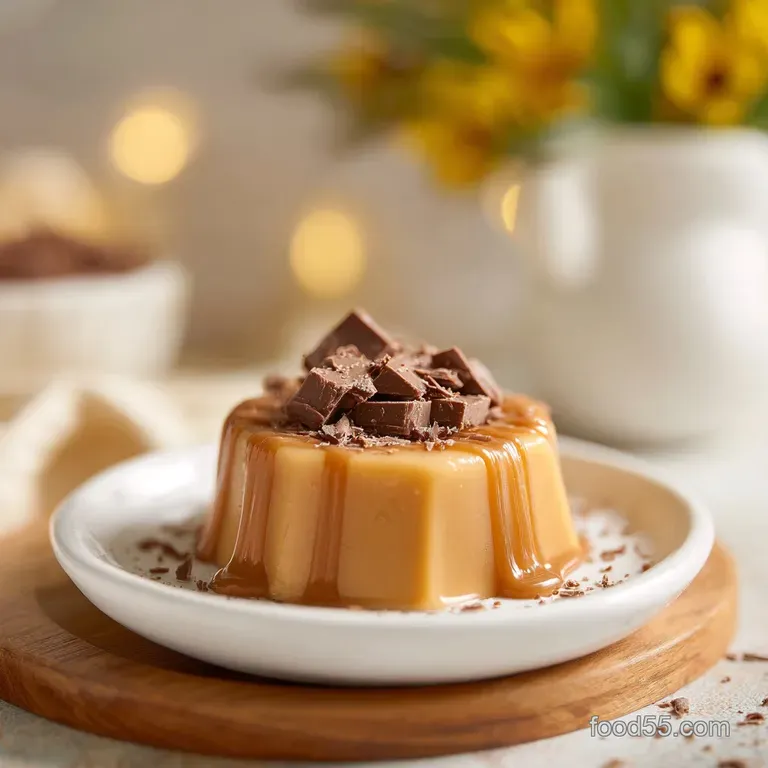
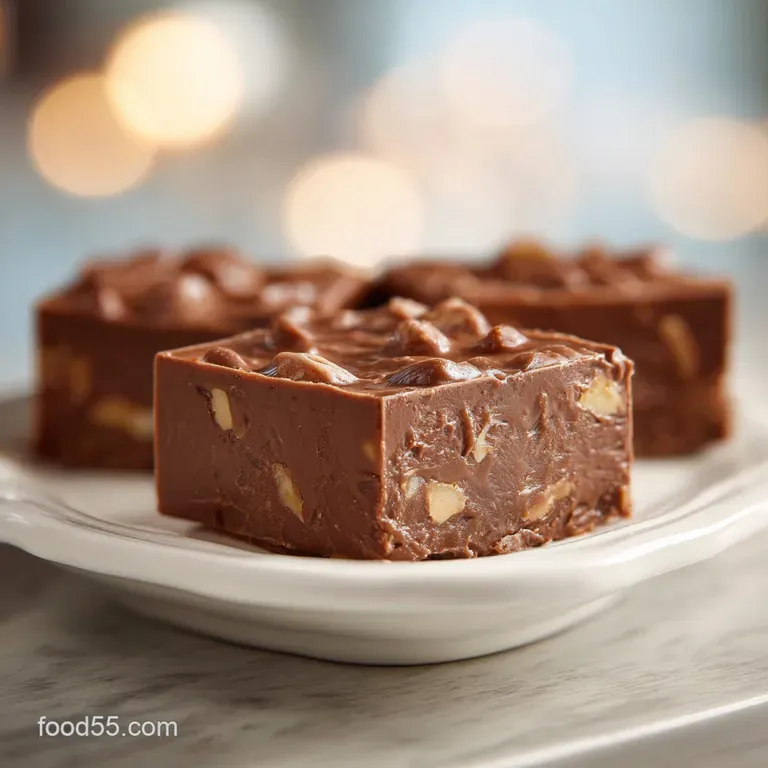
Toll House Fudge: Silky and Classic
- Time: Active 15 minutes, Passive 2 hours, Total 2 hours 25 minutes
- Flavor/Texture Hook: Velvety semi sweet chocolate with a buttery, melt on-the tongue finish.
- Perfect for: Holiday gifting, bake sales, or nostalgic late night cravings.
- Making the Iconic Toll House Fudge Without the Grainy Disaster
- Why This Recipe Works
- Ingredient Deep Dive Analysis
- Essential Elements for a Flawless Result
- Necessary Kitchen Tools for Success
- The Precise Method for Velvety Success
- Navigating Common Texture Failures and Fixes
- Scaling Your Production for Large Crowds
- Debunking Common Myths About Candy Making
- Long Term Storage and Reducing Kitchen Waste
- Ideal Pairings for a Dessert Platter
- Recipe FAQs
- 📝 Recipe Card
Making the Iconic Toll House Fudge Without the Grainy Disaster
We have all been there: you spend twenty minutes hovering over a hot stove, pouring your heart into a batch of sweets, only to have it set into something that feels like flavored sandpaper.
The first time I tried making fudge without a recipe, I ended up with a brick of sugar crystals that literally crunched between my teeth. It was heartbreaking. This specific version of Toll House Fudge is the targeted fix for that exact failure.
It uses a specific ratio of evaporated milk and marshmallows to act as an insurance policy against crystallization, ensuring your result is always velvety.
When you start boiling the sugar and evaporated milk, the kitchen fills with this heavy, caramelized aroma that smells like a professional candy shop. It is a scent that brings people together, signaling that something special is happening on the stove.
This recipe is more than just a sweet treat; it is a shared experience. We are looking for that specific moment where the mixture transforms from a thin liquid into a glossy, thick ribbon. Once you see that change, you know you are on the right track to success.
The beauty of this method lies in its simplicity, but don't let that fool you into being careless. Precision is your best friend here. We are going to walk through exactly how to time your boil and how to stir in your morsels so they emulsify perfectly.
By the time we are done, you'll be the person everyone begs for "that one chocolate recipe" every single December. Let's get into why this works so well and how to avoid the common pitfalls of home candy making.
Why This Recipe Works
- Marshmallow Stabilization: The gelatin and corn syrup in the miniature marshmallows prevent large sugar crystals from forming, acting as a "shield" for a smooth texture.
- Evaporated Milk Concentration: Since much of the water is already removed, this milk provides a rich, creamy base without the risk of the fudge becoming too runny or weeping.
- The Hard Boil Timer: Boiling for exactly five minutes allows the sugar to reach the "soft ball" stage without needing a candy thermometer, creating the ideal structure.
- Fat Emulsification: The combination of butter and chocolate fats creates a stable suspension that gives the fudge its signature melt in-your mouth quality.
| Premium Ingredient | Budget Alternative | Flavor Impact | Savings |
|---|---|---|---|
| Pure Vanilla Extract | Vanillin Essence | Slightly more artificial aftertaste | Save $5-8 |
| Chopped Walnuts | Sunflower Seeds | Nutty but less "classic" crunch | Save $3-4 |
| High End Cacao | Store Brand Morsels | Less complex chocolate notes | Save $2-3 |
Finding the right balance between cost and quality is key when you are making 48 servings. While I always reach for the pure vanilla when I can, the high sugar content in fudge is quite forgiving if you need to use a more budget friendly extract.
The real secret is the technique, not just the price tag of the chocolate.
Ingredient Deep Dive Analysis
| Component | Science Role | Pro Secret |
|---|---|---|
| Evaporated Milk | Protein Source | Don't swap for regular milk; the water content will ruin the set. |
| Mini Marshmallows | Texture Modifier | Use fresh marshmallows; stale ones won't melt evenly into the base. |
| Semi Sweet Morsels | Structural Fat | Keep them at room temp so they don't shock the hot sugar mixture. |
Essential Elements for a Flawless Result
- 1.5 cups granulated sugar: The structural backbone. Why this? Provides the sweetness and the crystalline structure needed for the fudge to set. (Substitute: Caster sugar for faster dissolving).
- 0.67 cup NESTLÉ® CARNATION® Evaporated Milk: The liquid base. Why this? High protein and fat content ensure a creamy, stable emulsion. (Substitute: Heavy cream, though it's much richer).
- 2 tablespoons unsalted butter: For shine and mouthfeel. Why this? Adds a velvety finish and prevents the fudge from being too brittle. (Substitute: Salted butter, but omit the extra salt).
- 0.25 teaspoon salt: The flavor balancer. Why this? Cuts through the intense sugar to highlight the chocolate notes. (Substitute: Sea salt flakes).
- 2 cups miniature marshmallows: The secret stabilizer. Why this? Prevents crystallization and adds a light, airy chew. (Substitute: Marshmallow fluff, 1 jar).
- 1.5 cups NESTLÉ® TOLL HOUSE® Semi Sweet Chocolate Morsels: The star flavor. Why this? Specific fat to sugar ratio designed for melting and resetting. (Substitute: Dark chocolate chips for a less sweet version).
- 1 teaspoon pure vanilla extract: For aromatic depth. Why this? Rounds out the cocoa flavors and adds a nostalgic scent. (Substitute: Almond extract for a cherry like twist).
- 0.5 cup chopped walnuts: For textural contrast. Why this? Provides a bitter, crunchy counterpoint to the soft, sweet fudge. (Substitute: Pecans or toasted almonds).
If you find yourself loving the way the chocolate and sugar play together here, you really should try my fudge crumb bars next. They use a similar flavor profile but offer a completely different, crumbly texture that's just as addictive.
Necessary Kitchen Tools for Success
You don't need a lab full of equipment, but a heavy duty 2 quart saucepan is non negotiable. Thinner pots have "hot spots" that will scorch the milk before the sugar actually melts, leading to bitter, burnt bits in your batch.
I also highly recommend using a silicone spatula rather than a wooden spoon; it allows you to scrape the bottom and corners of the pot more effectively, ensuring every grain of sugar is incorporated into the boil.
The 8 inch square baking pan is the standard for this recipe to get that perfect 1 inch thick square. If you use a 9x13 pan, your fudge will be very thin and lose that satisfying "bite." Always line it with parchment paper.
Trust me, trying to pry fudge out of a greased pan is a recipe for frustration and broken pieces. Leave an overhang so you can lift the entire block out once it's set.
The Precise Method for Velvety Success
1. Prepare the Foundation
Line an 8 inch square baking pan with parchment paper, leaving an inch of overhang on the sides for easy removal. This ensures your fudge won't stick and makes slicing much cleaner later on.
2. The Base Mix
In your heavy duty 2 quart saucepan, combine the 1.5 cups sugar, 0.67 cup evaporated milk, 2 tablespoons butter, and 0.25 teaspoon salt. Give it a quick stir before turning on the heat to ensure the salt is distributed.
3. The Controlled Boil
Bring the mixture to a full rolling boil over medium heat. You need to stir constantly during this phase. The smell will shift from cold milk to a warm, buttery syrup. If you see brown flecks, turn the heat down slightly; your pot is too hot.
4. The 5 Minute Timer
Once a rolling boil is reached (where bubbles don't disappear when you stir), boil for exactly 5 minutes. You must stir vigorously and constantly. This is the stage where the sugar is cooking to the correct temperature for the set.
5. The Melt Phase
Remove the saucepan from the heat immediately. Do not linger! Immediately stir in the 2 cups miniature marshmallows, 1.5 cups chocolate morsels, vanilla extract, and chopped nuts.
6. The Emulsion Phase
Stir vigorously until the marshmallows and chocolate are completely melted and the mixture is smooth. You will see the texture change from lumpy to a glossy, thick ribbons. The aroma of melting semi sweet chocolate will be intense and wonderful.
7. The Pour
Pour the hot mixture into the prepared pan and spread it evenly with your spatula. Work quickly, as it starts to set as it cools.
8. The Setting Phase
Allow the fudge to set at room temperature for at least 2 hours. Resist the urge to put it in the fridge immediately, as this can cause condensation and make the top sticky. Once firm, lift from the pan using the parchment and slice into 48 squares.
Navigating Common Texture Failures and Fixes
Why Your Fudge Is Grainy
This usually happens because the sugar didn't dissolve properly before the boil, or sugar crystals from the side of the pot fell back into the mix. To prevent this, make sure the mixture is smooth before it hits that rolling boil.
If Your Fudge Is Too Soft
This is almost always a result of under cooking. If you don't hit that full 5 minute boil at the right temperature, the sugar structure won't be strong enough to hold the fats in place. It will still taste great, but you might need to serve it with a spoon!
For Perfectly Clean Slices
If you want those sharp, professional edges, let the fudge set completely, then chill it for 30 minutes before cutting. Use a large, sharp knife dipped in hot water (and wiped dry) between every single cut.
| Problem | Root Cause | Solution |
|---|---|---|
| Fudge is "weeping" oil | Mixture got too hot or separated | Stir more vigorously during the melt phase to re emulsify. |
| Dull, matte surface | Over stirring while cooling | Pour the fudge immediately once the marshmallows melt. |
| Hard, brittle texture | Boiled for longer than 5 minutes | Stick strictly to the timer to keep the moisture balance. |
Common Mistakes Checklist
- ✓ Never use a thin bottomed pot; it causes localized scorching.
- ✓ Don't skip the parchment paper; greasing the pan is rarely enough for fudge.
- ✓ Ensure the boil is "rolling" meaning it doesn't stop when you stir it.
- ✓ Use miniature marshmallows, not the jumbo ones, so they melt fast enough.
- ✓ Let it set at room temperature first to avoid a "sweaty" surface.
Scaling Your Production for Large Crowds
When you need to double this recipe for a party, don't just throw everything in a giant pot and hope for the best. For a 2x batch, use a much larger pot to account for the "growth" of the bubbles during the boil sugar syrup expands significantly.
Keep your salt and vanilla at 1.5x the original amount rather than 2x to avoid overpowering the chocolate.
For a smaller 1/2 batch, use a small loaf pan instead of the 8 inch square. You’ll need to reduce your boil time by about 1 minute because the smaller volume of liquid reaches temperature much faster.
When working with half an egg or awkward measurements, I find it's better to stick to the full batch and just freeze the leftovers this fudge freezes beautifully.
If you are looking for a more "coffee shop" vibe for a smaller crowd, my Jamoca almond fudge is a fantastic alternative that scales down well for intimate gatherings.
| Method | Time | Texture | Best For |
|---|---|---|---|
| Stovetop (Classic) | 15 mins | Velvety and dense | The traditional, reliable set. |
| Microwave (Shortcut) | 8 mins | Slightly softer | Quick fixes or kids' projects. |
| Slow Cooker | 2 hours | Very creamy/melted | Large batches where timing is less critical. |
Debunking Common Myths About Candy Making
Many people believe that you absolutely must have a candy thermometer to make fudge. While it helps for some recipes, this specific marshmallow based version is designed to work with a timer.
The chemical properties of the marshmallows act as a buffer, making the exact temperature less of a "cliff" and more of a "slope."
Another myth is that you can't make fudge on a rainy day. While high humidity can affect candy that relies on very high temperatures (like toffee or peanut brittle), this fudge has enough stabilizers that the weather won't ruin your batch. As long as you boil it for the full five minutes, you're golden.
Finally, some say you should never stir fudge once it starts boiling. That rule applies to old-fashioned recipes that don't use milk or marshmallows. For this recipe, if you don't stir, the milk will scorch and your fudge will be ruined. Stir away!
Long Term Storage and Reducing Kitchen Waste
Storage: This fudge stays fresh at room temperature in an airtight container for up to 2 weeks. If you want it to last longer, you can keep it in the fridge for 3 weeks, though it might lose a bit of its shine.
For long term storage, wrap individual blocks in wax paper, place them in a freezer bag, and freeze for up to 3 months. Thaw at room temperature for an hour before eating.
Zero Waste: If you have leftover bits of fudge that are too small to serve, don't throw them away! Chop them up and fold them into vanilla bean ice cream or use them as a "surprise center" for chocolate cupcakes.
If you have leftover evaporated milk (since the can is usually larger than 0.67 cup), use the rest in your morning coffee or as a rich base for a quick mac and cheese sauce. Even the walnut dust at the bottom of the bag can be toasted and sprinkled over oatmeal.
Ideal Pairings for a Dessert Platter
This fudge is incredibly rich, so it needs something to balance it out. I love serving it alongside tart fruit, like fresh raspberries or sliced green apples. The acidity cuts through the heavy sugar and makes the whole experience feel less overwhelming.
If you're building a full dessert board, consider adding some salty elements. Pretzel sticks or sea salt crackers provide a fantastic crunch that contrasts with the soft fudge. For drinks, a dark roast coffee or a glass of cold milk is the classic choice, but a spicy chai tea also pairs beautifully with the vanilla and chocolate notes in the fudge.
It's all about creating that perfect balance of sweet, salty, and bitter to keep people coming back for "just one more square."

Recipe FAQs
Is chocolate fudge the most popular flavor?
Yes, it is the classic standard. While regional varieties exist, the rich, semi sweet profile of Toll House fudge remains the benchmark for home bakers.
Is Toll House still producing this specific recipe?
Yes, the recipe remains a staple. Nestle Toll House continues to support this method, which relies on the specific emulsification of evaporated milk, marshmallows, and chocolate.
What defines millionaire fudge?
No, it is not the same as standard Toll House fudge. Millionaire fudge is a more complex, multi layered confection that typically incorporates caramel and a chocolate ganache topping.
Is Mackinaw Island fudge the same as a quick stovetop recipe?
No, this is a common misconception. Mackinaw Island fudge is traditionally made using a marble slab and a copper kettle to cream the sugar to a specific crystalline structure, whereas this recipe relies on marshmallows to achieve a smooth texture without the intense labor. If you enjoy experimenting with different textures, see how the same principles of sugar-to-fat ratios affect consistency in our Peanut Butter Fudge.
How to ensure a smooth, non-grainy texture?
Stir vigorously and constantly throughout the process. Maintaining a steady, rolling boil for exactly 5 minutes ensures the sugar dissolves completely without crystallizing before you add the chocolate and marshmallows.
How to prevent the fudge from sticking to the pan?
Line your 8 inch square pan with parchment paper. Leave an inch of overhang on the sides so you can lift the entire block out cleanly after it has set for 2 hours.
How to fix fudge that won't set at room temperature?
Check your boil duration first. If the mixture did not reach a true rolling boil for the full 5 minutes, it may lack the density required to firm up; ensure your heat is high enough that the boil doesn't subside when you stir.
Classic Toll House Fudge

Ingredients:
Instructions:
Nutrition Facts:
| Calories | 83 calories |
|---|---|
| Protein | 0.7 g |
| Fat | 3.6 g |
| Carbs | 12.5 g |
| Fiber | 0.5 g |
| Sugar | 11.2 g |
| Sodium | 22 mg |
