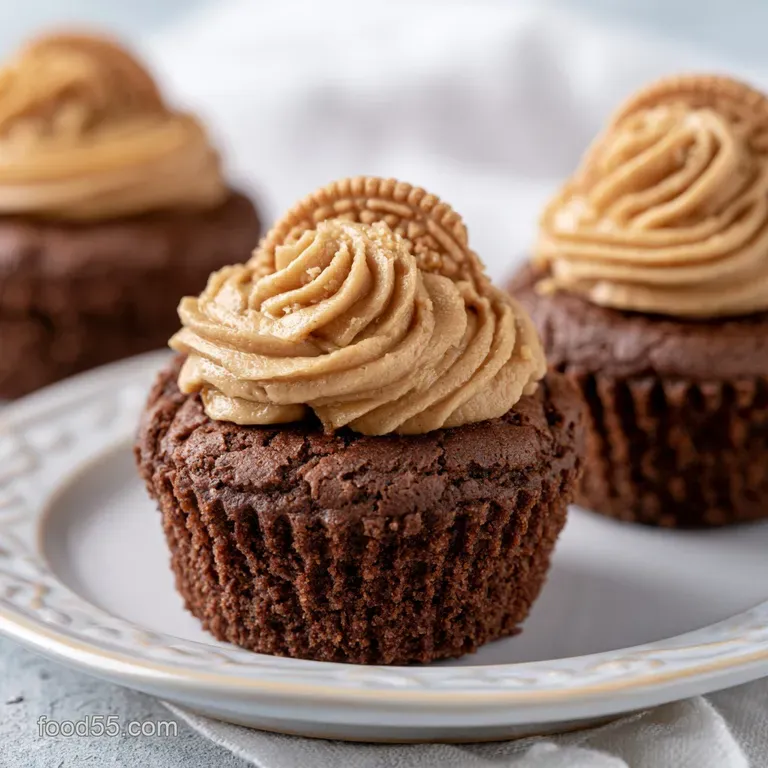
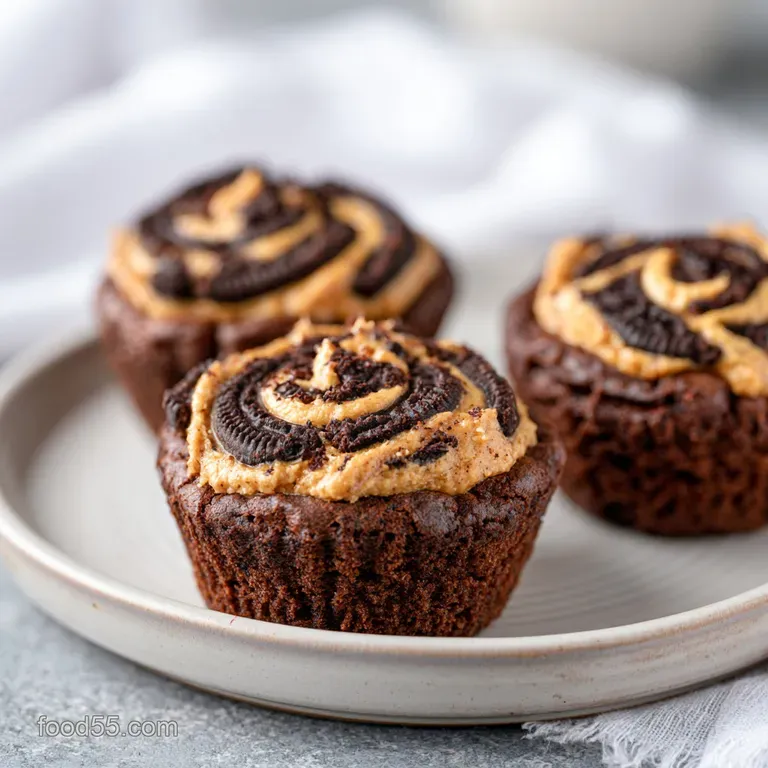
Dessert Heaven Cookie Dough Reese's Brookie Cups
- Time:15 minutes active + 25 minutes baking = Total 40 minutes
- Flavor/Texture Hook: Velvety chocolate meets salty peanut butter with a shatter crisp edge
- Perfect for: Last minute party treats or a high energy sugar craving
That sound of the whisk hitting the side of the bowl, the smell of butter melting in the microwave, and that first hit of cocoa powder in the air - that's my happy place. I remember trying to make these for a friend's birthday a few years back, and I was convinced that putting a heavy dollop of cookie dough on top of brownie batter would just lead to a muddy, sunken mess.
I'd heard from other bakers that you have to bake the layers separately and stack them like a cake to get that clean line.
But I decided to ignore that. I wanted something that felt like a warm hug in a muffin tin, not a professional pastry project. To my surprise, by adjusting the moisture in the cookie dough and getting the oven temp just right, I found that the two layers actually support each other.
The brownie acts as a fudgy anchor, while the cookie dough puffs up just enough to cradle the candy. You'll love this decadent recipe for Dessert Heaven Cookie Dough Reese s.
Forget the idea that you need a fancy pastry degree to get those distinct layers. Most people overcomplicate this by over mixing the batter or using too much flour in the cookie top, which makes it cakey instead of chewy.
We're going for a specific contrast here: a dark, intense chocolate bottom and a golden, salty sweet top. It's all about the balance of fats and sugars.
Dessert Heaven Cookie Dough Reese s
Right then, let's get into why this actually works. When you're dealing with two different batters in one cup, you're essentially managing two different bake times and two different structures. If the brownie is too runny, the cookie sinks. If the cookie is too heavy, it crushes the brownie.
- Density Balance
- The brownie base uses melted butter and less flour, creating a dense, fudgy floor that can support the weight of the cookie dough without collapsing.
- Sugar Stability
- Using brown sugar in the cookie layer provides that chewy, molasses like texture that keeps it from drying out while the brownie cooks.
- Fat Insulation
- The Reese's cup acts as a little heat shield, keeping the very center of the cookie dough soft while the edges get that golden, shatter like crispness.
- Thermal Mass
- Muffin tins distribute heat more evenly than a flat pan, which ensures the centers are set without burning the bottoms.
If you're into this kind of texture, you might also love my peanut butter cookies which use a similar salt to sugar ratio to get that perfect chew.
| Method | Time | Texture | Best For |
|---|---|---|---|
| Fast (Pre made) | 20 mins | Softer, less complex | Quick cravings |
| Classic (Homemade) | 40 mins | Fudgy, complex, rich | Parties/Gifting |
The Secret to Layering
The magic of this dish isn't just the ingredients, it's how they interact. I've found that the order of operations is everything. If you press the cookie dough too hard into the brownie batter, they merge into one giant blob. You want them to be friends, but not roommates.
For the Fudgy Brownie Base
The brownie needs to be "under baked" in spirit but "set" in reality. By using only 65g of flour, we're keeping the gluten low. This ensures the base stays velvety rather than bread like. When you distribute it, don't overfill. If you go past that 1/3 mark, you're risking a blowout in your oven.
For the Cookie Dough Layer
The cookie dough needs more structure. That's where the baking soda and the chilled butter come in. We want the dough to hold its shape as a ball before it hits the heat. If the dough is too warm, it'll spread and swallow the brownie.
For the Reese's Crown
The candy goes in last. If you bury it, you lose the visual wow factor. If you put it on too early, it might slide. Pressing it firmly into the center of the cookie ball anchors it, ensuring it stays put during the rise.
The Recipe Specs
Before we start, let's talk about the gear. You don't need much, but a standard 12 slot muffin tin is non negotiable. I prefer using paper liners because these are so rich they can actually stick to the pan if you aren't careful with the grease.
- 1. Oven Temp
- Exactly 350°F (175°C).
- 2. Bake Time
- 20-25 minutes.
- 3. Cooling Window
- 10 minutes in the pan.
Decision Shortcut:
- If you want them extra fudgy, pull them at 20 mins.
- If you prefer a crispier edge, go for 25 mins.
- If you want a saltier hit, sprinkle flaky salt on top immediately after baking.
The Essential Ingredients
I've listed everything below. I'm a big believer in using real butter here. Don't even bother with the low-fat stuff; it changes the way the sugar crystallizes, and you'll lose that velvety mouthfeel.
For the Brownie Layer:
- 115g unsalted butter, meltedWhy this? Provides the richness and fudgy base
- 200g granulated sugarWhy this? Creates the crackly top layer
- 1 large eggWhy this? Binds the flour and cocoa
- 5ml vanilla extractWhy this? Rounds out the cocoa bitterness
- 30g unsweetened cocoa powderWhy this? Deep, dark chocolate flavor
- 65g all purpose flourWhy this? Keeps it fudgy, not cakey
- 1.5g saltWhy this? Enhances the chocolate notes
For the Cookie Layer:
- 115g softened unsalted butterWhy this? Needed for creaming with sugar
- 65g brown sugar, packedWhy this? Adds chew and caramel flavor
- 30ml milkWhy this? Adjusts the dough consistency
- 2.5ml vanilla extractWhy this? Classic cookie aroma
- 125g all purpose flourWhy this? Provides the necessary lift
- 1.5g baking sodaWhy this? Helps the dough rise and brown
- 85g mini chocolate chipsWhy this? Extra pockets of melted chocolate
The Topping: - 12 standard size Reese's Peanut Butter Cups Why this? The iconic salty sweet finish
| Original Ingredient | Substitute | Why It Works |
|---|---|---|
| All Purpose Flour | Almond Flour | Grain free. Note: Denser crumb and more fragile structure |
| Unsalted Butter | Coconut Oil | dairy-free. Note: Adds a slight coconut hint and softer set |
| Granulated Sugar | Coconut Sugar | Lower glycemic. Note: Darker color and deeper molasses taste |
The Gear You Need
You don't need a professional kitchen for this, but a few things make it way easier. A stand mixer such as KitchenAid is great for the cookie dough, but a hand mixer or even a sturdy whisk and some elbow grease will do the trick.
I highly recommend using a small cookie scoop. It's the only way to ensure all 12 portions are the same size. If one cookie dough ball is bigger than the rest, it'll bake slower, and you'll end up with some that are raw and some that are burnt.
Step by step Process
Let's crack on. Make sure your butter for the cookie dough is actually softened - not melted. There's a big difference in how the air incorporates into the sugar.
- Preheat your oven to 350°F (175°C) and prepare a 12 slot standard muffin tin with paper liners or non stick spray.
- Whisk melted butter and sugar until smooth, then beat in the egg and vanilla until glossy. Note: Beating until glossy ensures the sugar is well incorporated.
- Sift in cocoa powder, flour, and salt; fold gently with a spatula until just combined. Note: Stop folding as soon as the streaks of flour disappear to avoid a tough brownie.
- Distribute the brownie batter evenly among the 12 cups, filling each about 1/3 of the way up.
- Cream softened butter and brown sugar until fluffy, then stir in milk and vanilla. Note: Fluffy butter means more air, which means a better rise.
- Mix in flour and baking soda, then fold in the mini chocolate chips.
- Form 12 uniform balls of cookie dough using a small scoop.
- Place one dough ball onto each brownie base. Press down slightly to anchor the dough and rotate to flatten the top.
- Press one Reese's peanut butter cup firmly into the center of each cookie dough ball.
- Bake for 20-25 minutes until edges are deep golden brown and the center has a slight springy jiggle.
- Allow to cool in the pan for 10 minutes before transferring to a wire rack.
Chef's Note: If you see the cookie dough starting to slide, don't panic. Just use a toothpick to nudge it back into the center. Also, try freezing your butter for 10 minutes before creaming it if your kitchen is too hot; it helps the dough hold its shape better.
Fixes and Common Errors
Even the best of us mess up. I once forgot to sift the cocoa powder and ended up with these little bitter clumps of dry powder in my brownie base. It was edible, but not exactly the "heaven" we're aiming for.
Troubleshooting Common Issues
| Issue | Solution |
|---|---|
| Why Did My Cookie Dough Sink | This usually happens if the brownie batter was too wet or if the cookie dough was too warm. When the fat in the cookie dough melts too quickly before the structure sets, it collapses into the brownie. |
| Why Are the Edges Burnt But the Center Raw | This is a temperature issue. If your oven runs hot, the edges will caramelize and burn before the heat reaches the center. According to Serious Eats, oven temperatures c |
| Stop the Reese's from Melting Completely | You can't stop it entirely - that's the best part! But if you want the cup to keep its shape, place it on the dough right before it goes in the oven, rather than letting it sit out on the counter. |
Quick Success Checklist:
- ✓ Sifted the cocoa powder to avoid clumps.
- ✓ Used a scale for the flour (don't scoop and level!).
- ✓ Butter for the top was softened, not liquid.
- ✓ Allowed 10 minutes of cooling time before moving.
- ✓ Reese's cups were pressed firmly into the center.
Making it Your Own
Depending on who you're serving, you might want to tweak this. For those who find it too sweet, you can add a pinch of espresso powder to the brownie batter. It doesn't make it taste like coffee, but it makes the chocolate taste "more" like chocolate.
For a gluten-free version, you can use a 1:1 gluten-free flour blend. I've found that according to King Arthur Baking, blends with xanthan gum work best for cookies and brownies to mimic the stretch of gluten.
Scaling Guidelines:
Scaling Down (1/2 Batch): Use a 6 slot muffin tin. You'll need to beat one egg and use exactly half of it (about 25g). Reduce the bake time by about 20%, checking them at the 16 minute mark.
Scaling Up (2x Batch): Work in batches. Don't try to cream 230g of butter in a tiny bowl. Keep your salt and spices at 1.5x the original amount rather than doubling them, as salt can become overwhelming in larger quantities.
Baking Tips for Big Batches: If you're filling two trays at once, lower the oven temperature to 325°F and extend the time by 5-10 minutes. This prevents the tray closest to the heating element from burning.
Freshness and Storage
These are incredibly rich, so you likely won't eat all 12 at once. Because of the high fat content in the peanut butter and butter, they stay moist for a long time.
Storage Guidelines: - Fridge: Store in an airtight container for up to 5 days. They become almost fudge like when cold. - Freezer: Wrap individually in parchment paper and place in a freezer bag for up to 3 months.
Reheating: To get that "just baked" feel, pop one in the microwave for 10-15 seconds. The Reese's cup will soften and the chocolate chips will get melty again.
Zero Waste Tips: If you have a tiny bit of brownie batter left over, don't throw it away! Put it in a small ramekin and bake it alongside the cups for a "chef's treat" sample. If you have leftover cocoa powder, mix it into your morning oatmeal or use it to dust the top of some fresh strawberries.
Best Flavor Pairings
Since these are so sweet and rich, you need something to cut through the heaviness. I love serving these with a cold glass of almond milk or a strong, unsweetened black coffee. The bitterness of the coffee balances the sugar perfectly.
If you're putting together a dessert platter, try pairing these with something lighter. My madeleine cookies are a great contrast because they are airy and lemony, which cleanses the palate between bites of the rich chocolate and peanut butter.
You could also serve these with a side of fresh raspberries or a dollop of unsweetened Greek yogurt to add a bit of acidity. Trust me, the tanginess of the berries makes the Dessert Heaven Cookie Dough Reese s taste even more intense.
Right then, that's the whole process! This recipe is all about the joy of sharing something that looks impressive but is actually quite simple to pull off. Whether you're bringing these to a potluck or just treating yourself on a Tuesday night, the combination of the fudgy base and the cookie top is unbeatable.
Let's get baking!
Recipe FAQs
Can you add Reese's cups to brownie mix?
Yes, they are a perfect addition. Pressing them into the cookie dough on top of the brownie batter keeps them from sinking and ensures a peanut butter center in every bite.
Can I put cookie dough in my brownie mix?
Yes, that is exactly how these are made. Layering a ball of cookie dough on top of the brownie batter creates a hybrid dessert with two distinct textures.
What are the 5 ingredient brownies?
This specific recipe uses more than five ingredients. We include salt and vanilla to better balance the richness of the cocoa and butter.
Can I put frozen cookie dough in brownie batter?
No, avoid using frozen dough. The extreme temperature difference can leave the brownie base undercooked or cause the cookie portion to sink.
Why did my cookie dough sink into the brownie batter?
This usually happens if the brownie batter is too wet or the dough is too warm. When the fat melts before the structure sets, the cookie collapses into the base.
How to fix burnt edges with a raw center?
Lower your oven temperature or check for hot spots. Ensure your oven is accurately calibrated to 350°F so the heat reaches the center before the edges caramelize.
Is it true that melted butter is fine for the cookie dough portion?
No, this is a common misconception. Softened butter allows air to incorporate into the sugar, which prevents the cookie from spreading too thin. If you enjoyed mastering this texture, see how we handle fats in our peanut butter bars.
Dessert Heaven Cookie Dough Reese S

