Gluten Free Mulberry Tart: Rich and Silky
- Time: 20 min active + 1 hour chilling
- Flavor/Texture Hook: Shattering crust with silky custard
- Perfect for: Seasonal summer gatherings or brunch
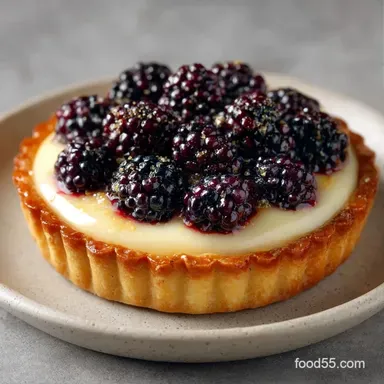
The scent of warming vanilla and buttery flour always hits me first. Then comes the sight of those deep indigo berries, looking like little gems against a pale yellow custard. There is something about the way a berry tart looks on a summer table that just feels right.
I remember the first time I tried this. My fingers were stained purple for two days because I spent the whole afternoon picking berries from a wild tree in the backyard. It was a messy, joyful process that reminded me why we cook with seasonal produce in the first place.
You can expect a dessert that is light but satisfying. This Mulberry Tart avoids the heavy, cloying sweetness of store-bought pies, focusing instead on the natural tang of the fruit. It's a balanced treat that celebrates the short window when mulberries are actually in season.
Mulberry Tart
Making a Mulberry Tart requires a bit of patience, especially with the gluten-free crust. Most people struggle with the texture, either ending up with a crumbly mess or something too dense. I've found that using powdered sugar instead of granulated in the dough helps keep the crust tender.
The goal is a contrast in textures. You want that initial snap of the pastry, followed by the creamy weight of the custard, and finally the burst of fresh berries. When you have a tree in the yard, you're essentially making a free mulberry tart, which makes the process even more rewarding.
This recipe focuses on a gluten free Mulberry Tart approach that doesn't compromise on the "melt in-your mouth" feel. By controlling the temperature of the butter and the tempering of the eggs, we get a professional result in a home kitchen.
Avoiding Common Crust Issues
A lot of recipes fail because they don't account for how gluten-free flour behaves. Without gluten to bind everything, the crust can shrink or crack during the bake. The trick is pressing the dough firmly into the pan to remove air pockets.
Cold Butter: Keeping the butter cubed and chilled ensures it doesn't melt into the flour prematurely. This creates those tiny steam vents that make the pastry light.
Powdered Sugar: Using a finer sugar prevents the crust from becoming grainy. It dissolves faster and blends into the fat more evenly.
The Chill Factor: Letting the crust cool completely before adding the filling is a non negotiable step. If the crust is warm, the custard will soak into the pastry, and you'll lose that crisp edge.
Why crusts crack
Gluten-free dough lacks elasticity. If you overwork it or let it get too warm, it loses its structure and splits.
Preventing soggy bottoms
Pre baking the shell until it is lightly golden creates a moisture barrier. This stops the custard from turning the base into mush.
The powder sugar logic
Granulated sugar can leave tiny crystals in a shortcrust. Powdered sugar creates a tighter, smoother crumb that feels more traditional.
Timing and Yield
This Mulberry Tart takes about 120 minutes from start to finish, though most of that is passive cooling and chilling time. You'll get 8 generous slices from a 9 inch pan.
| Method | Prep Time | Cook Time | Texture | Best For |
|---|---|---|---|---|
| Oven Baked | 20 mins | 40 mins | Crispy/Set | Traditional Slices |
| Stovetop Filling | 10 mins | 10 mins | Creamy/Glossy | Layering |
The active work is minimal, but you can't rush the refrigeration. If you cut into the Mulberry Tart before the hour is up, the custard might slump.
Why These Ingredients Work
Each part of this Mulberry Tart has a specific job. We aren't just throwing things together; we're building layers of flavor and stability.
Cornstarch: This acts as the stabilizer for the custard. It ensures the filling holds its shape when sliced.
Egg Yolks: These provide the richness and that deep yellow color. They emulsify the milk and butter into a smooth cream.
Lemon Juice: The acidity cuts through the richness of the custard and keeps the berries looking vibrant.
If you have extra berries, you can always make a batch of mulberry jam to use as a base layer under the custard.
Ingredient Deep Dive
| Ingredient | What It Does | Best Swap |
|---|---|---|
| GF Flour Blend | Provides structure | Almond flour (will be denser) |
| Whole Milk | Creates the creamy base | Coconut milk (adds nuttiness) |
| Apricot Preserves | Adds a glossy finish | Peach jam (similar flavor) |
| Fresh Mulberries | Main flavor and acid | Blackberries (more tart) |
Essential Kitchen Tools
You don't need a professional kitchen for this Mulberry Tart, but a few specific tools make it easier. A 9 inch tart pan with a removable bottom is a must; otherwise, getting the slices out is a nightmare.
I suggest using a pastry cutter or a sturdy fork to blend the butter into the flour. If you use your hands too much, the warmth from your palms will melt the butter, and the crust will lose its flake.
A heavy bottomed saucepan is important for the custard. Thin pans create hot spots, which can lead to those dreaded scrambled egg bits in your filling.
Step by step Guide
Right then, let's get into the actual making of the Mulberry Tart. Follow these steps closely to ensure the textures stay distinct.
Phase 1: The Shattering Crust
- Whisk together the gluten-free flour, powdered sugar, and salt in a medium bowl.
- Add cold cubed butter and blend with a fork or pastry cutter until the mixture resembles coarse crumbs. Note: Don't overmix or the crust becomes tough.
- Press the dough firmly into the bottom and up the sides of a 9 inch tart pan; smooth the surface with a measuring cup.
- Bake at 350°F (175°C) for 12-15 minutes until lightly golden. Let cool completely.
Phase 2: The Filling
- Whisk milk, granulated sugar, and cornstarch in a saucepan over medium heat until simmering and thickened.
- Gently whisk a small amount of hot milk into the egg yolks to temper them, then stir the yolk mixture back into the pan. Note: This prevents the eggs from cooking instantly.
- Stir constantly for 2 minutes until thick and glossy, then remove from heat and stir in vanilla and butter.
- Pour custard into the cooled crust, smooth the top, and refrigerate for at least 1 hour.
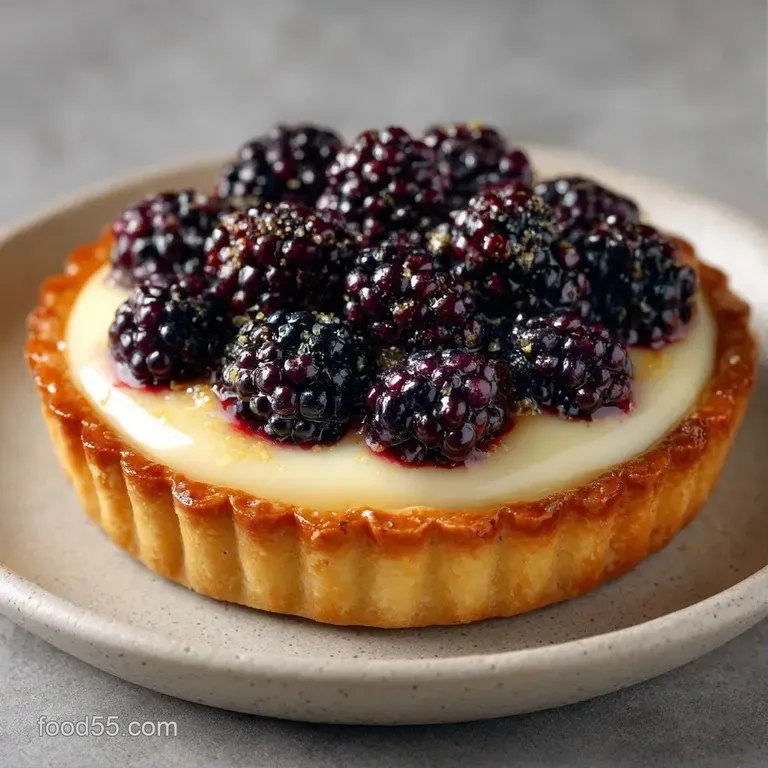
Phase 3: The Mulberry Assembly
- Combine apricot preserves and water in a small saucepan over heat until melted and pourable to create a glaze.
- Toss fresh mulberries with lemon juice and arrange them atop the chilled custard.
- Brush the apricot glaze over the mulberries for a professional finish.
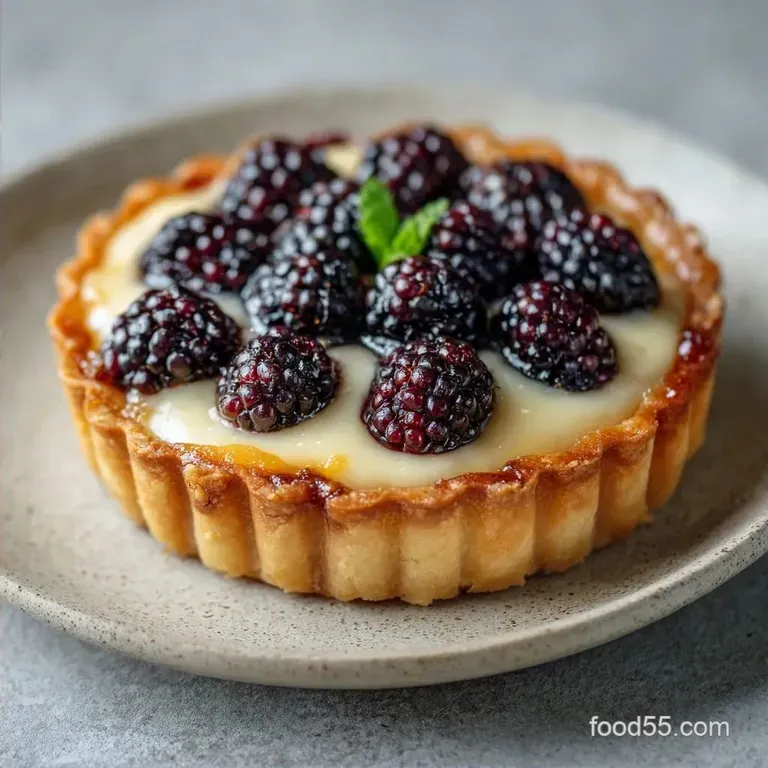
Chef's Note: For a more vibrant look, add a few fresh mint leaves or a sprinkle of lemon zest around the edges of the Mulberry Tart just before serving.
Fixing Common Problems
Even with a plan, things happen. Maybe the berries are too juicy, or the crust didn't set. Here is how to handle the most frequent Mulberry Tart mishaps.
Troubleshooting Common Issues
| Issue | Solution |
|---|---|
| Why your crust shrank | If the dough is too warm when it hits the oven, the butter melts too fast, causing the walls to slump. Always ensure your butter is cold and the dough is pressed firmly. |
| Your custard is lumpy | This usually happens if the tempering step was rushed. If you see lumps, you can pass the hot custard through a fine mesh sieve before pouring it into the Mulberry Tart shell. |
| Why are your berries leaking | Mulberries are delicate. If you toss them in lemon juice too early, they start to break down. Only dress them right before you place them on the tart. |
Simple Dietary Changes
This recipe is already a gluten free Mulberry Tart, but you can tweak it further. If you want to make a free mulberry tart using only what's in the pantry, you can swap the whole milk for any creamy plant based alternative.
For those avoiding refined sugar, you can replace the granulated sugar in the custard with maple syrup. Just be aware that this will make the filling slightly thinner, so you might need an extra teaspoon of cornstarch.
If you enjoy this flavor profile, you might also like these mulberry muffins for a quicker breakfast option.
| Original Ingredient | Substitute | Why It Works |
|---|---|---|
| Whole Milk (2 cups) | Full fat Coconut Milk | Similar fat content. Note: Adds a slight tropical flavor |
| Egg Yolks (3) | Flax egg + 1 tsp cornstarch | Bind ingredients. Note: Results in a softer, less rich set |
| Powdered Sugar | Finely ground coconut sugar | Lower glycemic index. Note: Changes crust color to brown |
Storage and Waste Tips
A Mulberry Tart is best eaten within 48 hours. Store it in the refrigerator, covered loosely with plastic wrap to prevent the glaze from sticking to the film.
If you have leftovers, the slices stay good in the fridge for up to 3 days. I don't recommend freezing the assembled tart, as the custard can separate and the fresh berries will turn mushy upon thawing.
To avoid waste, any leftover mulberries that are too soft for the tart can be simmered down with a bit of sugar for a quick syrup. You can also use the leftover apricot glaze as a wash for other fruit cakes.
Plating and Pairings
When it comes to the Mulberry Tart, the colors do the heavy lifting. The deep purple of the berries against the creamy custard is already striking. To make it pop, I use three specific color accents.
First, a sprig of bright green mint provides a fresh contrast to the dark berries. Second, a dusting of powdered sugar on the plate adds a clean, white frame. Third, a few thin slices of fresh strawberry add a touch of red, making the plate feel like a summer garden.
For a pairing, serve a slice of this Mulberry Tart with a dollop of unsweetened whipped cream or a scoop of vanilla bean ice cream. The cold creaminess balances the tartness of the fruit and the richness of the custard perfectly.
Recipe FAQs
Can I use frozen mulberries instead of fresh ones?
No, stick with fresh. Frozen berries release excess moisture and bleed color into the custard, ruining the clean presentation.
What if I don't have a tart pan?
Use a springform pan or a pie dish. Press the dough firmly into the bottom and sides to ensure the crust holds its shape during baking.
How do I know when the tart crust is done?
Bake until the edges are lightly golden. This typically takes 12-15 minutes at 350°F.
Can I make the dough ahead of time?
Yes, you can. Wrap the prepared dough tightly in plastic and keep it chilled in the refrigerator until you are ready to press it into the pan.
How can I use mulberries if they are too overripe for the tart?
Simmer them with sugar to create a syrup. For a more shelf stable option, try making a homemade jam.
How can I prevent the custard from becoming lumpy?
Temper the egg yolks. Gently whisk a small amount of hot milk into the yolks before stirring the mixture back into the saucepan.
Is it true that the custard must be boiled for several minutes to thicken?
No, this is a common misconception. Stir constantly for only 2 minutes once the mixture thickens to maintain a glossy, smooth texture.
gluten free Mulberry Tart