Red White and Blue Ice Cream: Failure-Proof
- Time:15 minutes active + 6 hours 15 mins chilling
- Flavor/Texture Hook: Velvety smooth cream with tart, fruity swirls
- Perfect for: 4th of July parties or Independence Day Desserts
The high pitched whirr of my hand mixer is usually the soundtrack to my weekend, but last July, it sounded like a victory lap. I remember staring at the bowl, watching the heavy cream transform from a liquid splash into thick, snowy peaks that held their shape like a sculpture.
There is something so satisfying about that moment, right before you fold in the sweetness and turn it into something frozen.
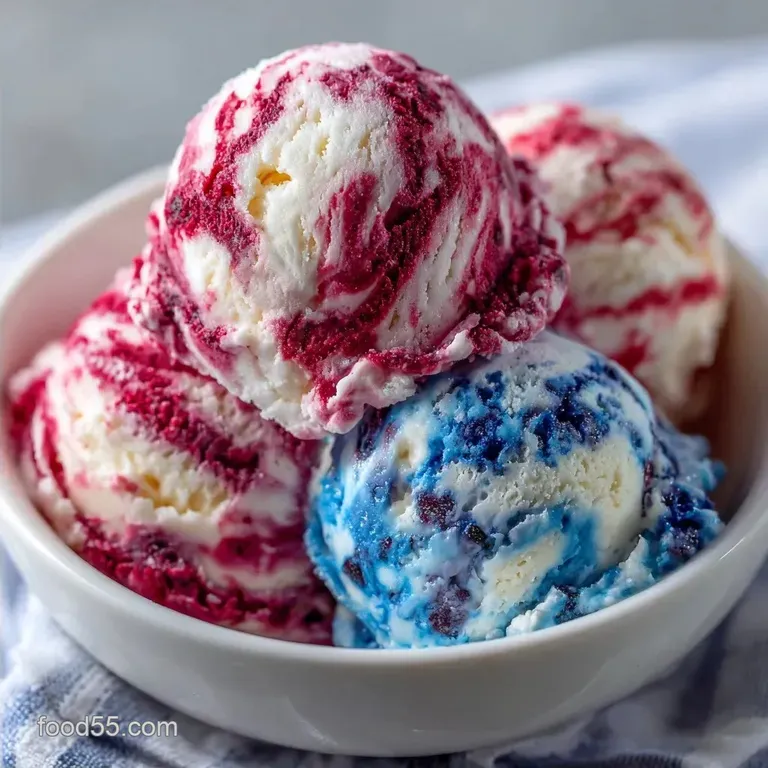
I used to buy those pre made tubs for family get togethers, but they always looked so bland. I wanted something that actually looked like a celebration, something with vibrant streaks of berry and a texture that didn't feel like eating a frozen popsicle. That's how I landed on this specific method. This Patriotic Ice Cream is all about the contrast, pairing the rich, buttery vanilla base with the sharp, bright tang of strawberries and blueberries.
You're going to love how simple this is. We aren't dealing with custard or tempering eggs, which means no risk of scrambling your base. It's just a few ingredients, a bit of patience for the freeze, and a result that looks like it came from a fancy creamery.
Trust me on this, once you see those swirls of red and blue against the white, you'll never go back to store-bought.
Easy No Churn Patriotic Ice Cream
Right then, let's talk about why this actually works. Most people think you need a heavy duty machine to get that professional feel, but you can cheat the system using physics. The magic happens when we whip the heavy cream.
We're essentially trapping millions of tiny air bubbles in a fat matrix, which gives the ice cream its volume.
Then we bring in the sweetened condensed milk. Because it has such a high sugar content and very little water, it lowers the freezing point of the mixture. This prevents the water in the cream from turning into large, crunchy ice crystals. Instead, you get a velvety scoop that melts slowly on your tongue. According to the experts at Serious Eats, the ratio of fat to sugar is what determines if a frozen dessert feels like a cloud or a block of ice.
- Air Incorporation
- Beating the cream creates a foam that keeps the final product light.
- Sugar Depression
- Condensed milk prevents large ice crystals from forming.
- Fat Stability
- The high fat content in heavy cream provides the structure needed to hold the fruit purees without separating.
| Method | Time | Texture | Best For |
|---|---|---|---|
| Churn Machine | 4 hours | Airy/Fine | Daily treats |
| No Churn | 6 hours 15 mins | Dense/Velvety | Party crowds |
| Hand Stirred | 8 hours | Icy/Grainy | Quick fixes |
Component Analysis
Before we get into the mixing, it's worth looking at what each part does. You can't just swap things randomly here because the balance of sugar and fat is what keeps it from becoming a brick in your freezer.
| Ingredient | Science Role | Pro Secret |
|---|---|---|
| Heavy Cream | Structure/Air | Use a chilled bowl to keep fat stable |
| Condensed Milk | Sweetener/Anti freeze | Stir in salt to cut the cloying sugar |
| Fruit Puree | Flavor/Contrast | Strain out seeds for a silkier mouthfeel |
| Gel Coloring | Visual Pop | Use gel, not liquid, to avoid thinning the base |
Shopping List Breakdown
When you're hitting the store, don't settle for "light" or "low-fat" versions. This recipe depends on fat for that luxurious feel. Honestly, don't even bother with low-fat cheese or cream substitutes here, as they'll just leave you with a grainy mess.
- 2 cups heavy whipping cream, chilled Why this? High fat content is required for stiff peaks (Substitute: Double cream)
- 1 can (397g) sweetened condensed milk Why this? Provides sugar and a smooth texture (Substitute: Evaporated milk + 1/2 cup powdered sugar)
- 1 tsp vanilla extract Why this? Rounds out the sweetness (Substitute: Vanilla bean paste)
- 1g fine sea salt Why this? Balances the sugar (Substitute: Kosher salt)
- 1/2 cup strawberry puree or seedless raspberry jam Why this? Adds tart red color/flavor (Substitute: Redcurrant jelly)
- 1/2 cup blueberry puree or seedless blueberry jam Why this? Adds deep blue flavor (Substitute: Blackberry jam)
- 2 drops red gel food coloring Why this? Intensifies the red (Substitute: Beet powder)
- 2 drops blue gel food coloring Why this? Creates a vibrant blue (Substitute: Spirulina powder)
Essential Tool Kit
You don't need a professional kitchen, but a few specific tools make this much easier. If you have a stand mixer such as a KitchenAid, use it, but a handheld mixer works just as well.
For the mixing, you'll need a large, cold mixing bowl. If your kitchen is warm, put the bowl in the freezer for 10 mins before starting. You'll also need a rubber spatula for the folding process, as a whisk will deflate all those precious air bubbles we just worked so hard to create.
For the final shape, a 9x5 inch loaf pan is the standard, but any freezer safe container will do. Don't forget the plastic wrap, which is the secret to preventing freezer burn.
The Cooking Process
Let's crack on with the actual making. This is where we turn a few pantry staples into a showstopper.
Phase 1: Aerating the Base
Pour the chilled heavy cream into your cold mixing bowl. Beat on medium high speed until stiff peaks form. You'll know it's ready when you lift the beaters and the cream stands straight up without drooping. Be careful not to overbeat, or you'll accidentally make butter.
Phase 2: Folding for Volume
In a separate medium bowl, stir your vanilla extract and that pinch of fine sea salt into the sweetened condensed milk. Now, using your rubber spatula, gently fold the whipped cream into the milk. Use a "cut and fold" motion: cut through the middle, scrape the bottom, and fold over.
Do this until the mixture is uniform and velvety, but don't stir aggressively.
Phase 3: Creating the Marble Effect
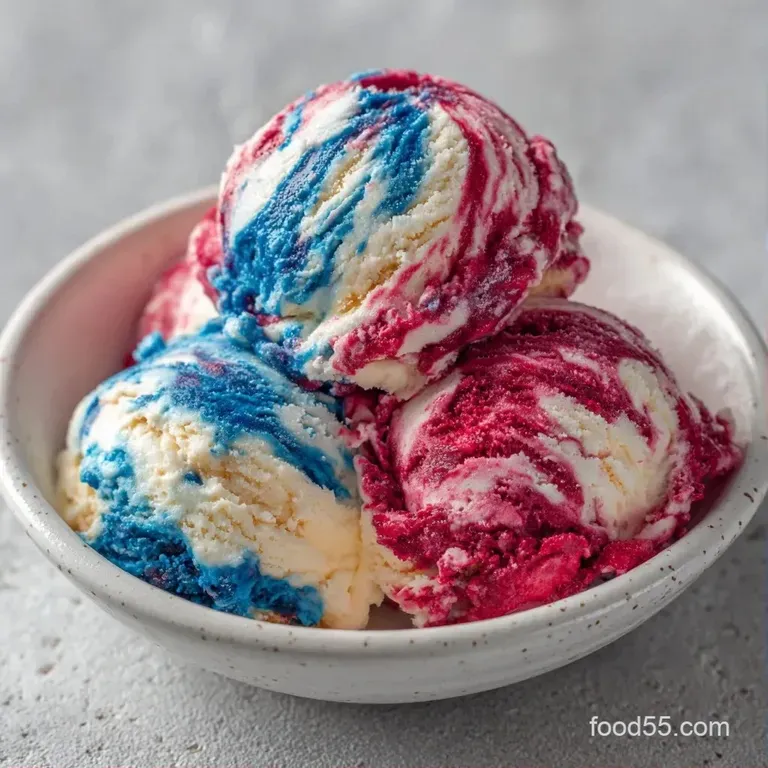
Divide your white base into three equal portions. To the first, stir in the red coloring and strawberry puree. To the second, add the blue coloring and blueberry puree. Leave the third plain. Spoon these into your parchment lined loaf pan in random dollops. Take a knife or skewer and gently swirl the colors together.
Don't over mix, or you'll end up with a purple blur instead of distinct red, white, and blue streaks.
Phase 4: The Deep Freeze
Cover the surface with plastic wrap, pressing it directly onto the cream. This creates a seal that stops frost from forming on the surface. Freeze for at least 6 hours 15 mins until the center is firm to the touch.
Avoiding Kitchen Disasters
Even with a simple recipe, things can go sideways. The most common issue I see is "icy" ice cream, which usually happens if the cream wasn't whipped enough or the freezer is too warm. If you're looking for a different kind of frozen treat, you might like the texture of a Smoothie Bowl recipe, which is more about the blend than the aeration.
Troubleshooting Common Issues
| Issue | Solution |
|---|---|
| Why Your Base Is Runny | If your cream doesn't hold a peak, it's usually because it was too warm. Ensure the cream is straight from the fridge. |
| Why Your Colors Bleed | This happens when the fruit purees are too watery. If you're making your own puree, simmer it on the stove for a few minutes to reduce the liquid before adding it to the cream. |
| Why You See Ice Crystals | Air is the enemy of ice crystals. If you stir too vigorously during the folding phase, you'll knock out the air, leading to a gritty texture. |
Common Mistakes Checklist
- ✓ Did you chill the mixing bowl?
- ✓ Are the peaks stiff, not just soft?
- ✓ Did you fold instead of stir?
- ✓ Is the plastic wrap touching the cream?
- ✓ Did you use gel colors instead of liquid?
Customizing Your Batch
Once you've nailed the basic Patriotic Ice Cream, you can start playing with the flavors. I love adding a bit of contrast to the sweetness. For an added crunch, fold in some crushed pretzels or white chocolate chips into the white base. The saltiness of the pretzels against the sweet cream is a total winner.
For a tart twist, swap the strawberry puree for a fresh lemon curd. This creates a "Red, White, and Yellow" vibe that's still very summer appropriate. If you're leaning towards a dairy-free option, you can use chilled coconut cream and condensed coconut milk, though the texture will be slightly denser and have a hint of coconut flavor.
If you find the base too sweet, add a tablespoon of fresh lemon juice to the condensed milk. This brightens the whole dish and makes the fruit flavors pop more. Trust me, that little bit of acidity makes a huge difference in how the dish tastes overall.
Storage Guidelines
This treat keeps beautifully if handled correctly. Store it in an airtight container in the back of your freezer, where the temperature is most stable. It will stay velvety for about 2 weeks. After that, it may start to develop some ice crystals.
If you have leftover fruit purees from making this recipe, don't toss them! You can freeze them in ice cube trays and pop them into a glass of sparkling water for a festive summer drink. Or, stir them into some Greek yogurt for a quick breakfast.
When you're ready to serve, let the container sit on the counter for 3-5 minutes. This makes it much easier to scoop without shattering the container or straining your wrist.
Pairing Ideas
This is a bold dessert, so it pairs best with things that either complement the berries or provide a contrasting texture. I love serving it alongside a warm brownie or a slice of toasted pound cake.
If you want to go all out for a party, this is the perfect companion to a NoBake Red White Blue Cheesecake. Putting them both on a platter creates a massive, colorful dessert spread that always gets people talking.
You could also serve it with a side of fresh macerated berries. Just toss some sliced strawberries and blueberries with a teaspoon of sugar and a squeeze of lime. Spoon that over the top of the ice cream for an extra layer of freshness.
It brings people together around the table, which is exactly what these kinds of desserts are for.
Right then, you're all set to make some memories. This Patriotic Ice Cream isn't just about the look; it's about that shared joy of a homemade treat on a hot summer day. Let's crack on and get freezing!
Recipe FAQs
What sides pair well with Patriotic Ice Cream for a 4th of July dinner?
Serve it alongside grilled meats and summer corn. For a savory contrast, pair it with an homemade roasted salsa on your burger platter.
How do I create the patriotic swirl effect?
Spoon the three colors into a loaf pan in random dollops. Use a knife or skewer to gently swirl the colors together without fully blending them.
Can I use seedless jam instead of fruit puree?
Yes, seedless raspberry or blueberry jam works perfectly. Just ensure the jam is smooth to maintain the velvety texture of the base.
How long should I freeze this ice cream?
Freeze for at least 6 hours. This ensures the no-churn base is completely firm before scooping.
Why is my ice cream base runny?
The heavy cream was likely too warm. Ensure the cream is chilled straight from the fridge before beating to ensure stiff peaks form.
Is it true that liquid food coloring is better than gel for this recipe?
No, this is a common misconception. Gel coloring provides a more intense hue without adding extra liquid that can cause the colors to bleed.
How to prevent ice crystals from forming in the ice cream?
Fold the whipped cream into the condensed milk gently. Use a rubber spatula and a cut-and-fold motion to avoid knocking out the air.
No Churn Patriotic Ice Cream

